


Temperature curves and boost clock rates in detail
The cooler works really well for its big size and since I want to compare the two BIOS versions, I completely dispense with the values of the open benchtable, which is unrealistic anyway. The comparison reveals very big differences both in the clock rate and the temperatures. The OC BIOS allows temperatures well below 70 °C, while the Silent BIOS is a perfect match for this mark. Interestingly, the extreme jumps in the clock rate hardly have a negative effect on the percentiles, so that the Silent BIOS is actually the more reasonable solution here as well. In spite of all the regulatory frenzy.
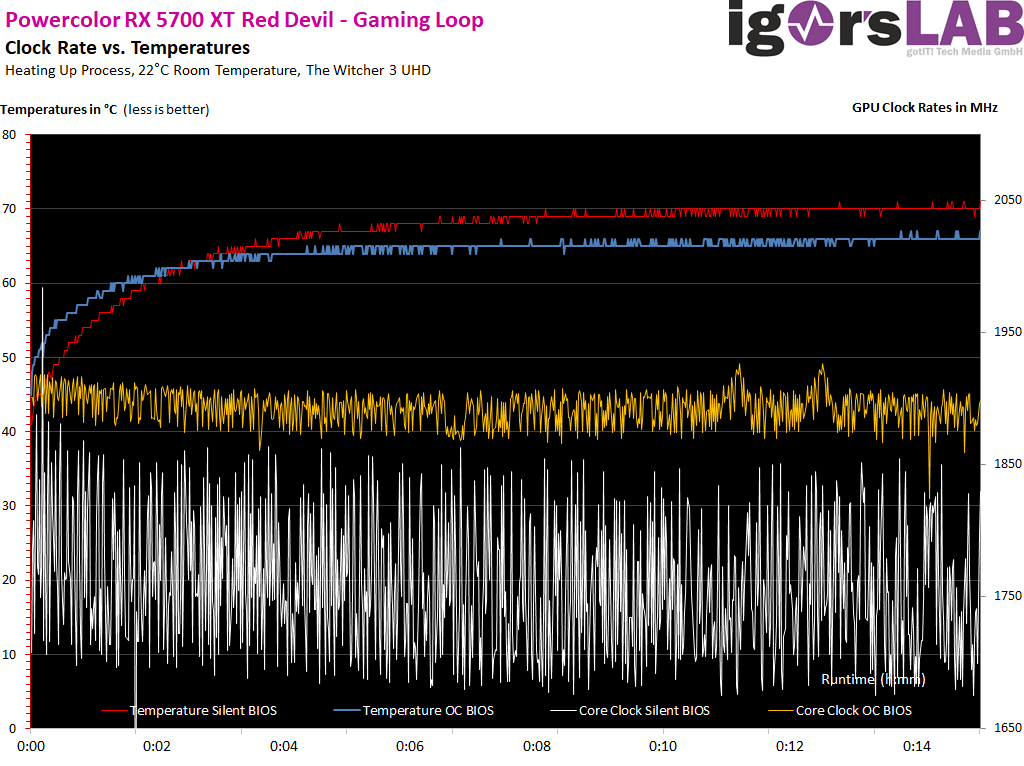
This doesn’t look any different in the stress test, as the waste heat is largely the same as the power consumption.

Und nun das Ganze noch einmal in nüchternen Zahlen in Tabellenform, wobei ich beide BIOS-Versionen im geschlossenen Gehäuse vergleiche:
| Start Values OC and Silent BIOS |
Final Values OC BIOS |
Final Values Silent BIOS |
|
|---|---|---|---|
| GPU Temperatures |
33 °C | 66 – 67 °C |
70 °C |
| GPU Clock Rates |
1994 MHz | 1888 – 1925 MHz |
1750 – 1798 MHz |
| Room Temperature (Air-Con) |
22 °C | 22 °C | 22 °C |
| Air Temperature in Case | 25 °C | 45 °C | 43 °C |
Board Analysis: Infrared Images
The following picture gallery shows all infrared images for the gaming and torture loop in a closed setup, but with both BIOS versions as comparison. The pictures are self-explanatory and speak a clear language. And I would like to point out once again that the sensor values for the memory are absolute nonsense, as the temperature under the flip-chip modules of the memory is also measurably lower on the board side:
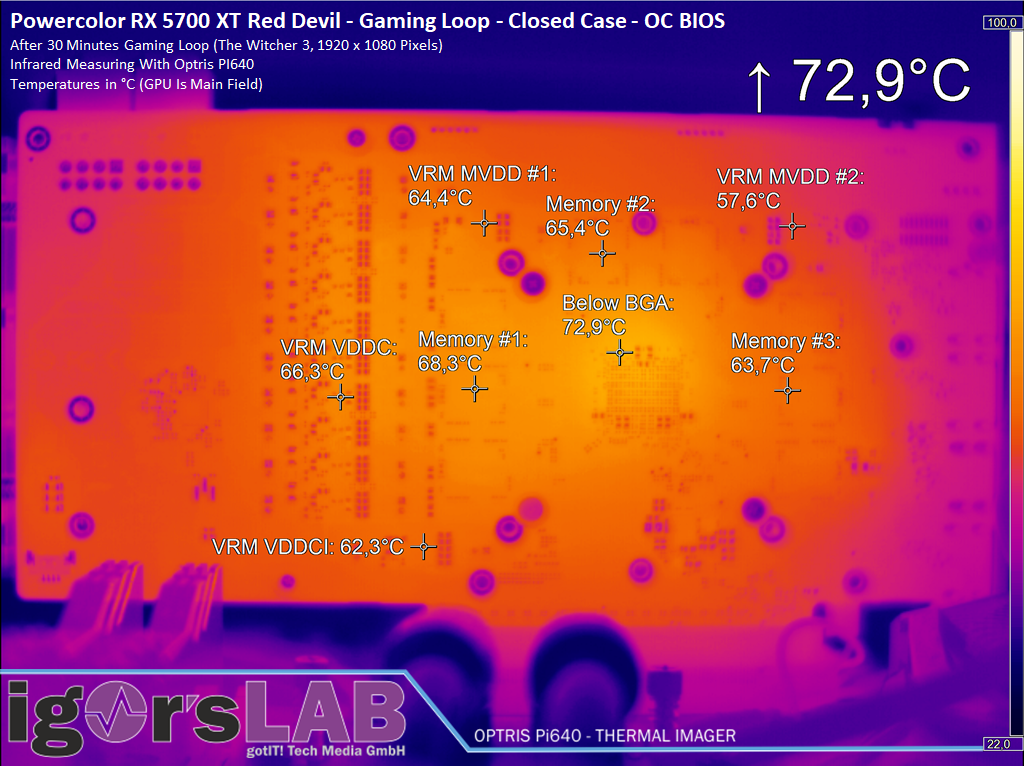
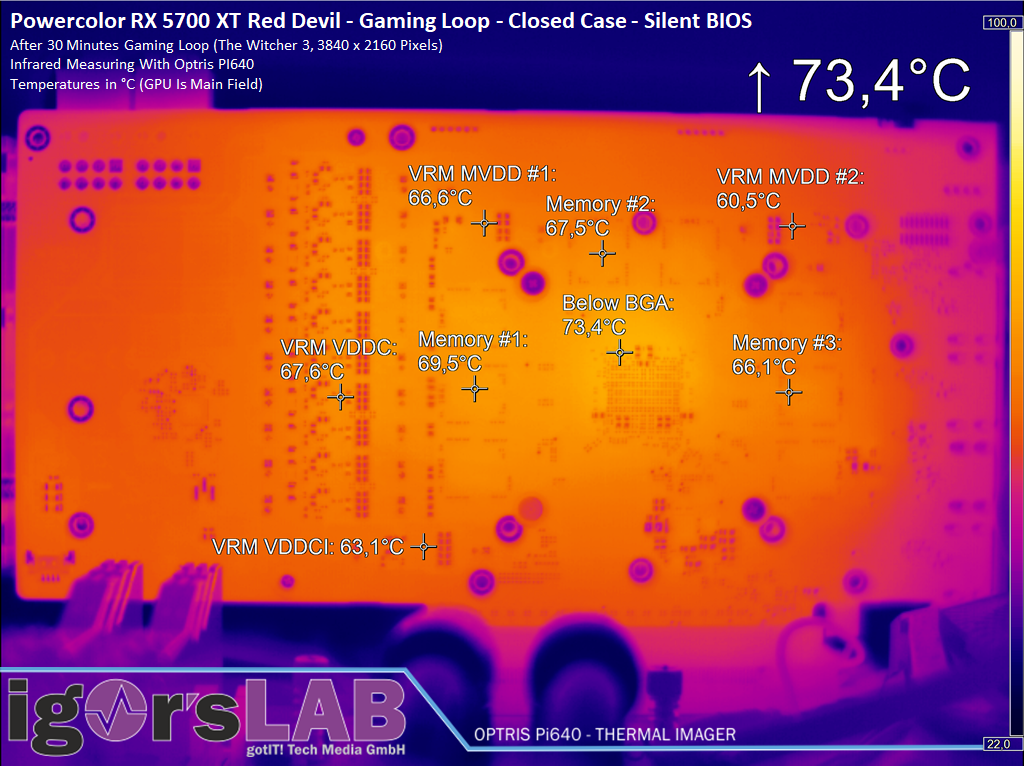
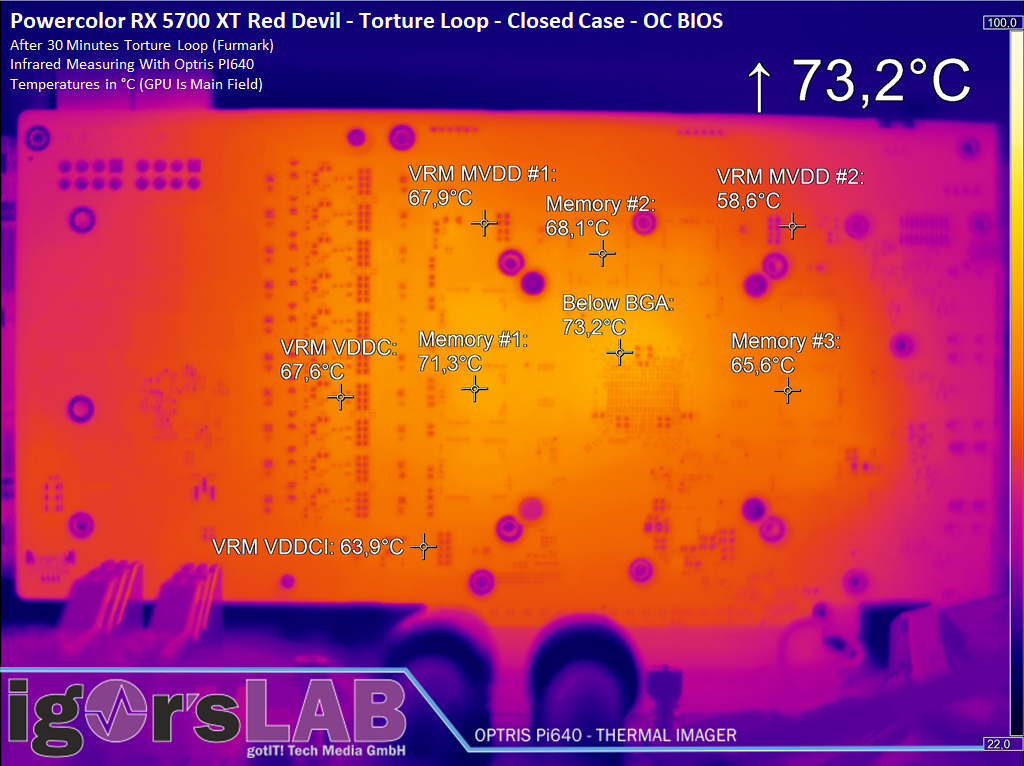
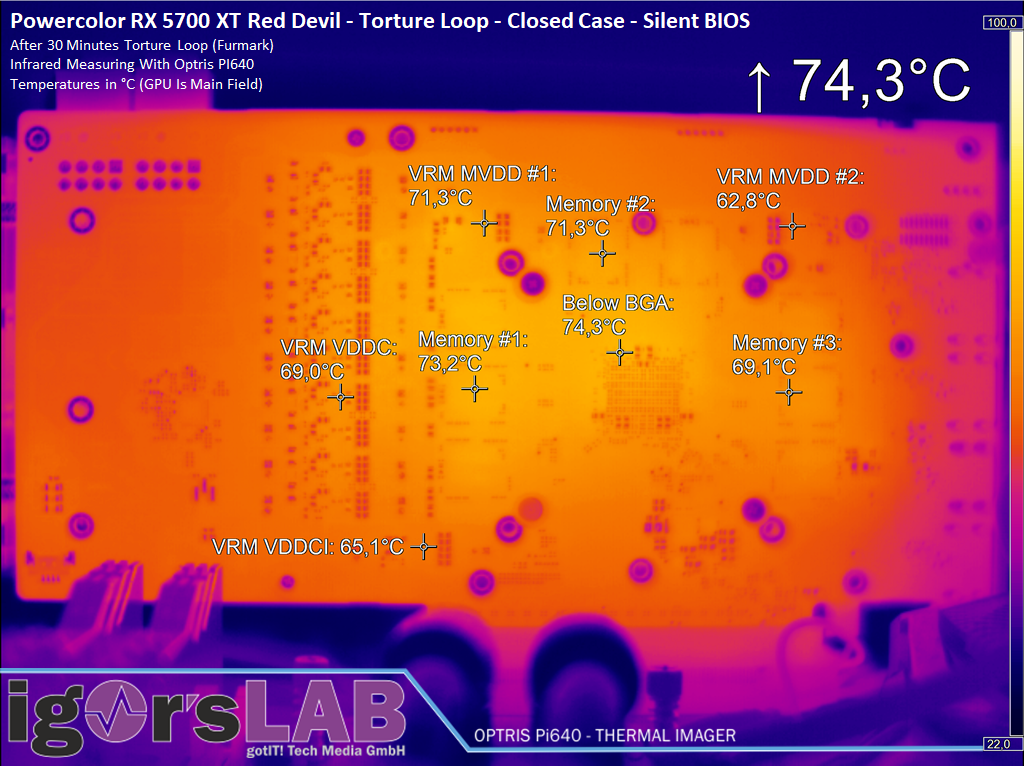
Whether OC or Silent BIOS: the cooler cools like a heavy worker and that’s a good thing.
- 1 - Introduction and Technical Data
- 2 - Tear Down: Board and Cooler
- 3 - Benchmarks 1920 x 1080 Pixels
- 4 - Benchmarks 2560 x 1440 Pixels
- 5 - Benchmarks 3840 x 2160 Pixels
- 6 - Power Consumption in Detail
- 7 - Temperature, Clock Rate and Infrared
- 8 - Fan Speed and Noise Emission
- 9 - Conclusion and Bottom Line


