


Now that the Wiimote is connected and a working sensor bar exists, we have to take care of the appropriate conversion of the Wiimote information into a working controller. The ideal (because programmable) tool is the free GlovePIE program, which we download first. The installation of GlovePIE does not give up any puzzles, so you can actually start right away. It is important that this program works with executable scripts and as a program itself is not a ready-made solution, but only a development environment and interpreter! However, one should not be deterred by this, because through the possibilities of intervention this supposed disadvantage quickly turns into an advantage.
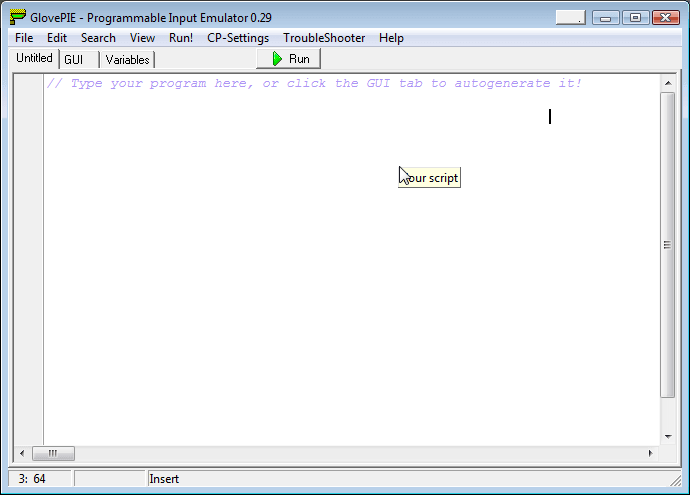
The program already offers a variety of pre-made scripts, which can be loaded and modified via the menu "File" and the menu item "Open". "Run" starts execution and ends with "Stop". Since the mouse is used often enough and the mouse inputs can be blocked in case of errors, it is worth remembering the key combination "Alt + R", with which you open the menu "Run" in this case. Then simply press the "Stop" entry and "Enter" with the arrow keys. If you are ready for your finger, you can also cancel with "Shift+P+I+E". And never forget to save finished scripts, otherwise you will start again next time.
In the following we will test different application scenarios and control variants and attach the respective scripts as "Copy & Paste" text. In this way, even untrained users should be able to create their own programming without any problems. So when scripts are described in the next examples, they always refer to GlovePIE 0.29.
It should also be mentioned that many games now have their own and specially adapted scripts. So if you are not sure about programming or are simply looking for suggestions, you will quickly find a lot of useful links via any search engine. There are also countless forums and communities around the Wiimote. Our article therefore deals only with the basics and possible applications, as the diversity would simply go beyond the scope of the readable.
As already mentioned, the Wiimote has several buttons. These keys can be easily assigning the keyboard keys to the desired keys in the script language of GlovePIE. The script language works object-oriented, so that the syntax is easy to overlook even for newcomers and logically comprehensible. The Wiimote is to be regarded as an object with properties:
Wiimote.Property
The buttons of the Wiimote are therefore logically defined as follows:
Wiimote.Up Wiimote.Down
Wiimote.Left Wiimote.Right
Wiimote.One Wiimote.Two
Wiimote.A Wiimote.B
Wiimote.Home Wiimote.Plus
Wiimote.Minus
These properties of the object can now be assigned values, respectively the values for the respective property are read out as far as it has values and this makes sense. The keys of the keyboard are either simply replaced by the letter in question (e.g. (a) presented.
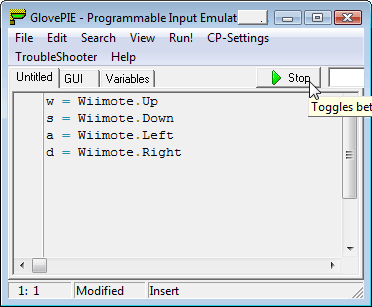
w = Wiimote.Up
s = Wiimote.Down
a = Wiimote.Left
d = Wiimote.Right
These four command lines transfer the actions of the Wiimote keycross to the usual keys (wsad) for movement within a game. If you now copy these lines into the GlovePIE window and run them with "Run", you have already programmed your first own Wiimote control, which is immediately available in every game that uses this combination. Of course, the keyboard still works as usual. Of course, the keys can also be combined and you can of course use buttons other than letters. Here is an example of setting the Wiimote key cross on the keyboard directionkeys (arrow keys) and examples of keyboard shortcuts:
Up = Wiimote.Up
Right = Wiimote.Right
Left = Wiimote.Left
Down = Wiimote.Down
Shift+a = Wiimote.One
Ctrl+b = Wiimote.Two
Tab+c = Wiimote.A
Home && Enter = Wiimote.Home
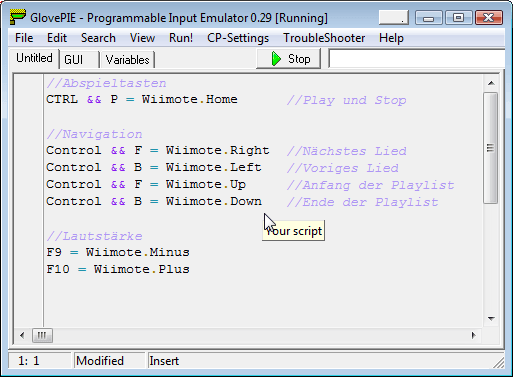
After we know how to prove the keys, we test what we have learned using two scripts. However, make sure that both player windows are visible and in the foreground. First, the script for the Windows Mediplayer:
Media player script:
Play-off scanning
CTRL && P = Wiimote.A //Play und Stop
Navigation
Control && F = Wiimote.Right //Nächstes Lied
Control && B = Wiimote.Left //Voriges Lied
Home && Enter = Wiimote.Up //Anfang der Playlist
End && Enter = Wiimote.Down //Ende der Playlist
Volume
F8 = Wiimote.Minus
F9 = Wiimote.Plus
|
|
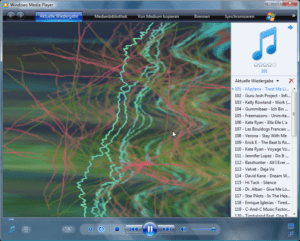 The remote-controlled WMP The remote-controlled WMP |
Winamp script:
Play-off scanning
x = Wiimote.A
v = Wiimote.Home
Shift+v = Wiimote.B //Stop mit Ausblenden
Navigation
b = Wiimote.Right
z = Wiimote.Left
Ctrl+z = Wiimote.Up //Anfang der Playlist
Ctrl+b = Wiimote.Down //Ende der Playlist
Left = Wiimote.One *5 seconds back
Right = Wiimote.Two *5 seconds before jumping
Volume
Down = Wiimote.Minus
Up = Wiimote.Plus
After the key control, the self-built sensor bar is now used for the first time. First, we emulate the mouse buttons according to the already known scheme:
Mouse.RightButton = Wiimote.A
Mouse.LeftButton = Wiimote.B
Mouse.MiddleButton = Wiiote.Home
The next step is to convert the motion into the screen's two-dimensional X-Y environment. This is also quite simple in principle, but first requires a calibration, because each Wiimote reacts a little differently. To do this, we copy the following small script and execute it:
Calibration script:
var.accx = wiimote. RawForceX
var.accy = wiimote. RawForceY
var.accz = wiimote. RawForceZ
debug = var.accx + " " + var.accy + " " + var.accz
In the debug line we can read the calibration values
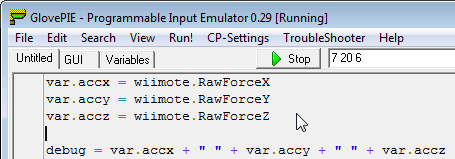
These values, in our case 7 / 20 / 6, we enter in the following mouse script as default values for the offset. This code is already a bit more extensive and is based on the script of vkapadia.
Overview of the available options:
- Mouse movement and three clickable mouse buttons
- Scrolling with the mouse wheel
- Control directional keys via the key cross of the Wiimote (D-Pad)
The control is somewhat complex, because the position must first be read out and calculated before it can be passed to the mouse as an X/Y value. Also interesting is the implemented limitation of the range of motion based on the screen size.
Finished mouse script:
First, we enter the variables from our calibration script
var.xtrim = 7
var.ytrim = 20
var.ztrim = 6
//
The keycross is applied to the arrow keys
if wiimote. Up
Up = true
else
Up = false
Endif
if wiimote. Down
Down = true
else
Down = false
Endif
if wiimote. Left
Left = true
else
Left = false
Endif
if wiimote. Right
Right = true
else
Right = false
Endif
Mouse Buttons
Mouse.RightButton = Wiimote.A
Mouse.LeftButton = Wiimote.B
Mouse.MiddleButton = Wiimote.Home
Reading out the determined position change of the Wiimote
and correction with the calibration values
var.accx = wiimote. RawForceX + var.xtrim
var.accy = wiimote. RawForceY + var.ytrim
var.accz = wiimote. RawForceZ + var.ztrim
if wiimote.dot1vis and wiimote.dot2vis then
if var.accy > -7 then
var.orientation = 0
elseif var.accy > -45 then
if var.accx< 0 then
var.orientation = 3
else
var.orientation = 1
Endif
else
var.orientation = 2
Endif
if var.leftpoint = 0 then
if var.orientation = 0 then
if wiimote.dot1x< wiimote.dot2x then
var.leftpoint = 1
else
var.leftpoint = 2
Endif
Endif
if var.orientation = 1 then
if wiimote.dot1y > wiimote.dot2y then
var.leftpoint = 1
else
var.leftpoint = 2
Endif
Endif
if var.orientation = 2 then
if wiimote.dot1x > wiimote.dot2x then
var.leftpoint = 1
else
var.leftpoint = 2
Endif
Endif
if var.orientation = 3 then
if wiimote.dot1y< wiimote.dot2y then
var.leftpoint = 1
else
var.leftpoint = 2
Endif
Endif
Endif
if var.leftpoint = 1 then
var.fix1x = wiimote.dot1x
var.fix1y = wiimote.dot1y
var.fix2x = wiimote.dot2x
var.fix2y = wiimote.dot2y
else
var.fix1x = wiimote.dot2x
var.fix1y = wiimote.dot2y
var.fix2x = wiimote.dot1x
var.fix2y = wiimote.dot1y
Endif
var.dx = var.fix2x – var.fix1x
var.dy = var.fix2y – var.fix1y
var.cx = (var.fix1x+var.fix2x)/1024.0 – 1
var.cy = (var.fix1y+var.fix2y)/1024.0 – .75
var.d = sqrt(var.dx*var.dx+var.dy*var.dy)
var.dx = var.dx / var.d
var.dy = var.dy / var.d
var.ox = -var.dy*var.cy-var.dx*var.cx;
var.oy = -var.dx*var.cy+var.dy*var.cx;
var.ax = (var.ox * screen.desktopwidth) + (screen.desktopwidth / 2)
var.ay = (-var.oy * screen.desktopwidth) + (screen.desktopheight / 2)
var.dx = var.ax – mouse.cursorposx
var.dy = var.ay – mouse.cursorposy
var.d = sqrt((var.dx*var.dx)+(var.dy*var.dy))
var.a = 180 / (200 + var.d * var.d * var.d * .001)
var.finalx = mouse.cursorposx * var.a + var.ax * (1 – var.a)
var.finaly = mouse.cursorposy * var.a + var.ay * (1 – var.a)
mouse.cursorposx = var.finalx
mouse.cursorposy = var.finaly
else
var.leftpoint = 0
Endif


Kommentieren