


Just in time for the start of the hot days, I had also considered how we could expand our test methods or how to expand our test methods. further expand and refine. This now also includes our new, modular water cooling measuring station, which is often called "Igor's paddling pool" in the laboratory, because in the end you never know how close a test object really holds. Unfortunately, I already had enough water games and so I will also provide a special container, where you can water pumps and gods safely.
Exactly for such emergencies I have installed not only an emergency stop for all pumps but also various shut-off valves and in case of doubt one has also cut one of the many quick-release fasteners quite firmly. Speaking of quick-release fasteners: the entire system is modularly structured, so any component from the pump to radiator or CPU/GPU cooler can be bridged, disconnected and replaced individually.
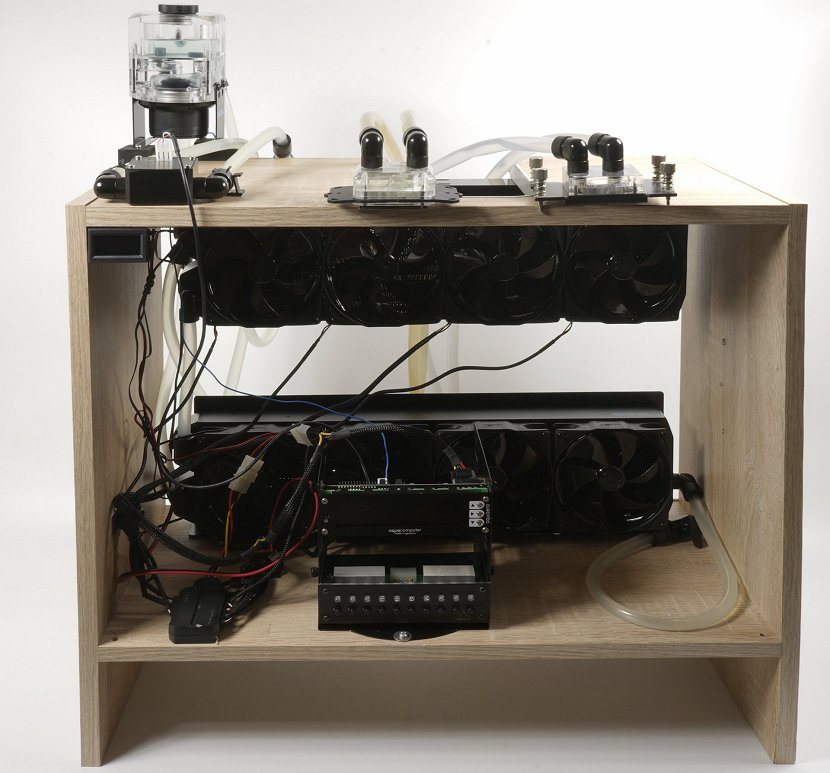
Sure, quick-release fasteners and angles aren't something that would be extremely conducive to a nice flow, but the pump used is strong enough to compensate for this with a gesture of nonchalance. In this way, almost any desired flow flow can be set, e.g. for the testing of a CPU cooler or for me even the combination of different test objects up to radiators. The comparison measurement always starts in the "short circuit" (i.e. shut-off valves in front of the test area on bridging) and then only on the complete loop.
I can measure the comparison values obtained in this way with the flow meter and the aquaero 6 Pro (both from Aqua Computer) quite well, because I have the flow meter with the help of a professional PF-D550 (Portable Doppler ultrasonic flow meter for liquids) first calibrated. This works quite well with the aquaero 6 Pro, although not with the high accuracy of the professional device. But for our purposes, that is certainly enough for the time being.
At the same time I also have the Chiller, whose pump I can also switch off and on by means of a self-attached switch. This means that the Chiller can now only be used as a pure "refrigerator" and I am much more variable with the flow in the test system. The hanging in between takes place, how could it be otherwise, with the very practical quick-release fasteners.
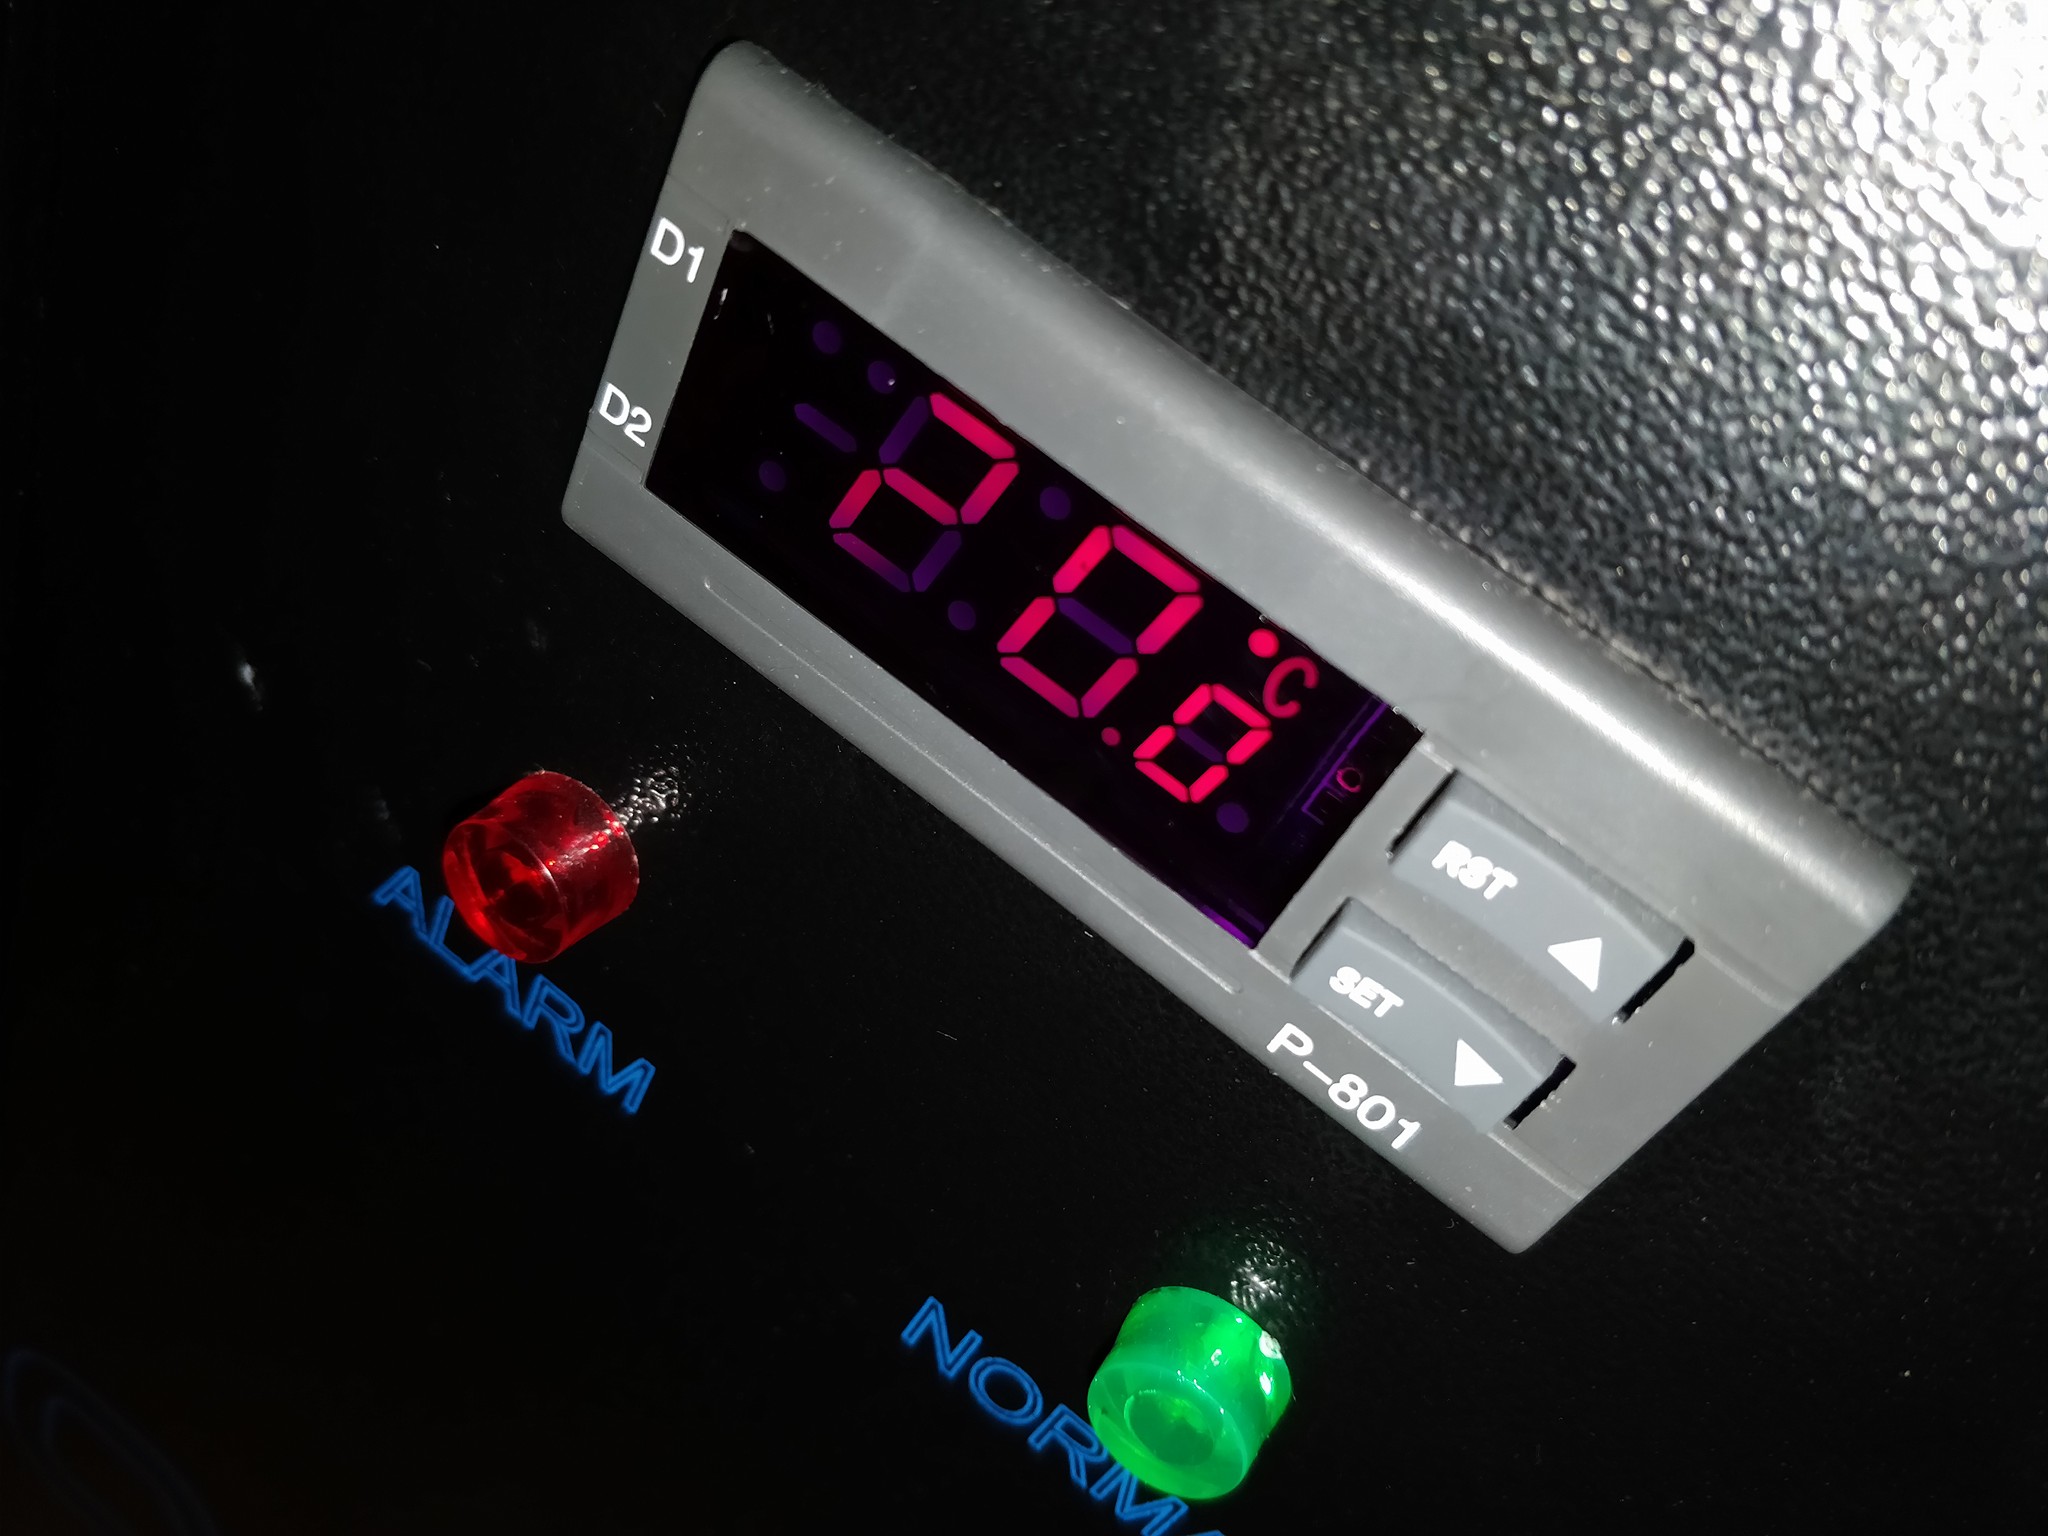
The values of the water temperatures on the two sensors can also be read out separately and at the aquaero quite well and even logged on the PC. The power supply is via a special 12V plug-in power supply from Phobya, so that the complete system can also operate autonomously and you can use the laptop for protocol. It does not always have to be connected to the benchtable or Be used.
So why all the effort? We also want to test components for water cooling systems more intensively and measurements include how strong a cooler, for example. reduces the flow rate or in which areas it cools optimally, simply with it. And of course I will always link this test system and short presentation with in upcoming articles, so that I do not have to roll the entire original mucus again every time.
So then, water march! 🙂
| Test systems and measuring rooms | |
|---|---|
| Hardware: |
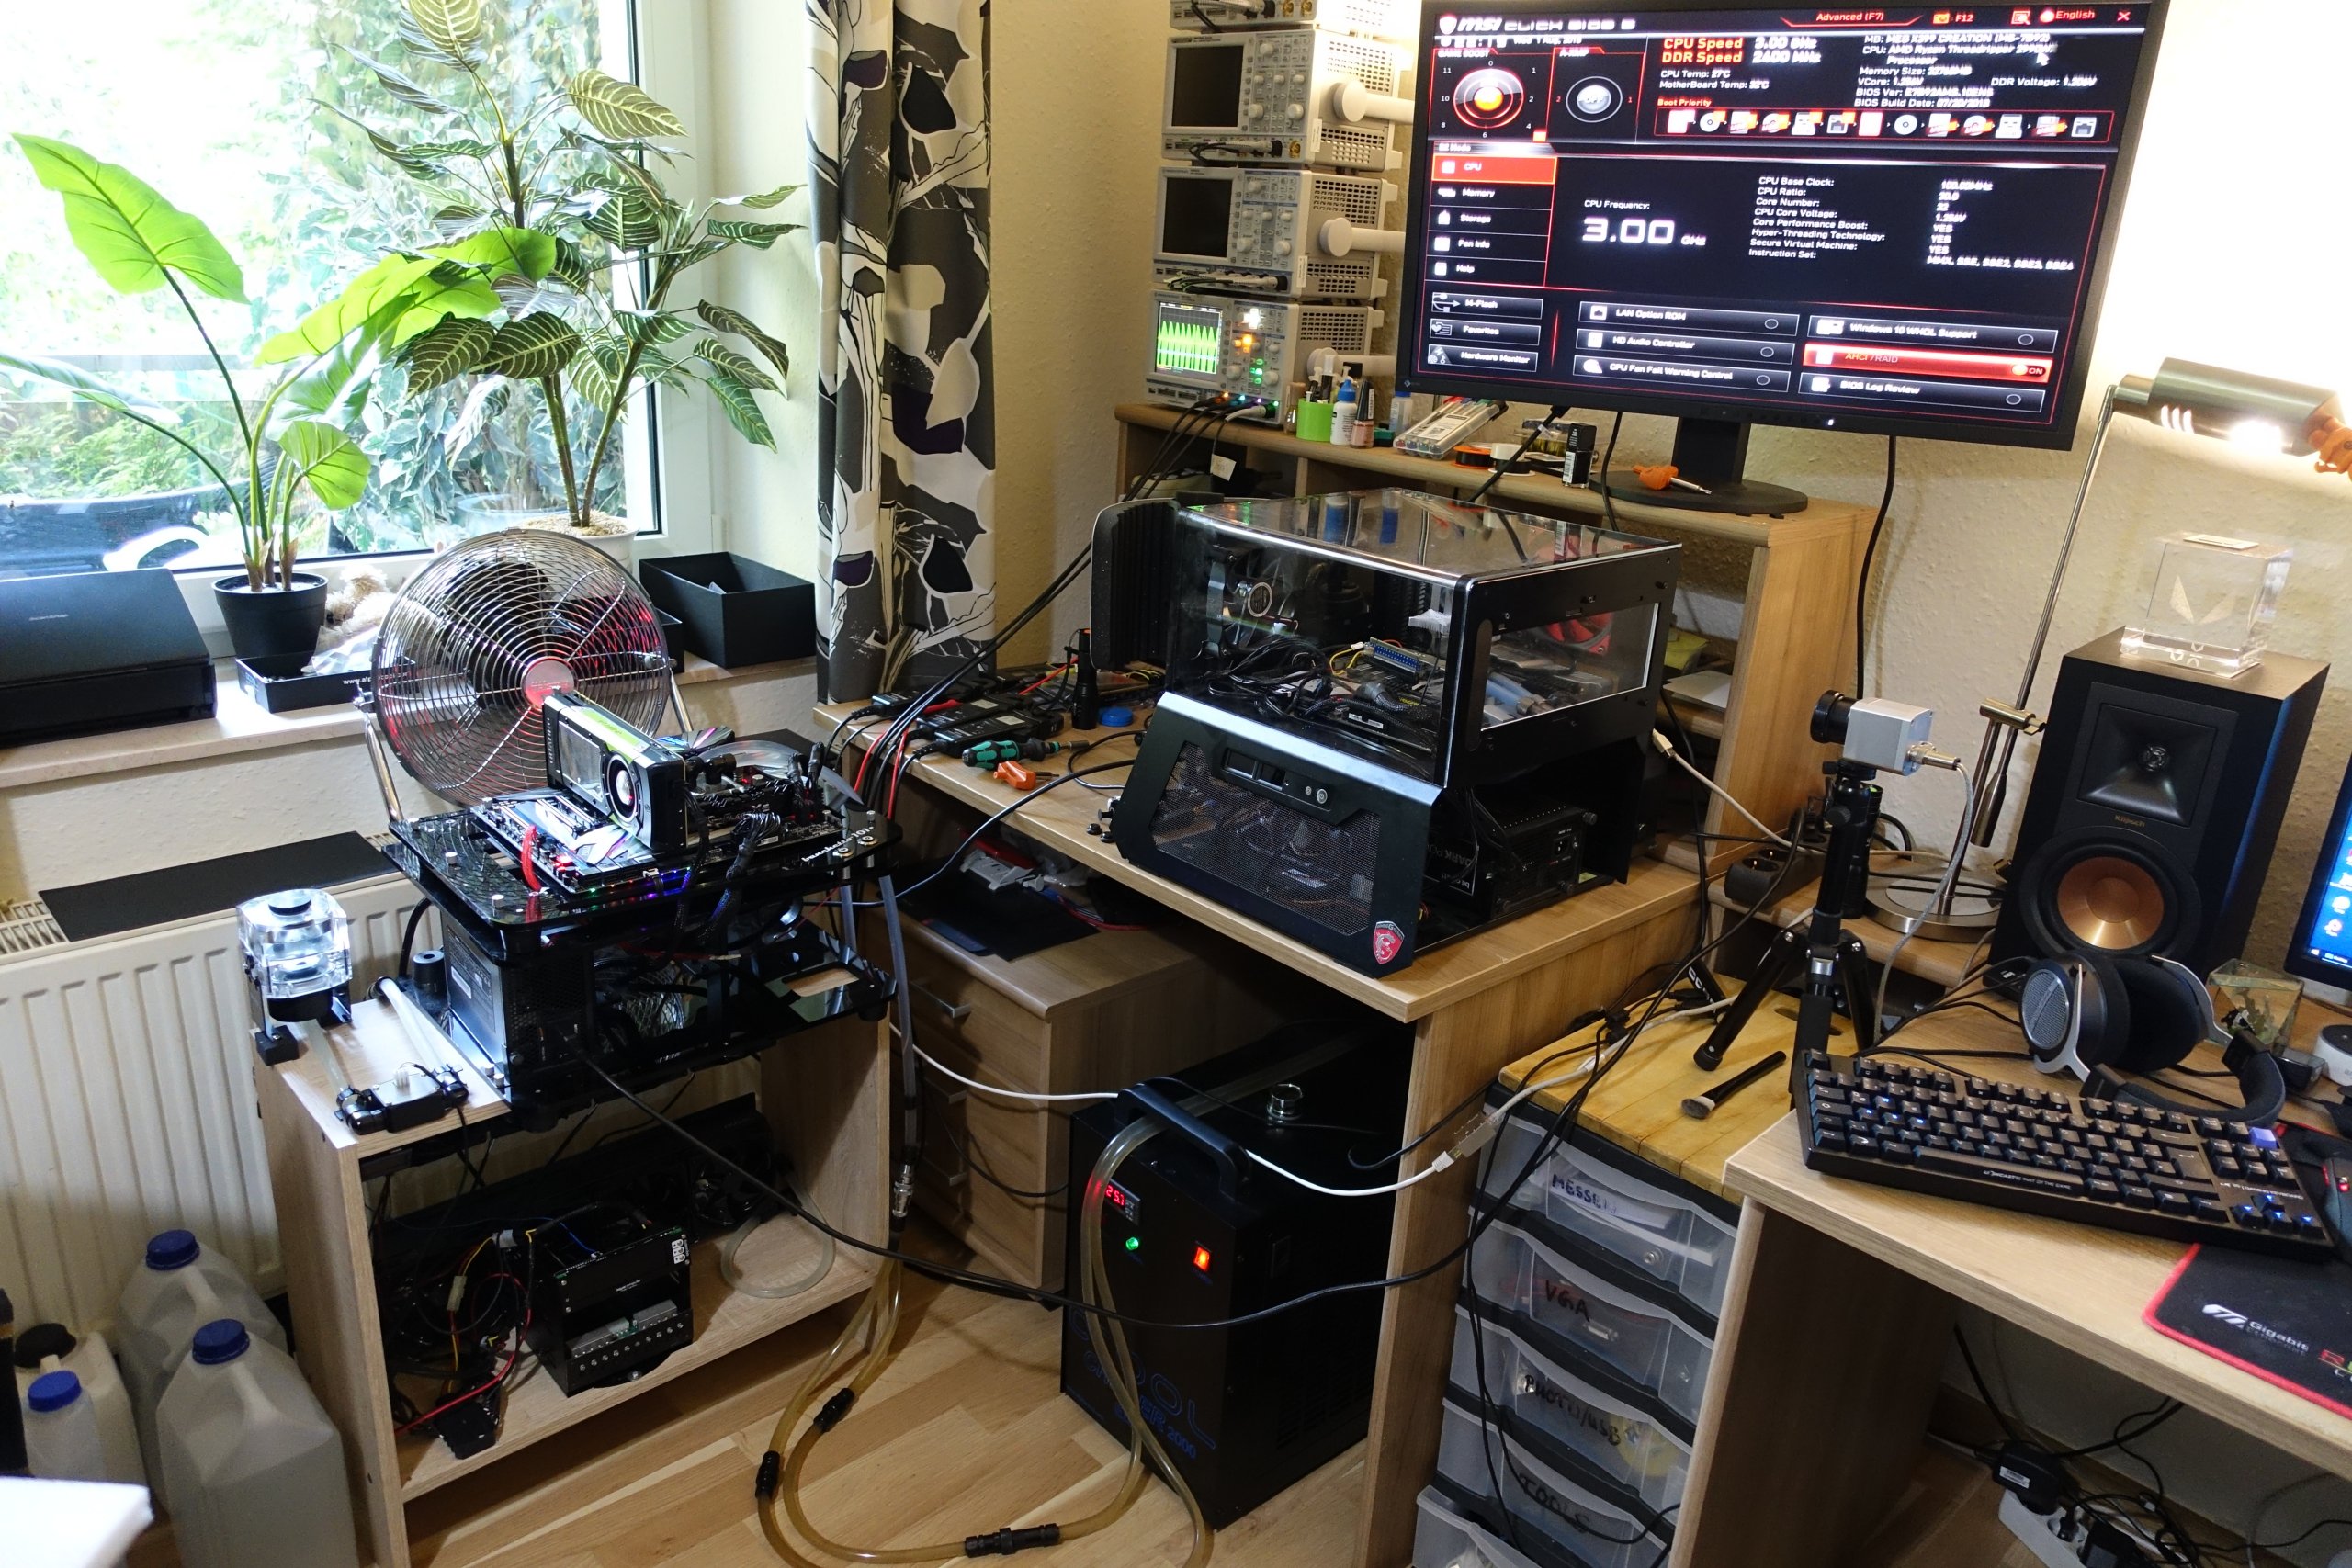
Intel Core i7-7900X x4.5 GHz MSI X299A Gaming Pro Carbon OC 4xG.Skill TridentZ DDR4 3400 1x 1 TByte Toshiba OCZ RD400 (M.2, System SSD) 2x 960 GByte Toshiba OCZ TR150 (Storage, Images) Be Quiet Dark Power Pro 11, 1200 watt power supply |
| Cooling: |
Alphacool VPP655 (standard pump, changeable) 2x Alphacool Nexxos UT60 Full Copper 480mm (single or together) 2x 4 Phobya Bionic Fan Phobya fan control, separate 12-power supply for self-sufficient operation without PC Alphacool quick-release fasteners for quick component and cooler changes Aqua Computer aquaero 6 PRO USB Fan Controller, Graphic LCD Aqua Computer flow sensor "high flow" G1/4 Thermal Grizzly Kryonaut (for cooler change) |
| Bench Table: |
Microcool Banchetto 101 |
| Monitor: | Eizo EV3237-BK |
| Power consumption: |
non-contact DC measurement on the PCIe slot (Riser-Card) non-contact DC measurement on the external PCIe power supply Direct voltage measurement on the respective feeders and on the power supply 2x Rohde & Schwarz HMO 3054, 500 MHz multi-channel oscillograph with memory function 4x Rohde & Schwarz HZO50, current togor adapter (1 mA to 30 A, 100 KHz, DC) 4x Rohde & Schwarz HZ355, touch divider (10:1, 500 MHz) 1x Rohde & Schwarz HMC 8012, digital multimeter with storage function |
| Thermography: |
Optris PI640, infrared camera PI Connect evaluation software with profiles |
| Acoustics: |
NTI Audio M2211 (with calibration file) Steinberg UR12 (with phantom power for the microphones) Creative X7, Smaart v.7 own low-reflection measuring room, 3.5 x 1.8 x 2.2 m (LxTxH) Axial measurements, perpendicular to the center of the sound source(s), measuring distance 50 cm Noise in dBA (Slow) as RTA measurement Frequency spectrum as a graph |
| Operating system | Windows 10 Pro (1709, all updates), driver as of Jul 31, 2018 |


Kommentieren