


Today’s article goes into detail about fan control software and a few important connection basics. The following three concrete topics will be the subject of today’s article: A small overview of various programs for fan control, a tutorial on, program FanControl and a tutorial on creating fan curves. This is a continuation of what Igor had already published at the beginning of October in his tutorial on planning and assembling PC air cooling systems.
Einsteiger-Tutorial: PC-Luftkühlung richtig planen und zusammenbauen
Case fans are not large electrical consumers, so several can share a PWM connection via Y-cable. For example, a normal 140 Silent Wings 4 has a maximum current of 0.33 A and a power consumption of 3.6 W, or a Noctua A14 has a maximum of 0.13 A and 1.56 W. If you assume that the connectors on the motherboard deliver about 1-2 A and 10-12 W maximum (limit because of the possible DC control), then the rule of thumb says “up to three” fans per PWM connector, which also corresponds to the fact that 360 or 420 AIOs like to include a 3-way Y-cable for the fans.
So let’s assume the maximum and leave it at that – this is also the recommended limit, which can often be found on the net. Now there are also higher-quality boards, such as the ASUS Dark Hero, which provide separate connections for custom loop water cooling systems, which are then equipped with a maximum of 3 A and 36 W, for example. But more on that in a moment.
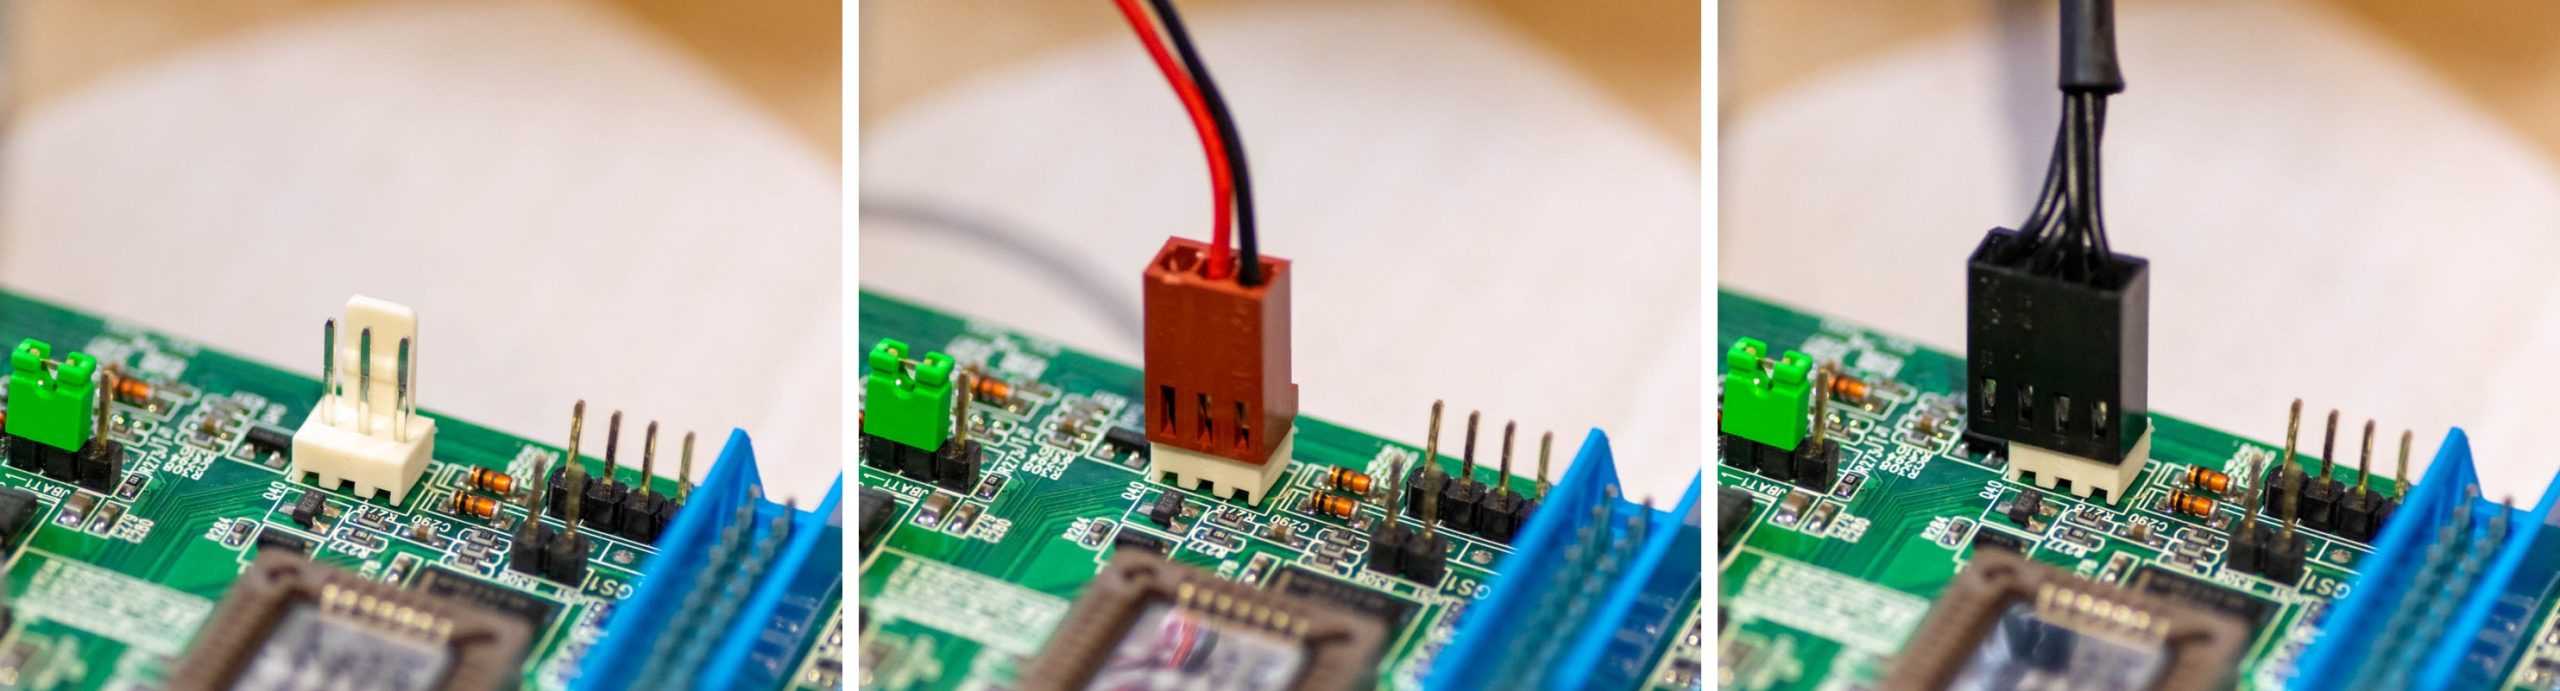
The fan connectors (headers) are compatible with the corresponding cables of the fans, as the picture above shows, even if connectors and cables are not always the same size. The connector centers itself in the groove of the plug by means of a plastic clip. It is possible to connect the 3-pole as well as 4-pole terminals with 2-pole, 3-pole and 4-pole connectors. The voltage supply is almost always ensured by this, but in some cases (tendentially more powerful pumps) only the signal of the speed is transmitted via two appropriately placed poles – and the power connection is then realized via another cable connection (Molex).
Mainboard connection
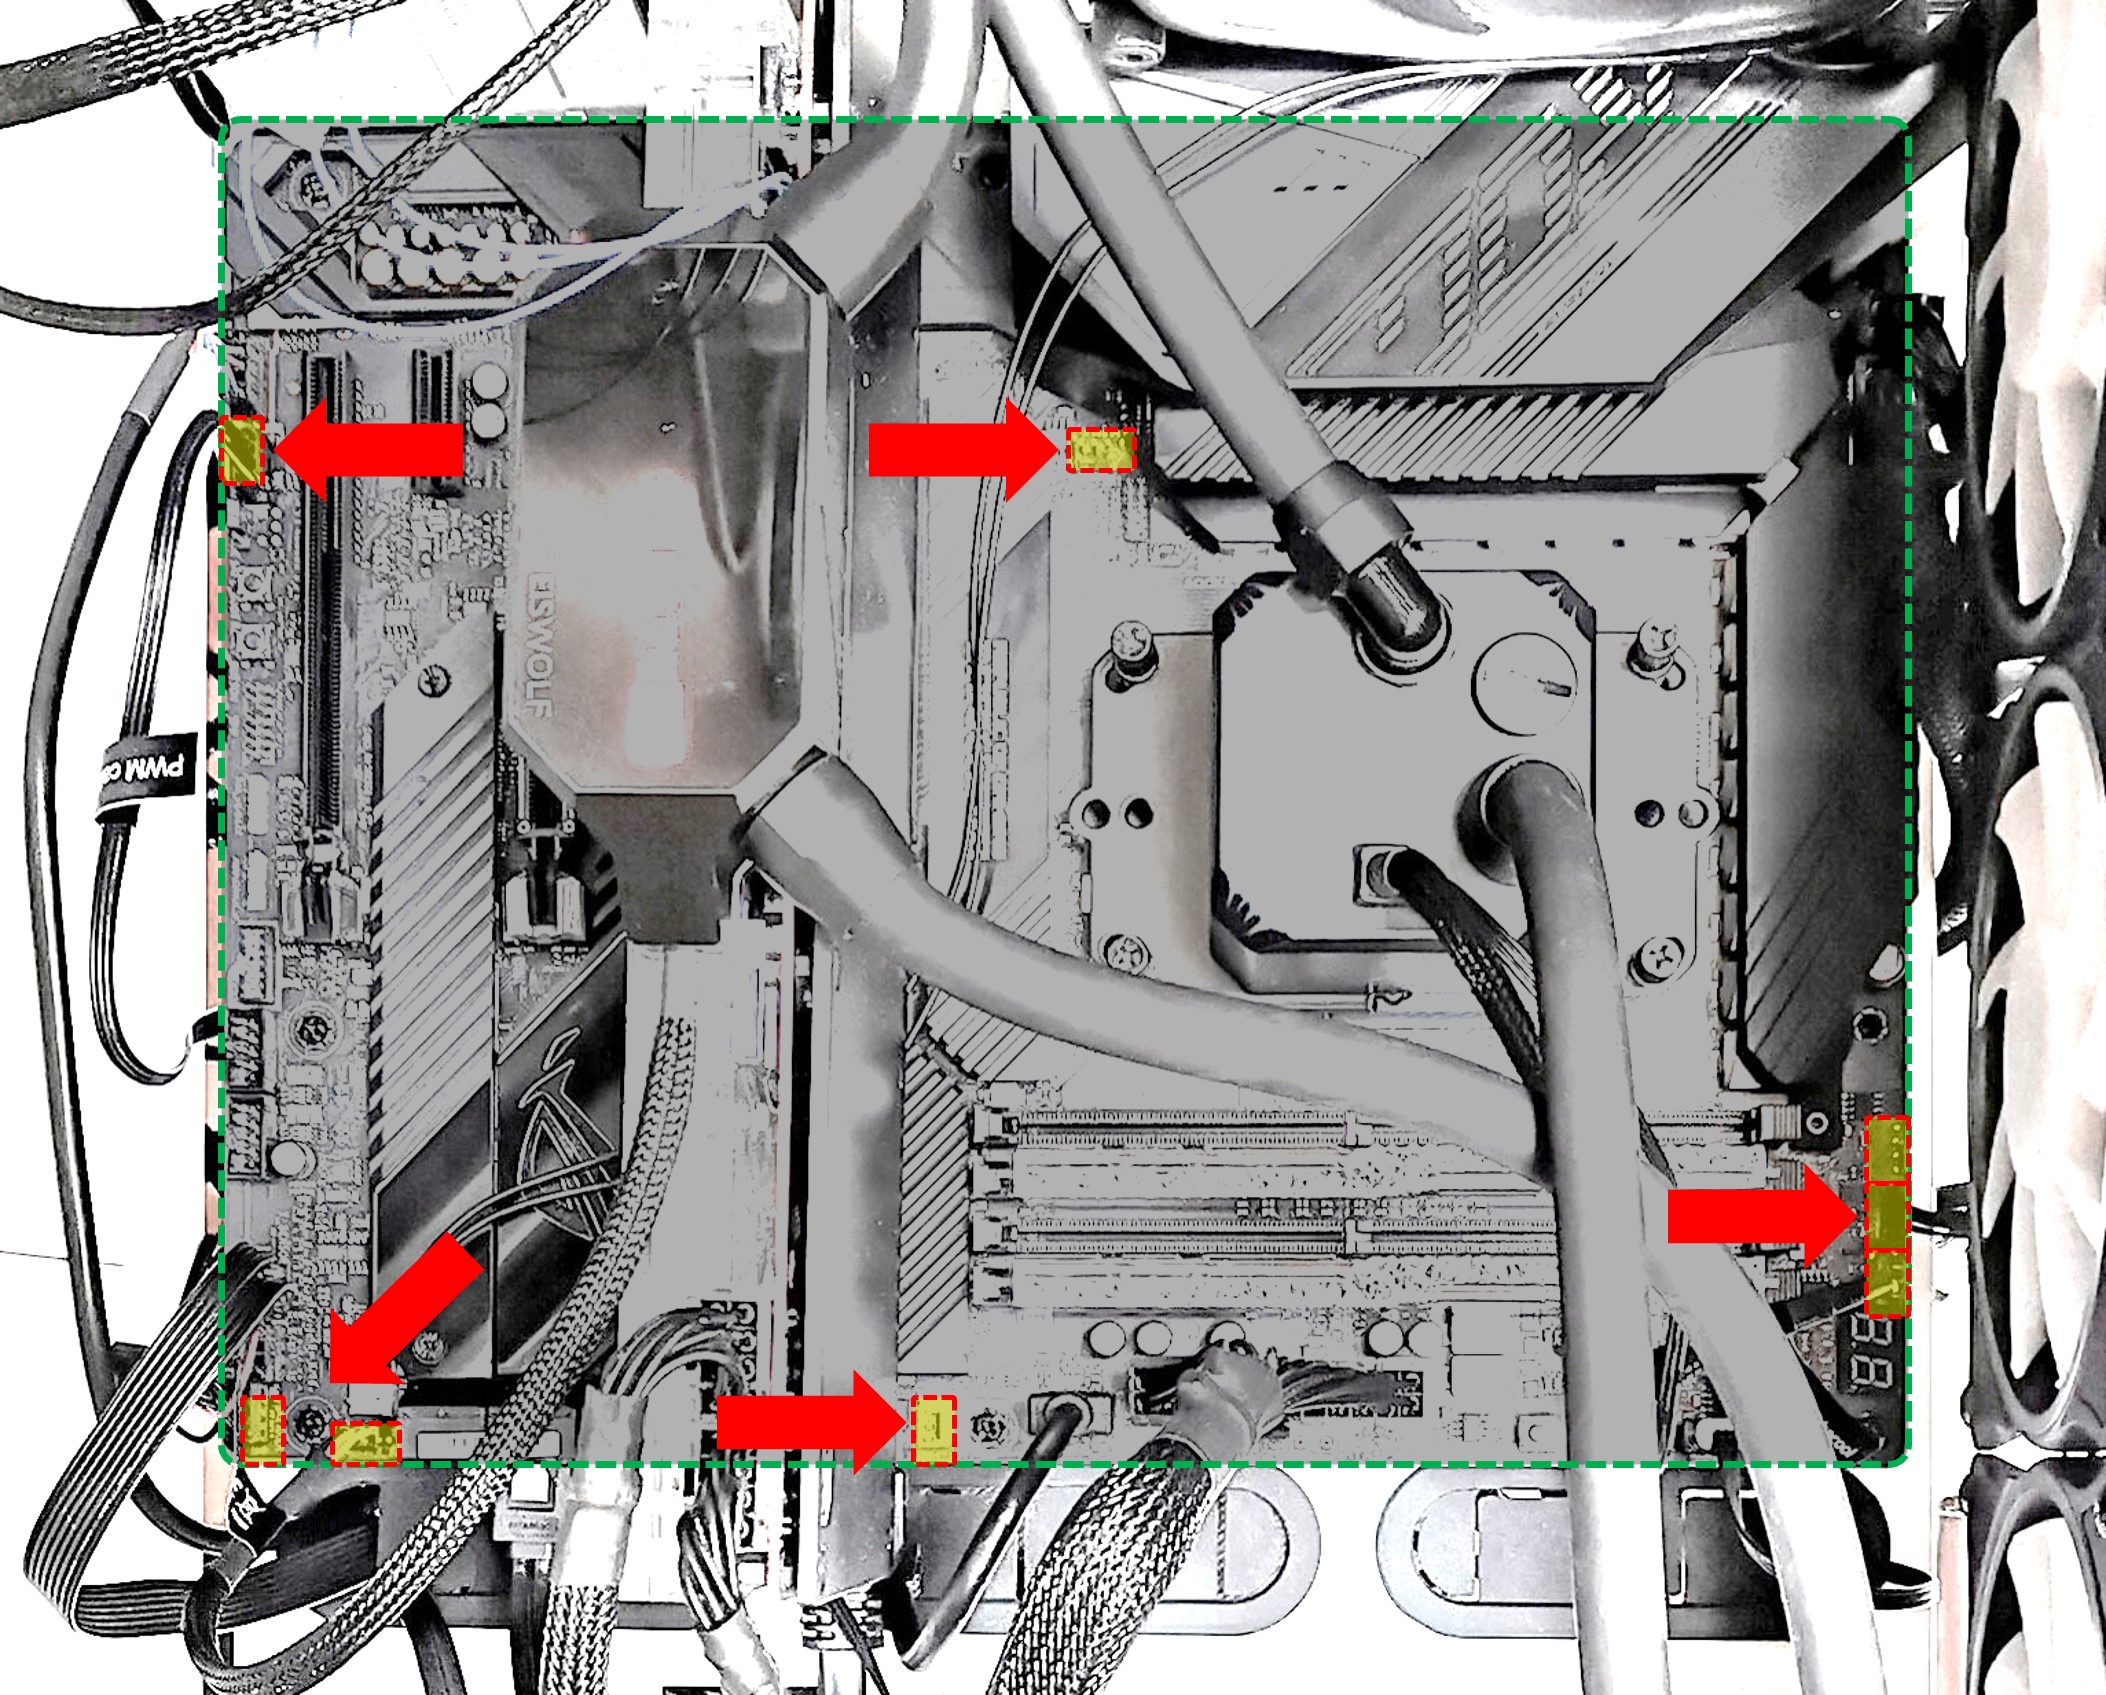
Igor’s tutorial article ended with the question of how and where to connect the various fans. For probably 95% of all users, the motherboards already have everything on board that is needed. A few PWM connectors, also called headers, can always be found, on good boards you can expect 4 to 6 connectors to be usefully placed in various locations. On the motherboard itself, as well as their instructions, there is usually a label indicating whether these are dedicated ports for the CPU, general case fans, or more powerful ports for water pumps.
CPU Fan
It is advisable to equip the CPU fan port in any case, be it with a CPU fan or also with another case fan, because there are some boards that warn or strike when no fan (or its speed) is detected at the CPU port – as a heat protection mechanism for the processors. Few boards have more than one CPU fan connector – those are for larger tower coolers with multiple fans without having to use a Y-cable.
Housing / Chassis Fan
Next, there are usually several PWM ports for case fans (chassis fan), which are placed as desired and accessible – usually one is located near the CPU socket for the rear (blowing out) tail fan.
Water Pump
(AIO) water pumps often also have a 2-, 3- or 4-pin connector, which fit – and belong – on the PWM ports of the motherboard. AIO pumps have 3 or 4 poles because that’s the only way they connect to the motherboard, while larger pumps for custom loops usually have a separate Molex connection directly to the power supply and then only need 2 or 3 poles for control. Often these connections are somewhat higher loadable, here a look in the manual helps. Water pumps should therefore always be suitably connected where connections are marked e.g. as AOI or Pump.


153 Antworten
Kommentar
Lade neue Kommentare
Veteran
Moderator
Urgestein
Urgestein
Urgestein
Mitglied
Veteran
Urgestein
Urgestein
Urgestein
Veteran
Urgestein
Veteran
Urgestein
Veteran
Veteran
Urgestein
Veteran
Urgestein
Alle Kommentare lesen unter igor´sLAB Community →