


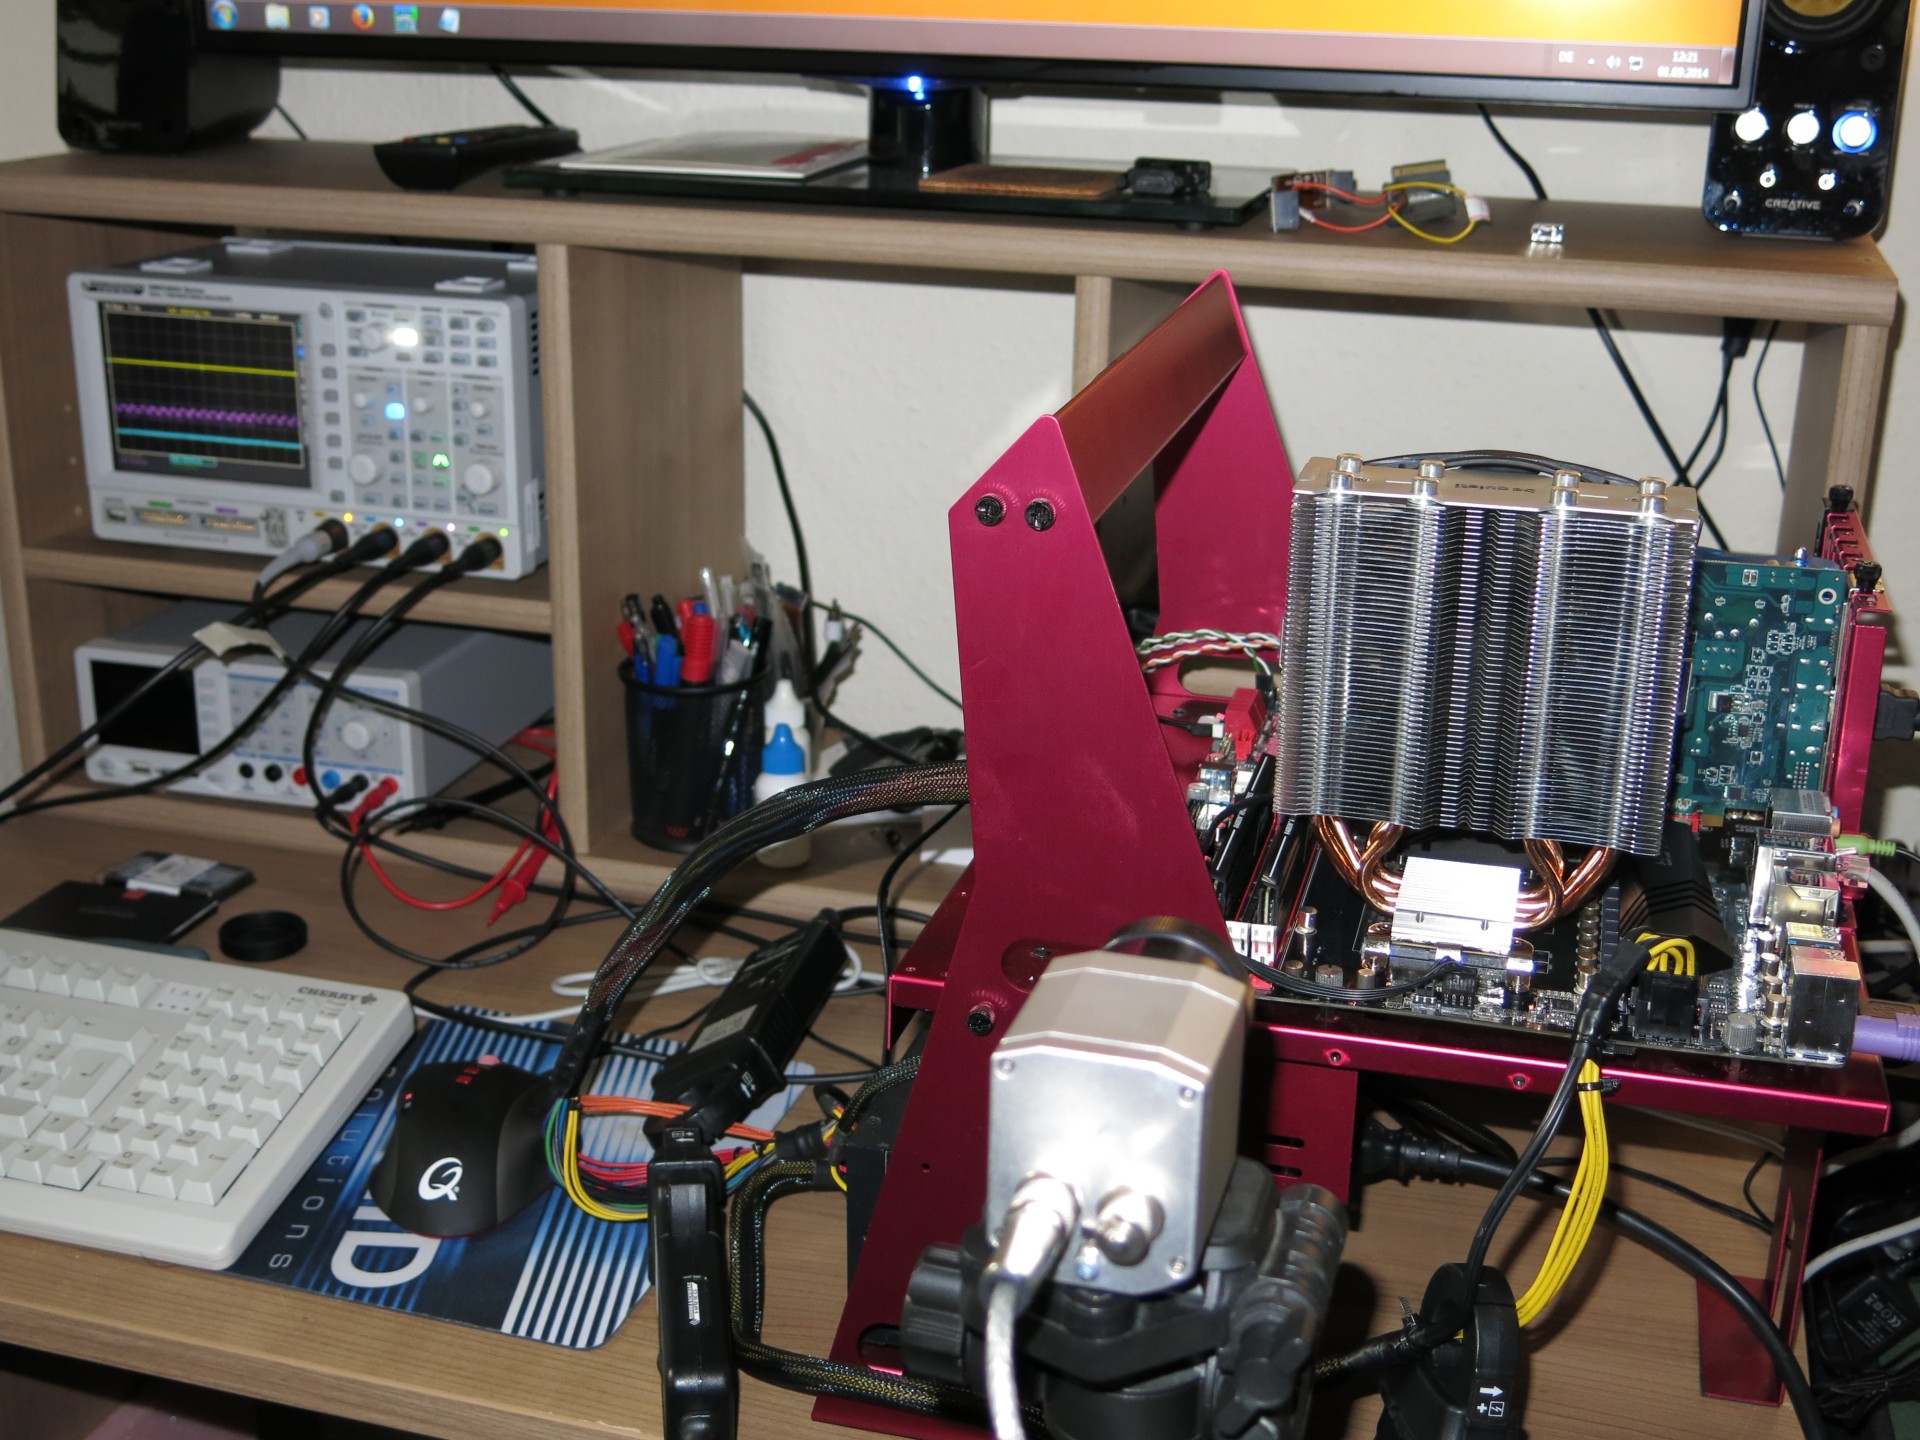
Test setup and measuring equipment
As already mentioned, let’s focus on the power consumption in our analysis. As always, we spared no effort in our German lab, unleashed all cables for the measurement directly on the motherboard and also modified the motherboard a bit. Now we have exactly the same measurement capabilities as for the graphics cards, based on the fast, memory-capable multi-channel oscilloscope HAMEG HMO 3054 and suitable current clamp adapters from the same manufacturer.
With this, we measure the power consumption of the CPU in the form of the actual input that occurs at the motherboard for the CPU, which also includes the losses of the voltage converters, which account for up to eight percent of the measured values depending on the load. Since the ASRock board provided by AMD unfortunately does not allow us to analyze the complete VR data accurately, we were NOT able to deduct these losses this time. The actual power consumption of the bare CPU is thus once again a bit lower than stated below.
| Test system | |
|---|---|
| Components: | AMD FX-8370E ASRock Fatal1ty 990FX Killer 16GB Radeon DDR3 1866 Samsung 840 EVO 500GB Be Quiet Dark Power Pro 1200W Microcool Banchetto 101 |
| Cooling: | be quiet! Dark Rock Pro 3, air cooler be quiet! Shadow Rock Slim, air cooler |
| Measurement method: | non-contact current measurement on all rails Voltage measurement Real-time infrared monitoring |
| Measuring devices: | 1x HAMEG HMO 3054, 500 MHz 4-channel oscilloscope with memory function 4x HAMEG HZO50 current clamp adapter (1mA-30A, 100 KHz, DC) 4x HAMEG HZ355 (10:1 scanning divider, 500 MHz) 1x HAMEG HMC 8012 digital multimeter with memory function 1x Optris PI450 80Hz infrared camera + PI Connect |
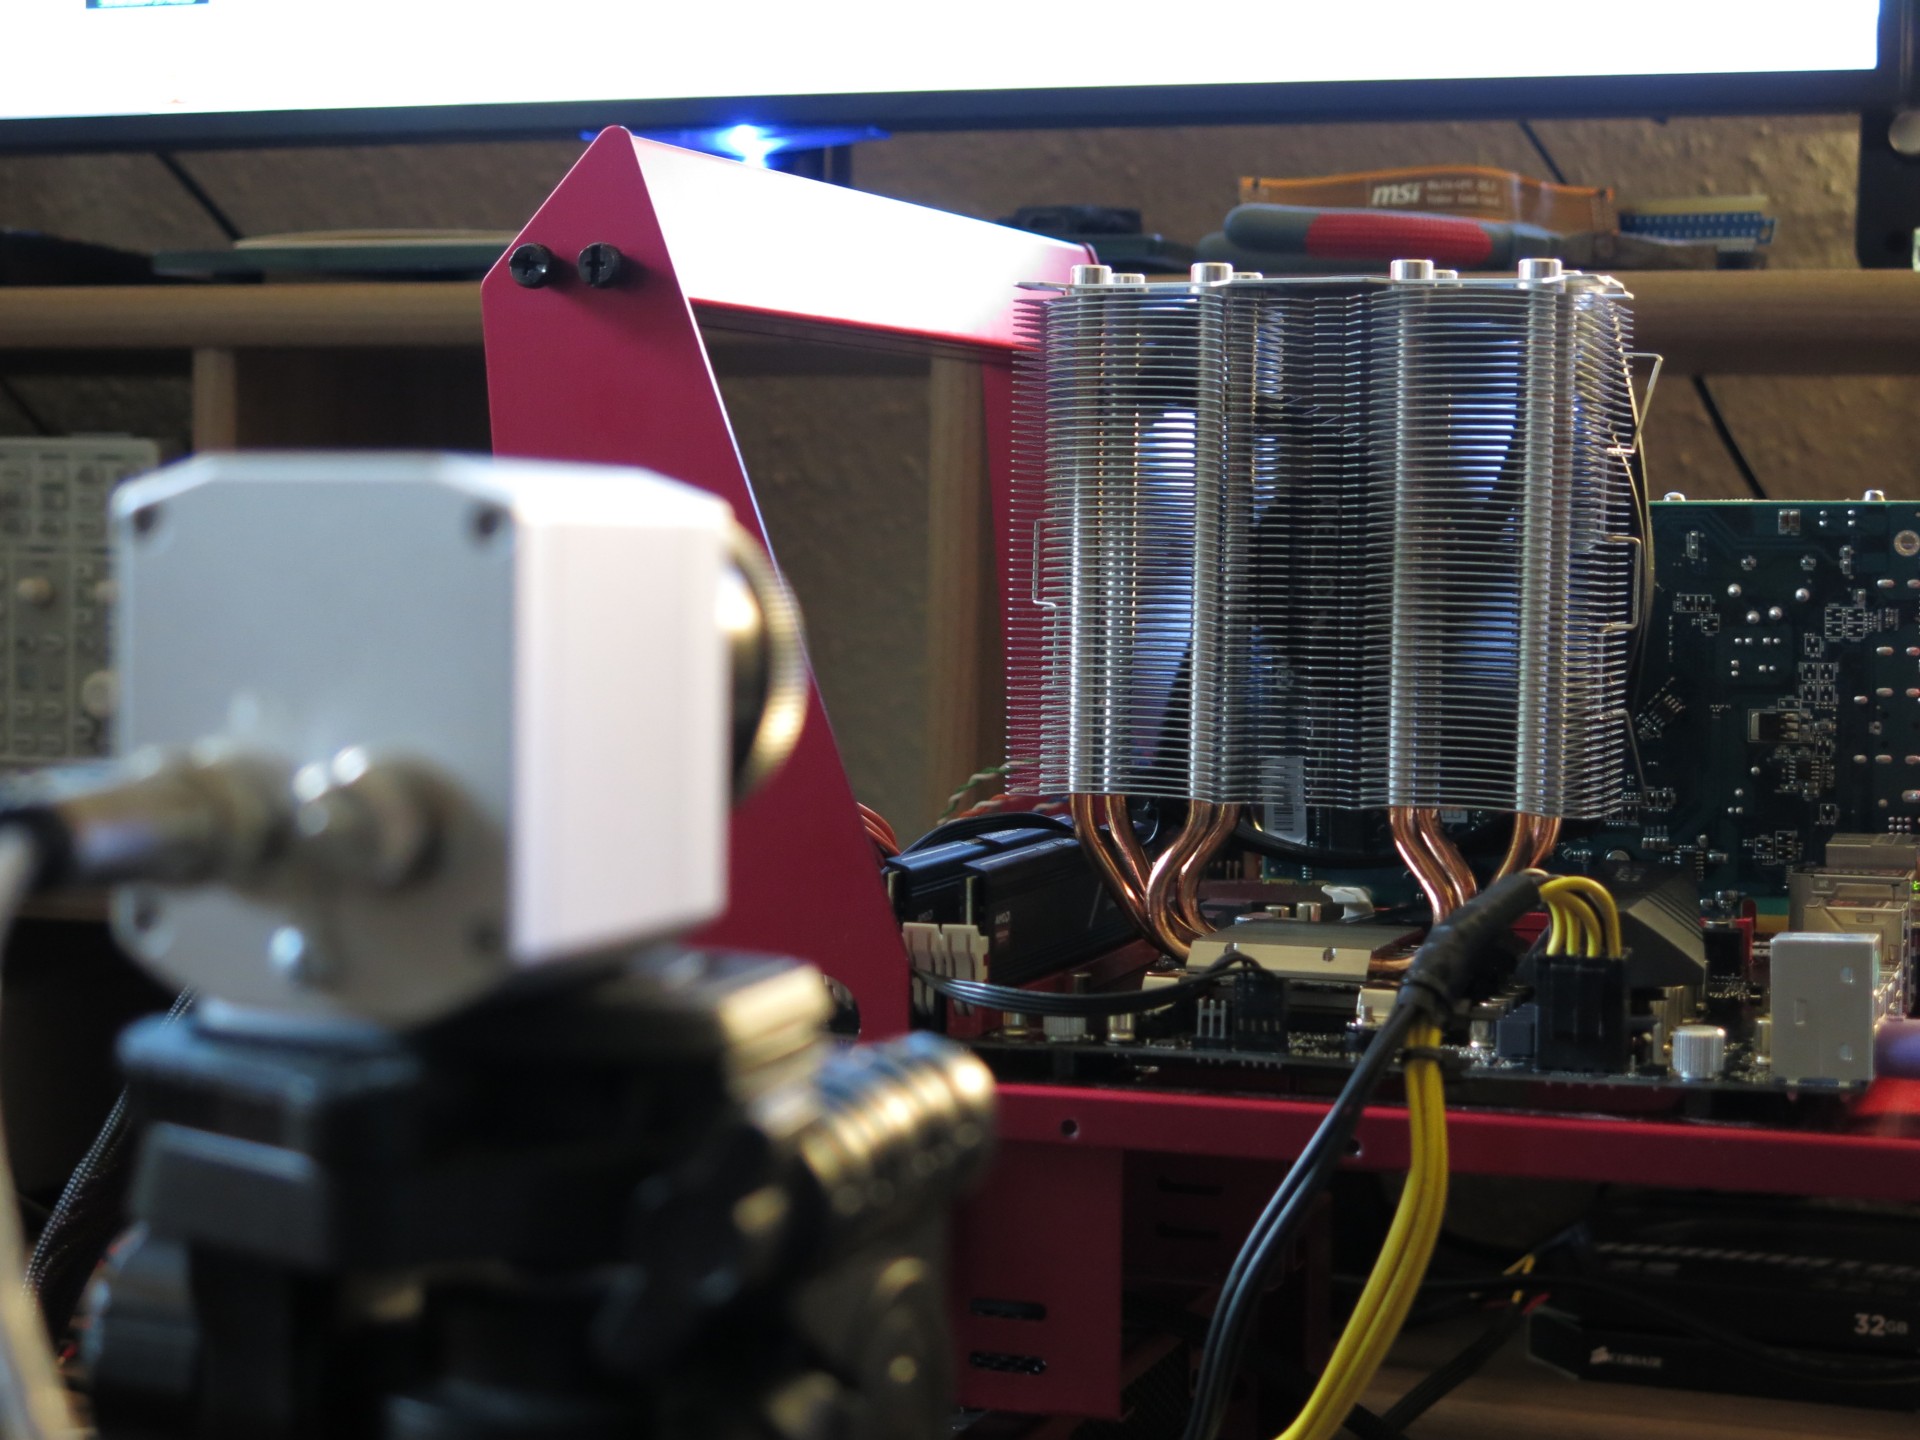
Infrared measurements with the Optris PI450
Now it gets highly interesting, because we use the PI450, an infrared camera developed by Optris specifically for process monitoring, to counter-test what the sensors give us. At a rate of 80 Hz, it provides us with real-time thermal images at top speed, which are transferred to a separate system via USB so that we can also record this preview as video if required. With a thermal sensitivity of 40 mK, it is especially suitable for detecting minimal temperature differences, which is of course very convenient for us.
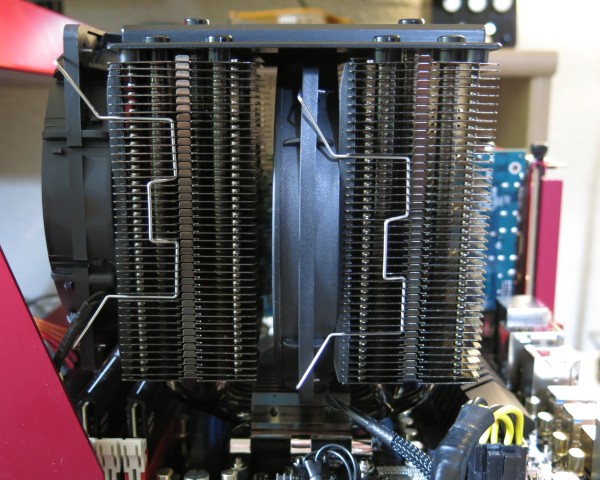
Air cooling with the be quiet! Dark Rock Pro 3
We first equipped the test system for better overclockability with the be quiet! Dark Rock Pro 3, a large dual-tower cooler with two fans that are automatically controlled by the CPU temperature. This huge cooler has such a good grip on the resulting waste heat from the CPU even at maximum overclocking that these fans can run at under 800 rpm. This means that the cooling giant, which weighs around 1.2 kilograms with fans, is so quiet in practice that we have reached the limits of our measurement equipment and have not measured the sound level in this test because it is almost inaudible. If you want to know more about this CPU cooler, just study the comparison test linked above.
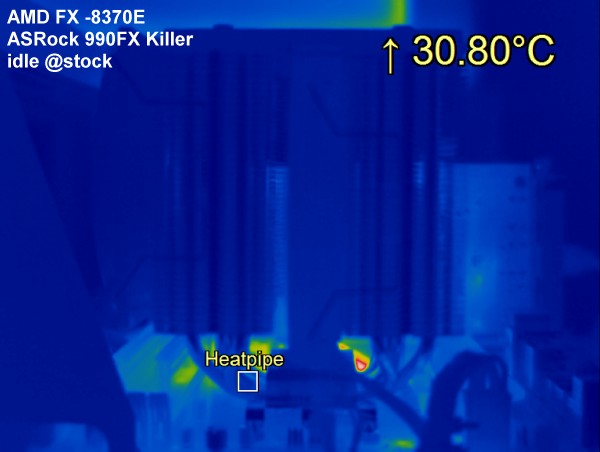
The values at idle are extremely low even after cooling down for a longer test period. We start when we measure only about 30°C at the heat pipe and the rest is also well cooled down.
Since we also want to sound out the optimal variant as a compromise of overclocking, voltage and cooling at the end, we will still exchange this massive cooler for a cheaper model later and make a recommendation.
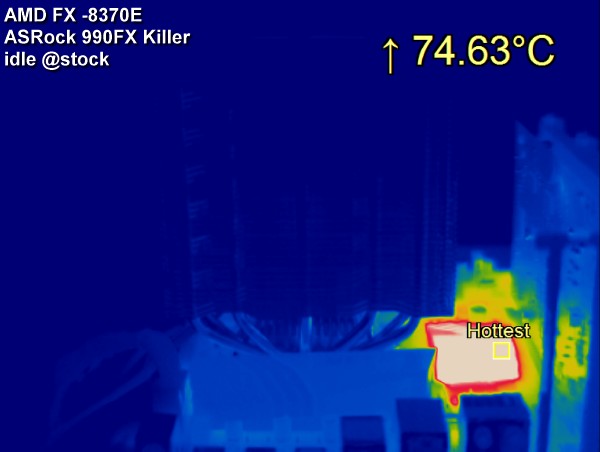
However, we still have to criticize the motherboard, because 75°C at idle is much too high for an unloaded chipset. When installed, we later even measured well over 80°C on the surface of the heat sink – much too much for our taste and also the middle finger of the right hand, which was quite painfully affected when changing the graphics card as a result of an unintentional contact.
AMD FX-8370E at standard clock (3.3 GHz)
1. Core voltage (Vcore)
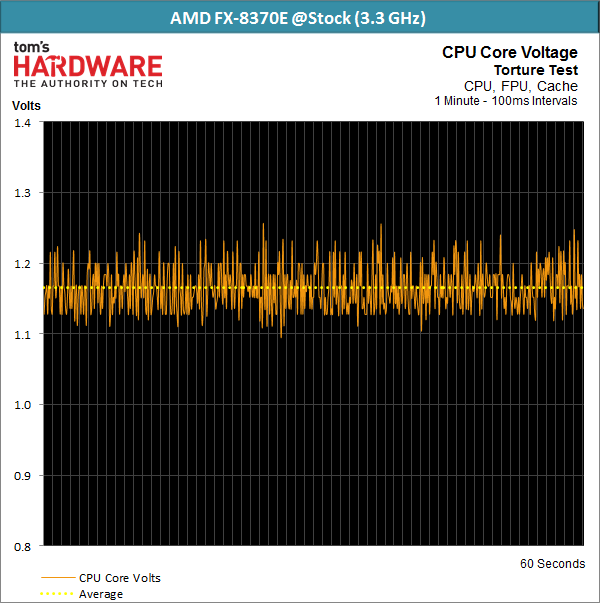
First, we look at the values for the applied core voltage, which is provided by the VRM (Voltage Regulator Module), because exactly this voltage ultimately determines the power consumption and waste heat. With an average of 1.17 volts, the value is slightly lower than the BIOS default (1.1850 volts). It is interesting to note that the values alternate quite a bit during the automatic presetting of the mainbar, which is no longer the case later when the voltage values are set manually. The Turbo clock drops to the base clock in some places during the stress test due to the high load.
2. Power consumption
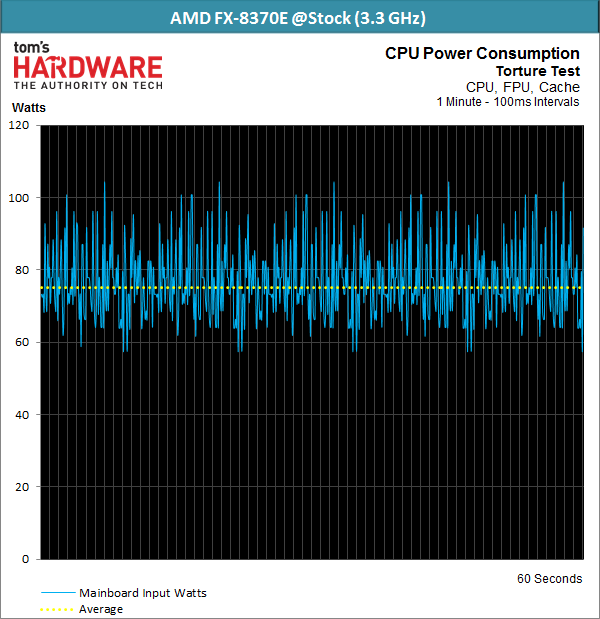
Now let’s look at what we have to feed in total for CPU and converter. While it is still just under 17 watts in idle, we measured a whole 75 watts at the supply rail for the CPU, which more than amazes us – in a positive sense. Because this is exactly how FX processors would have always wanted for us! If you subtract the voltage converter losses, you are easily at about 65 to 68 watts for the CPU alone. Certainly, current Intel CPUs of the same performance class undercut this value, but not as extremely as often reported. So let’s be fair.
3. Temperatures
The temperatures are also pleasantly low in idle mode and under load, so you could have even used one of the old boxed coolers here without ear damage in the end.
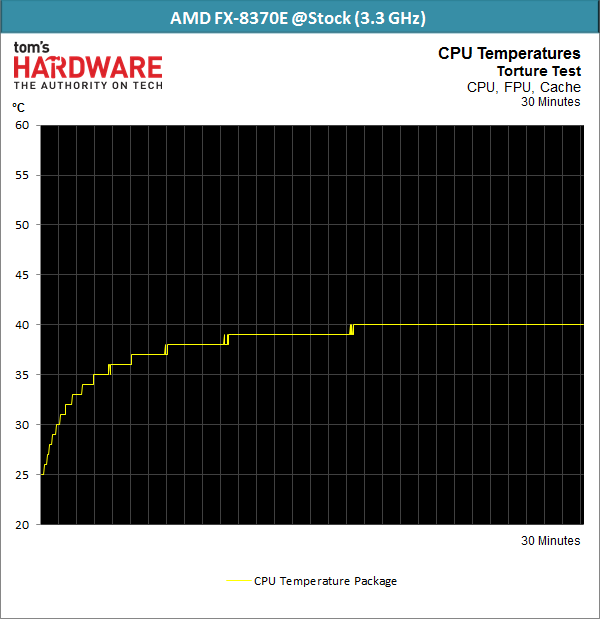
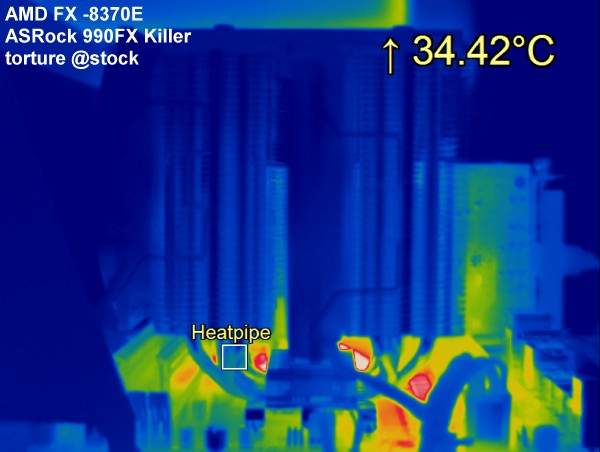
The heatpipe of the tower cooler is a whole 34 °C warm, which can definitely inspire, because the entire environment including RAM and voltage converter are significantly warmer than the cooler and heatpipes. A whole 40 °C in the CPU for the package is also a peak value.
If you put power consumption and performance in proportion, you get an interesting 8-core that is miles away from what AMD still offered with the older models of the FX line. Even though the low clock is at the expense of the overall performance, this CPU is exactly what it could and should have been when the new FX line was released. Only unfortunately almost two years too late.


18 Antworten
Kommentar
Lade neue Kommentare
Veteran
Urgestein
Urgestein
Urgestein
Urgestein
Mitglied
Urgestein
Urgestein
Urgestein
Mitglied
Urgestein
Neuling
Mitglied
Mitglied
1
Mitglied
Mitglied
Mitglied
Alle Kommentare lesen unter igor´sLAB Community →