


Construction diary Part 2 – Hard tubing for dummies
Now it’s time to get down to business. Once I had completed the planning for the pipe routing, the CPU block could be installed. The initial alignment should also turn out to be the final solution. The XC7 ELITE arrives with pre-applied thermal compound.

It therefore only needs to be fitted and screwed to the standard retention kit of the AM4 socket. Very easy, just like a boxed cooler!

The circuit is kept very simple, just like I always try to do with soft tubing. Out of the pump directly into the CPU block (note IN and OUT, this often has a big impact on the flow rate with water coolers), from the block into the radiator and back to the expansion tank.

I then took the radiator with the mounted fans and the pump combination out of the housing once again, as the connection between the radiator (out) and pump (in) was to be my first bending attempt.

Okay, so step by step, as you’ve already seen in countless videos from all the popular influencers and the like. Insert the silicone tube (this prevents the plastic pipe from kinking when bending) into the pipe and have the bending aid ready to hand.

And then it was time to heat the tube. To do this, I placed an ancient hot air gun on a piece of fire-retardant plasterboard, selected the lowest setting and continuously rotated the pipe in the hot air at a constant distance. It is better to take a little more time and heat slowly, but not for too long, otherwise the material will start to melt and bubbles will form.

And then it has to be quick and everything has to fit. Quickly insert the heated pipe, which is now of course more or less soft, into the bending aid and quickly place it around the bend and fix everything in place until the material cools down and solidifies again.

And now we have our first almost perfect 90° bend!

I don’t want to go too far out on a limb, but that was easy, wasn’t it?

The most difficult thing about this connection was actually cutting the respective sides of the bow to the correct length. It was better to cut off a little too little than a little too much until it fitted perfectly. Deburring the cut edges, fitting O-rings and screw connections:

Then just press the finished connection into the fittings and screw it together. Not bad for a first attempt!

But don’t get too excited too soon. If you want to work completely without 90° pipe connectors, you quickly find yourself in a situation where you have to bend a pipe around several corners and then it becomes a bit trickier. I needed two attempts for this connector because I had heated the pipe a little too much when trying to correct the angle afterwards and small bubbles had formed. Incidentally, the bending aid also doesn’t like it when you bend plastic that is too hot around the crank and acknowledged this botched job by pulling ugly black (melted) plastic threads. In retrospect, I still don’t like the second attempt 100%, but the bends are still clean and the overall result is very good.

Not perfect, but I have seen uglier piping.

To connect the CPU block (out) to the radiator (in), the same bend had to be made in principle.

With a bit of feeling and a little experience from the last pipe, it worked right away. I like that!

Before the graphics card and all the cabling can go in, the circuit must of course first be checked for leaks. All the fittings and screw connections were only tightened with my fingers, as I have had extremely painful experiences in the past with cracked acrylic blocks where the fittings were tightened with pliers. The practical filling aid (squeeze bottle) is used to fill the expansion tank as full as possible.

The pump is then started briefly and switched off again quickly, as it must never run dry! Keep topping up the coolant, start briefly, top up, start again until the expansion tank is almost full. Of course, you should first keep an eye on whether everything is tight and no drops are visible anywhere. If this is the case, it is advisable to run the pump at high speed for a few hours and tilt the system briefly in all directions so that all the air bubbles disappear from the circuit.

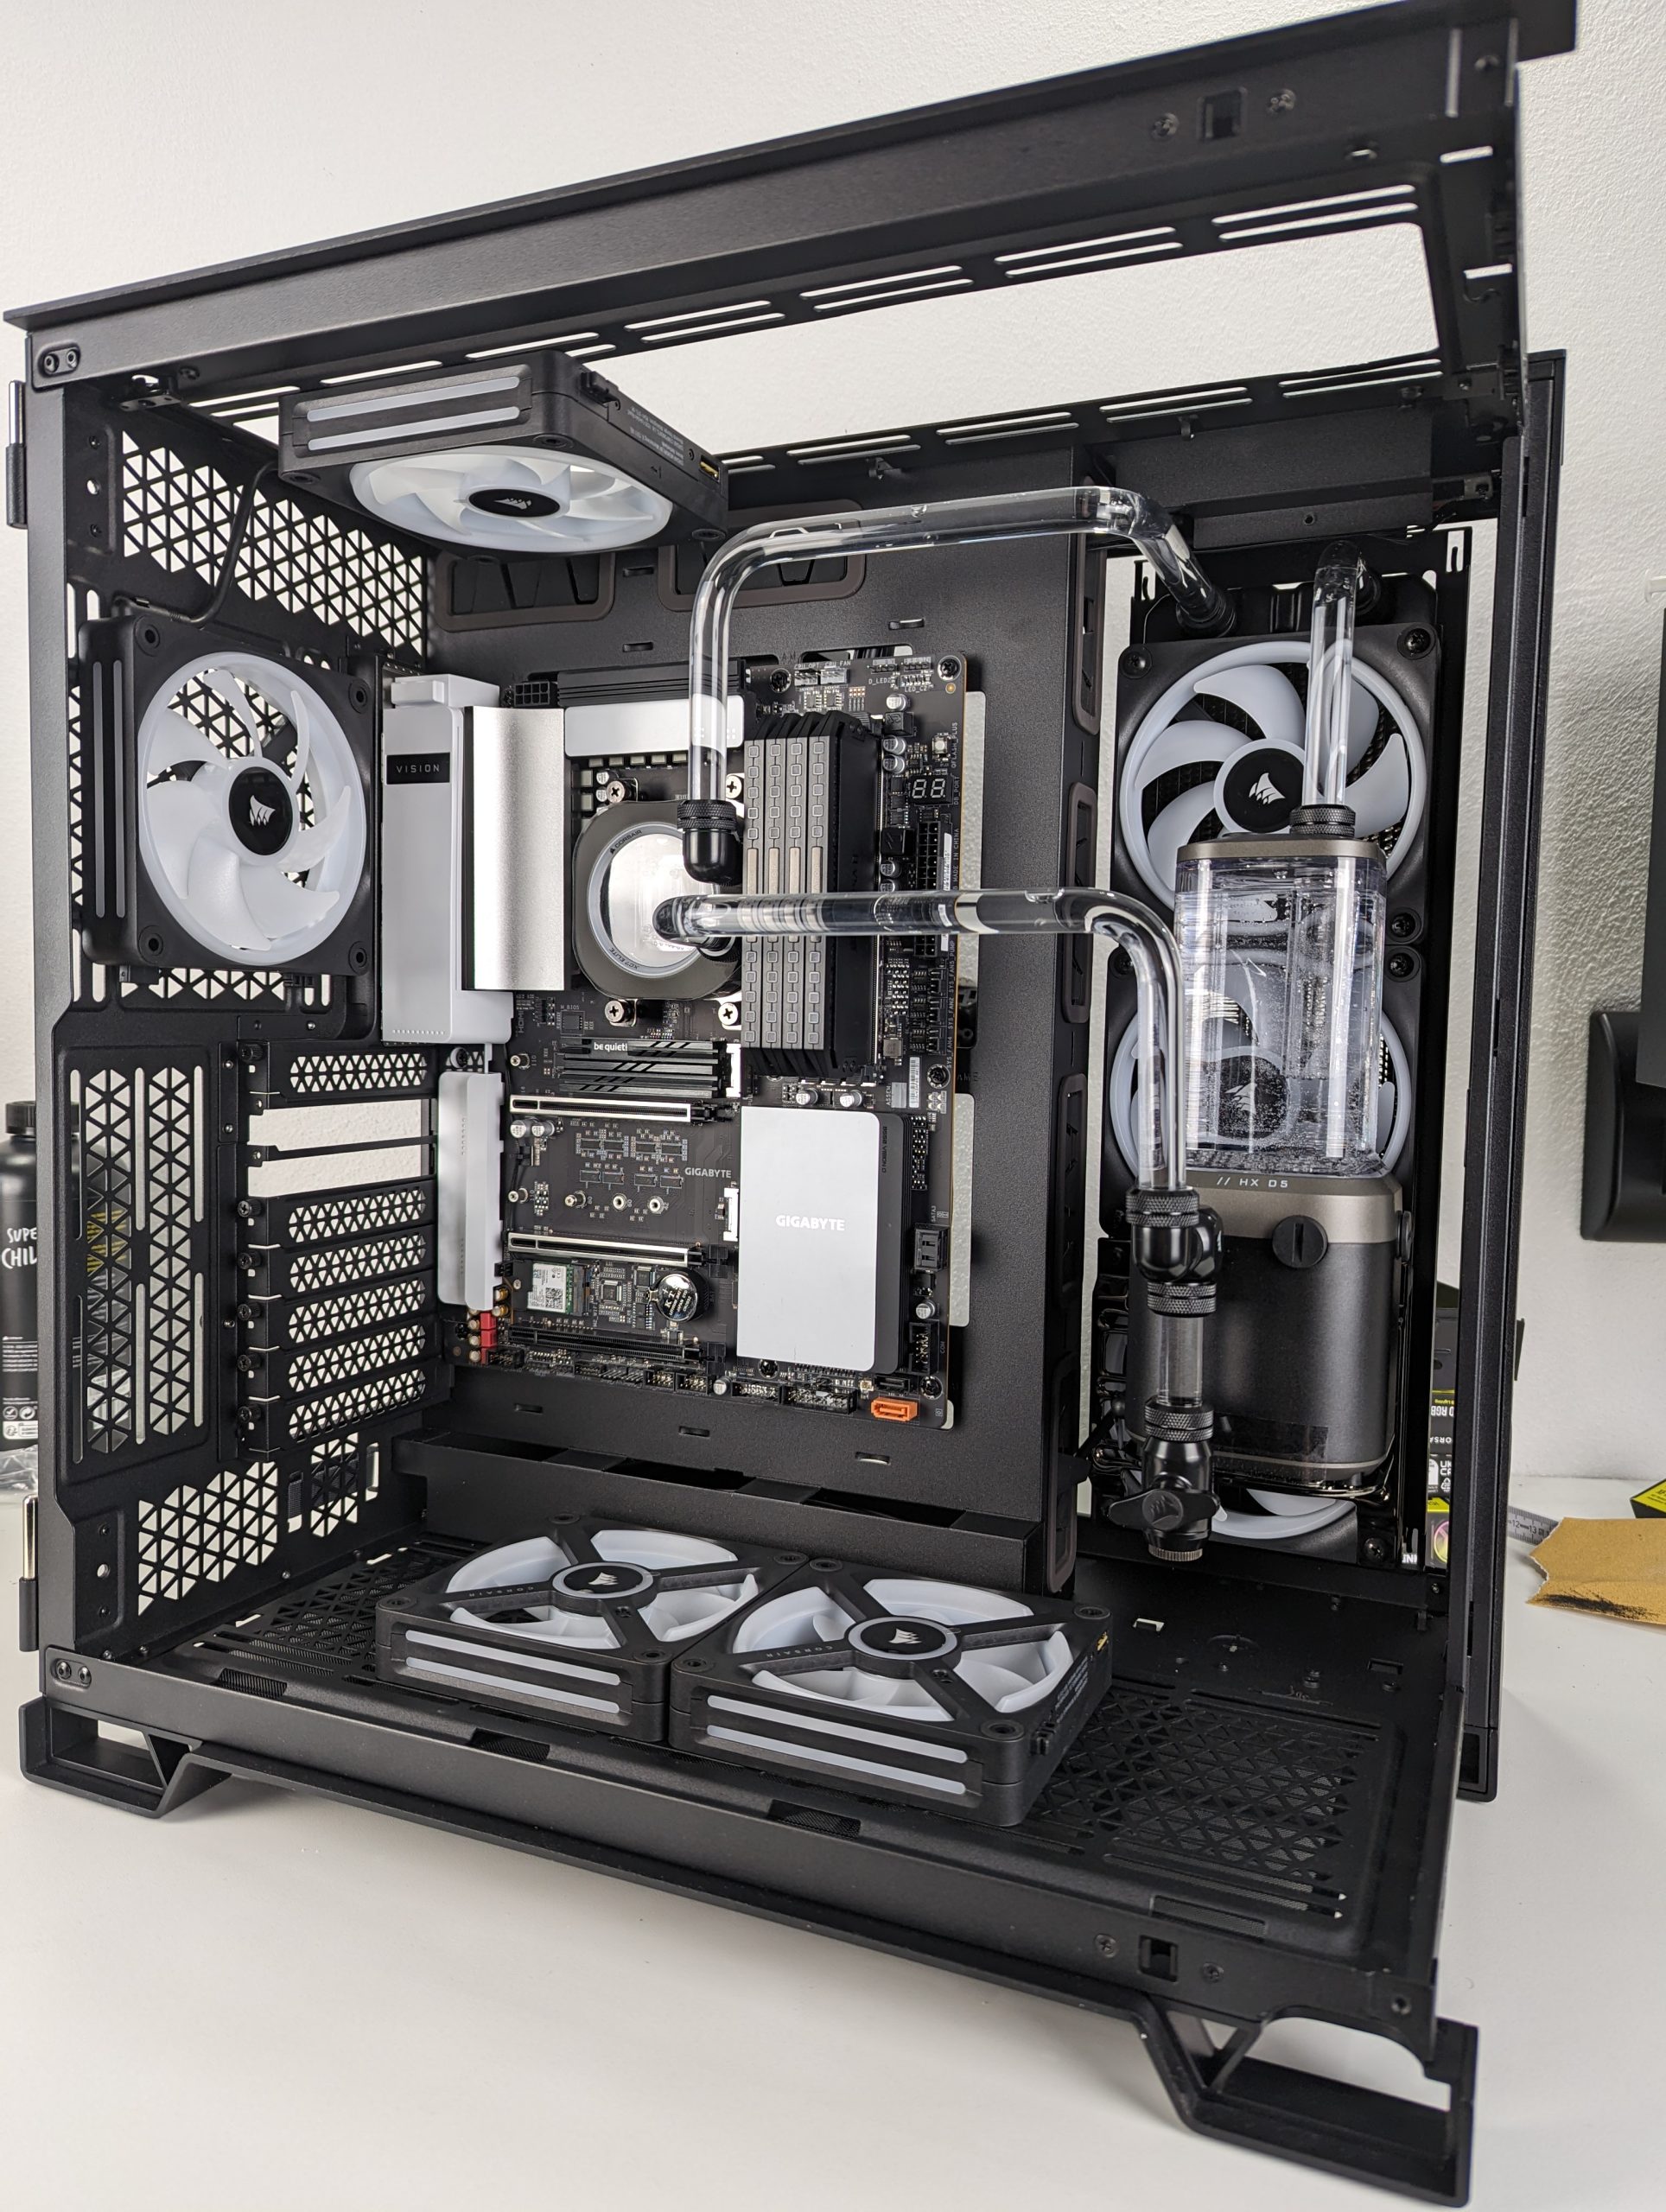
After a test run lasting several hours (everything was tight straight away), the remaining components were then installed. I was also interested in the iCUE-Link system, with which I had not yet had any experience. As I initially only had a limited number of QX fans available, I had to choose tactically clever positions. Two fans went into the floor to supply the graphics card with fresh air:

The other two moved into the lid and rear to remove the warm air from the housing.

I have to admit that the iCUE-Link system is extremely convenient. As you know, the fans can simply be plugged together, at the desired end only a single cable leads from one grouping to the next and everything then comes together at the splitter or system hub.

When I think about the tangle of cables caused by some fans with RGB lighting, the finished cabling with iCUE-Link really looks like only the cables from the front I/O are in the housing.

Just think: In the last picture you can see the cabling of 7 fans, an expansion tank and a CPU block – all with lighting. Nice!
The installation of the power supply unit was also simple, as no mounting frame or similar had to be removed.


I had initially feared that there might be collisions with the side connections of the SHIFT power supply because the drive cage sits relatively close above the power supply.

But everything fits in quite comfortably and the corresponding connections are also very easy to see!

Ready-made cabling. Now that’s what I call efficient.

Finally, we fitted the separator / air baffle next to the radiator and then we were finished in the rear chamber.

The front panel was fitted at the front:


Time for a test run and a little foretaste of the colorful impressions that will follow on the next page.


31 Antworten
Kommentar
Lade neue Kommentare
Mitglied
Mitglied
Urgestein
Mitglied
Urgestein
Mitglied
Urgestein
Urgestein
Veteran
Mitglied
Urgestein
Urgestein
Moderator
Urgestein
Urgestein
Urgestein
Moderator
Urgestein
Mitglied
Alle Kommentare lesen unter igor´sLAB Community →