


Installation report
Now we come to the interesting part – the practical test. I can say in advance that the assembly of the components in the H6 Flow was very pleasant. All openings, fasteners, and cable grommets are cleverly positioned, all threads are cleanly executed, and the straight screws have enough metal content that they won’t fall off a magnetic screwdriver. But before I go into raptures, here are the components to be installed:

CPU, RAM and NVME were installed in advance as usual and then transplanted into the case as one unit with the board. It’s nice that NZXT also installs the centering spacer for convenient installation of the motherboard. Thus, the board was in place in seconds and thanks to the already mentioned screws of reasonable quality also quickly screwed.

Before this important issue is forgotten, I again fix an air cooler on the CPU. The Scythe Mugen 5 is specified with 157.5mm height and the side panel still fits on it without any problems.

Since there was a little less than 1cm of space between the glass and the cooler, the manufacturer’s specification (max. 163mm) will definitely work. The Dark Rock Pro 4 (163mm) would therefore still fit, while Dark Rock Pro 5 and Dark Rock Elite with 168mm each would not.

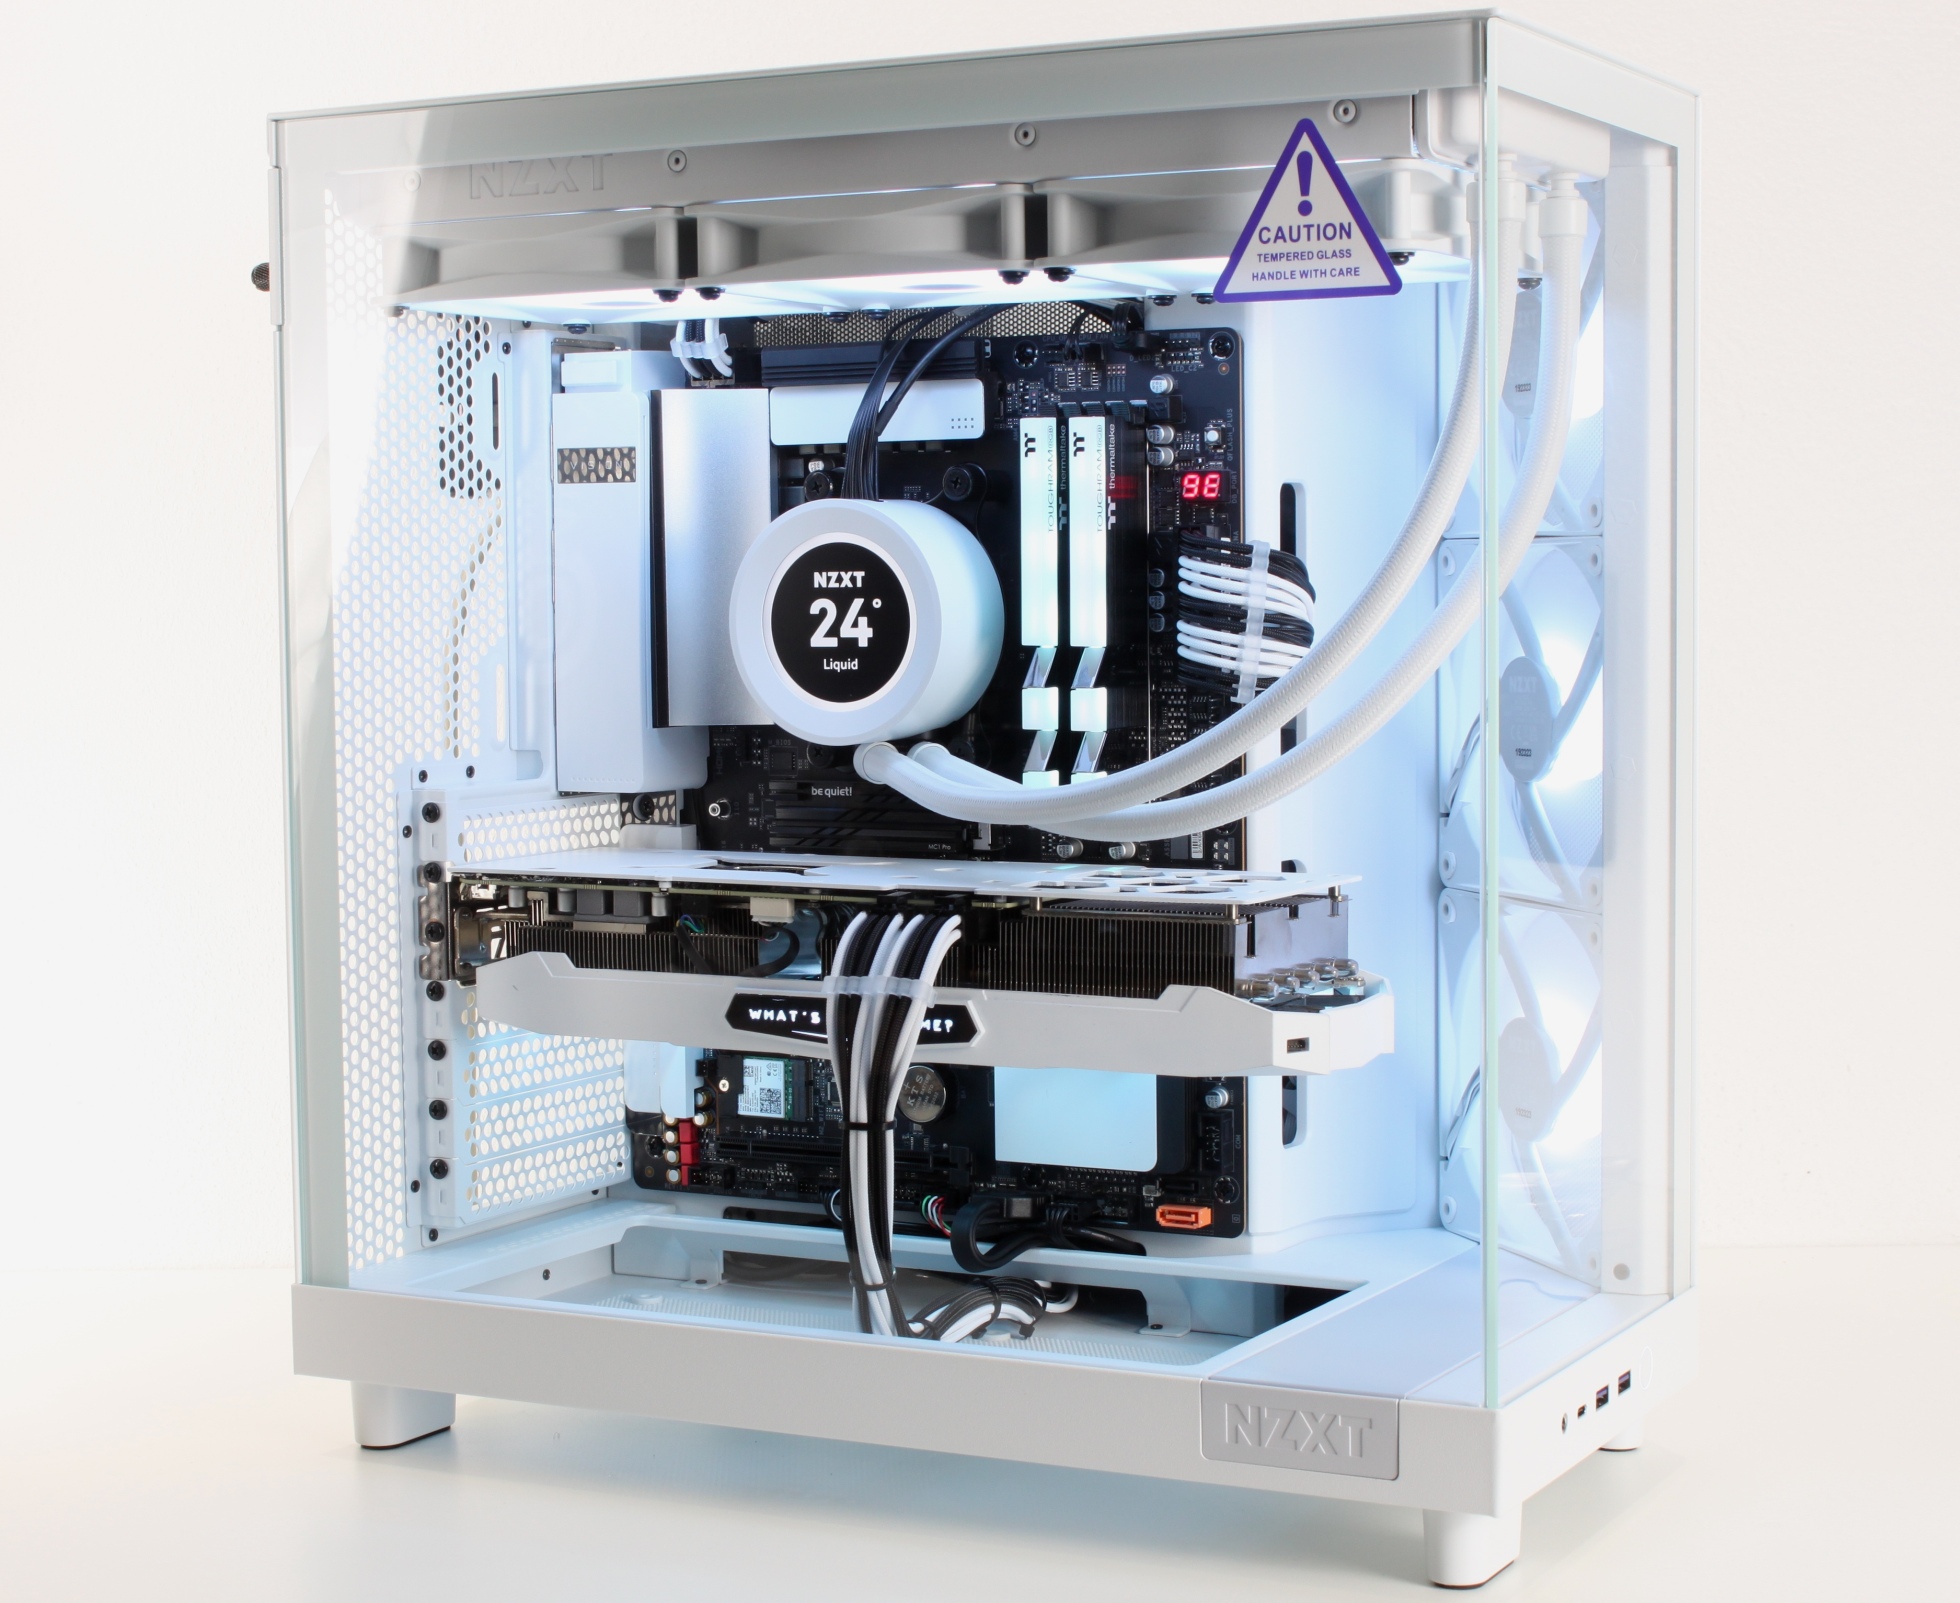
However, the H6 Flow is also designed more for a chic AIO cooling solution, which, in addition to the good cooling performance, also looks good. That’s exactly what I did and screwed the expensive NZXT Kraken Elite 360 RGB into the lid.

There is enough space between the AIO and the board to plug in the P8 connector without stress, even with sausage fingers.


The 24-pin cable doesn’t have to be squeezed under a cosmetic bezel here.

It can be neatly routed at the correct height through the lush cable grommet. Of course, it would look even cleaner with more cable combs 😉.

The installation of the power supply is also absolutely stress-free and done in a few seconds. Due to the good accessibility, there is no need to remove some stupid frame, mount it, thread everything in and screw it back together again!

Simply bring the power supply unit into position:

Screws in and ready!

The last component to go in was the painted graphics card. The slot covers are designed without a bar, so that an optional vertical GPU kit can be retrofitted without much effort. As of today, the “original part” will change hands for 89.99€, but other kits should also be compatible.

Graphics card put in its place:

Power supply: Check.

Close the lid and turn around, please.

Yes, you can make it all neater. With this solution, I just wanted to show that even lazy people don’t have to be afraid of storing all the cable clutter in the spacious rear compartment.

Test run..


21 Antworten
Kommentar
Lade neue Kommentare
Urgestein
Veteran
Moderator
Veteran
Urgestein
Mitglied
Urgestein
Urgestein
Veteran
Urgestein
Urgestein
Mitglied
Neuling
Mitglied
Urgestein
Moderator
Mitglied
Urgestein
Veteran
Alle Kommentare lesen unter igor´sLAB Community →