


Commissioning
Before you start leveling and adjusting the settings, you should first update the firmware of the mainboard and the screen. These are two separate updates, first update the touchscreen and then the board! The files and a short tutorial can be found at the Ender-3 S1 Pro downloads.
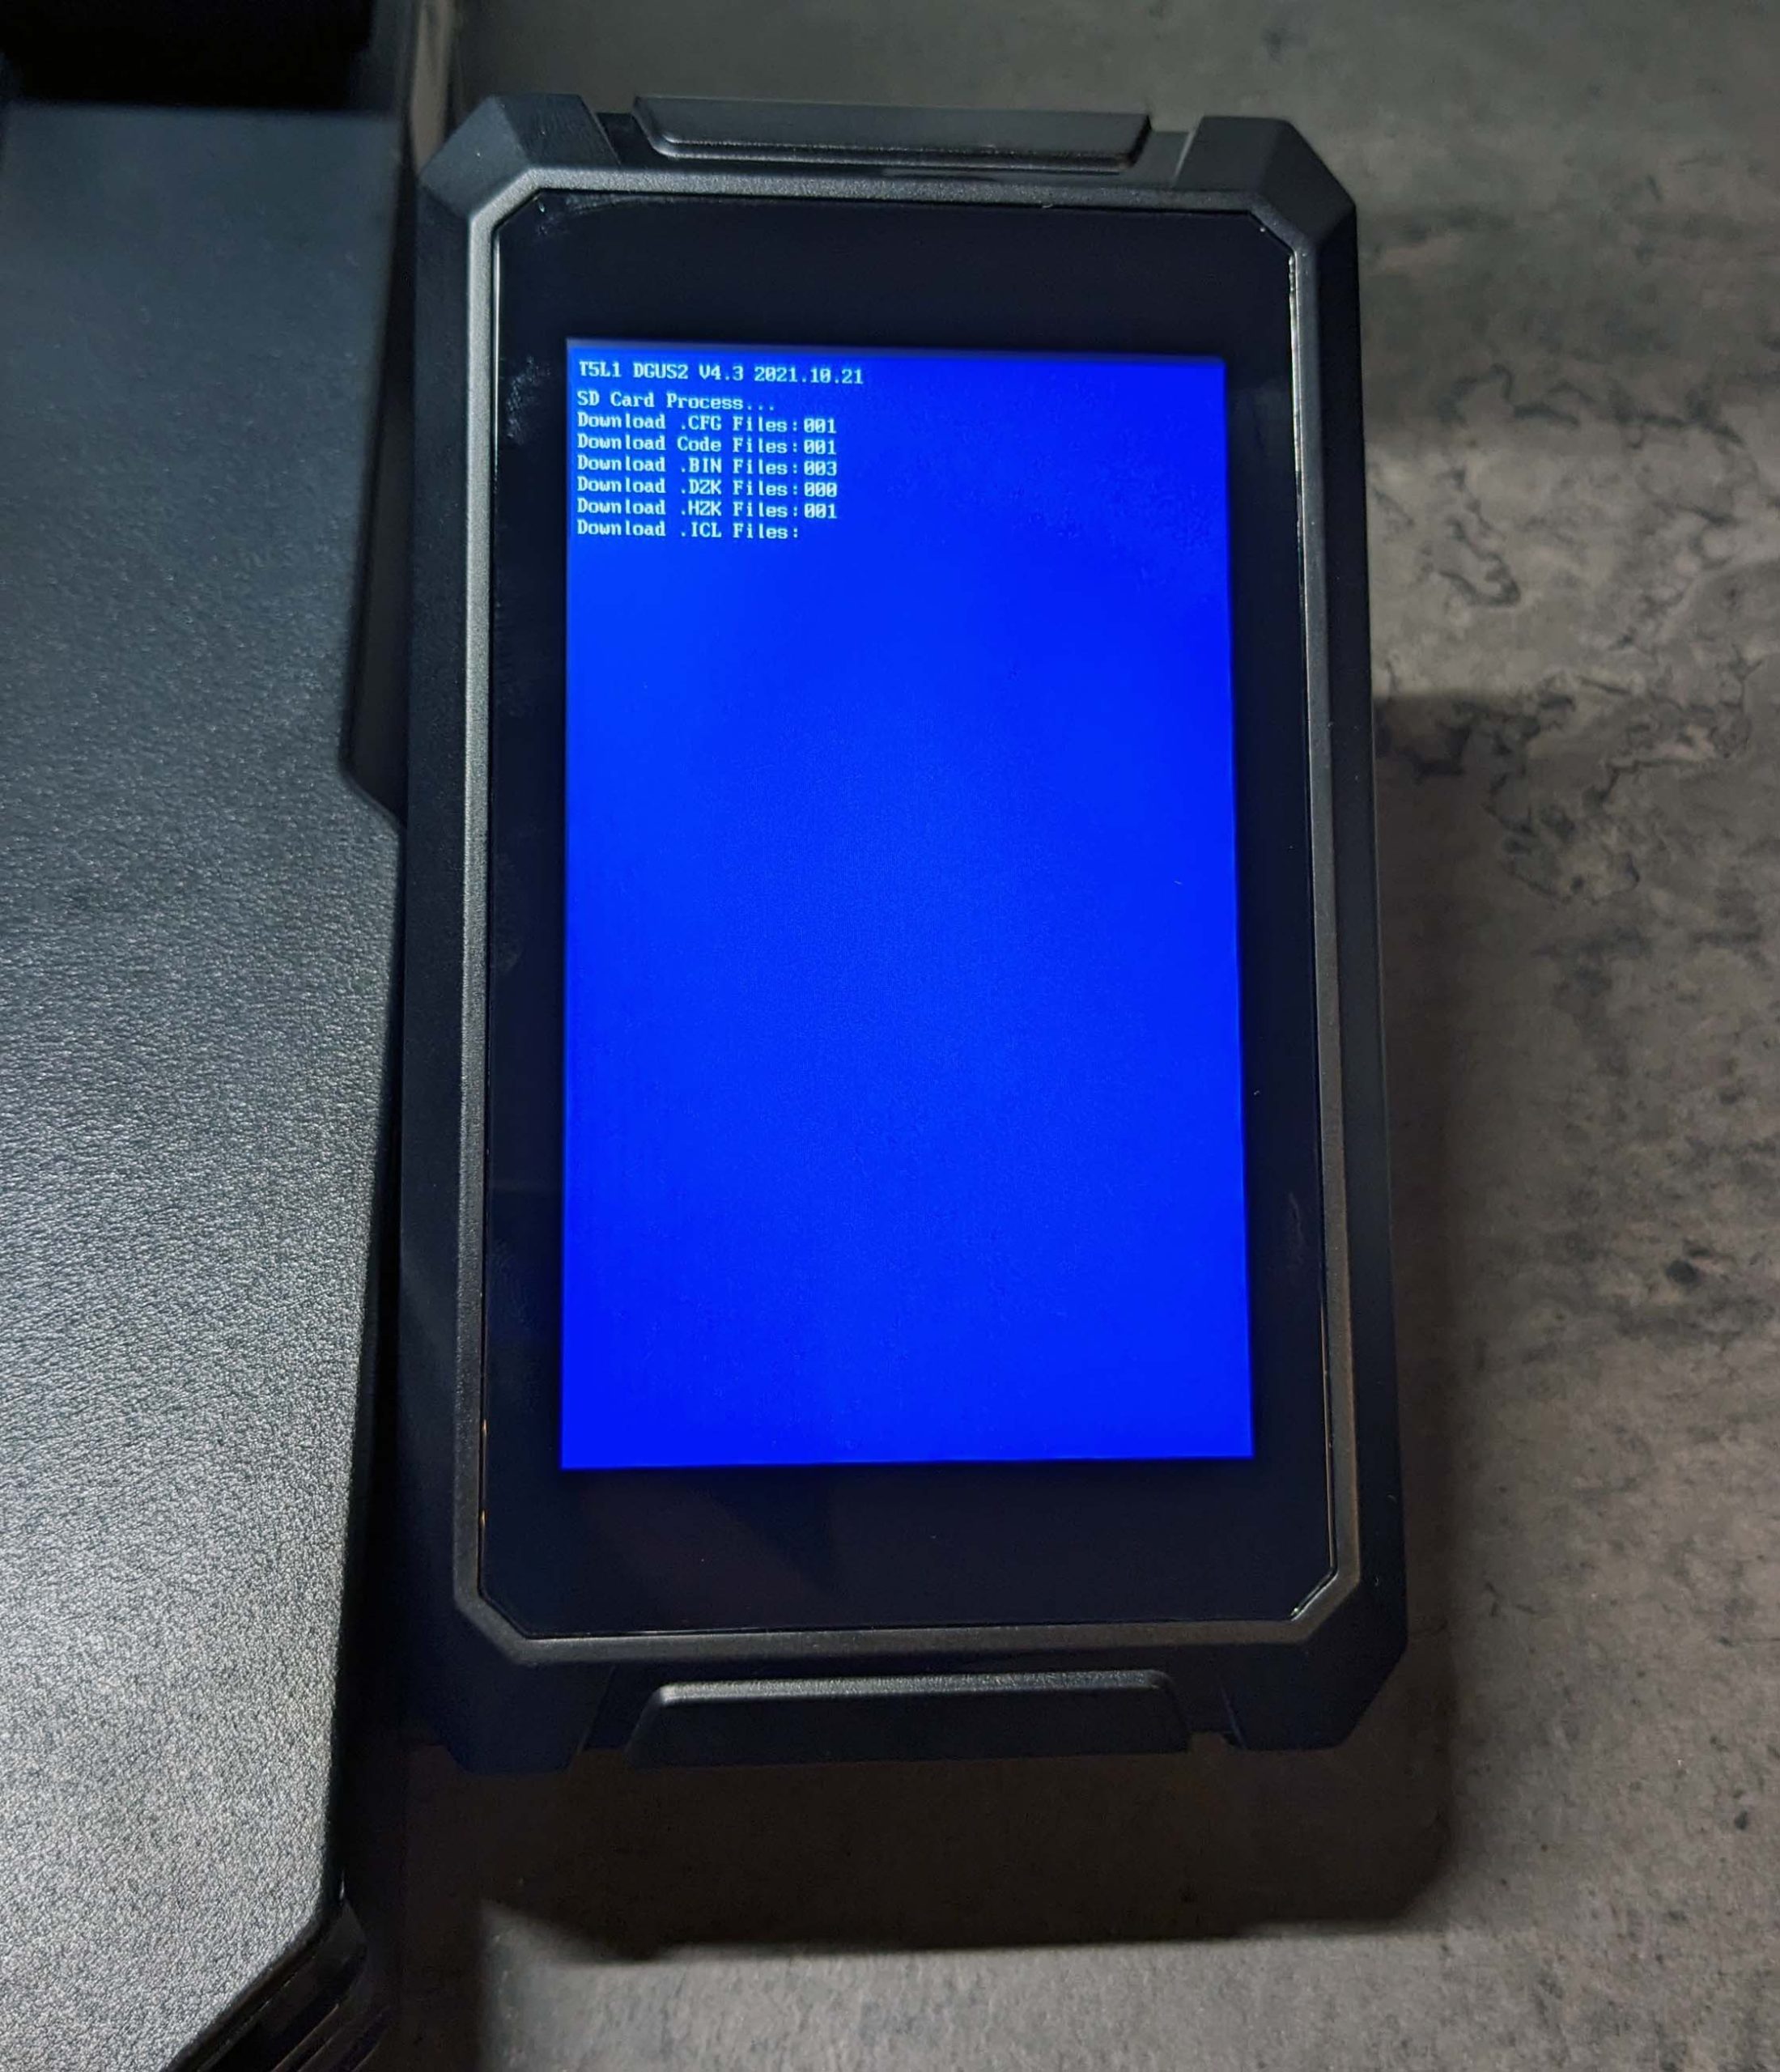
I used version 2.0.8.26F4 from February 2023 for my test article here, mine shipped with version 2.0.8.24.
After that, it’s on to adjusting the X and Y axes. Both extruder and print bed should not wobble, but also not be too tight. The distance of the rubber rollers to the aluminum extrusion can be determined by turning the eccentric nuts.
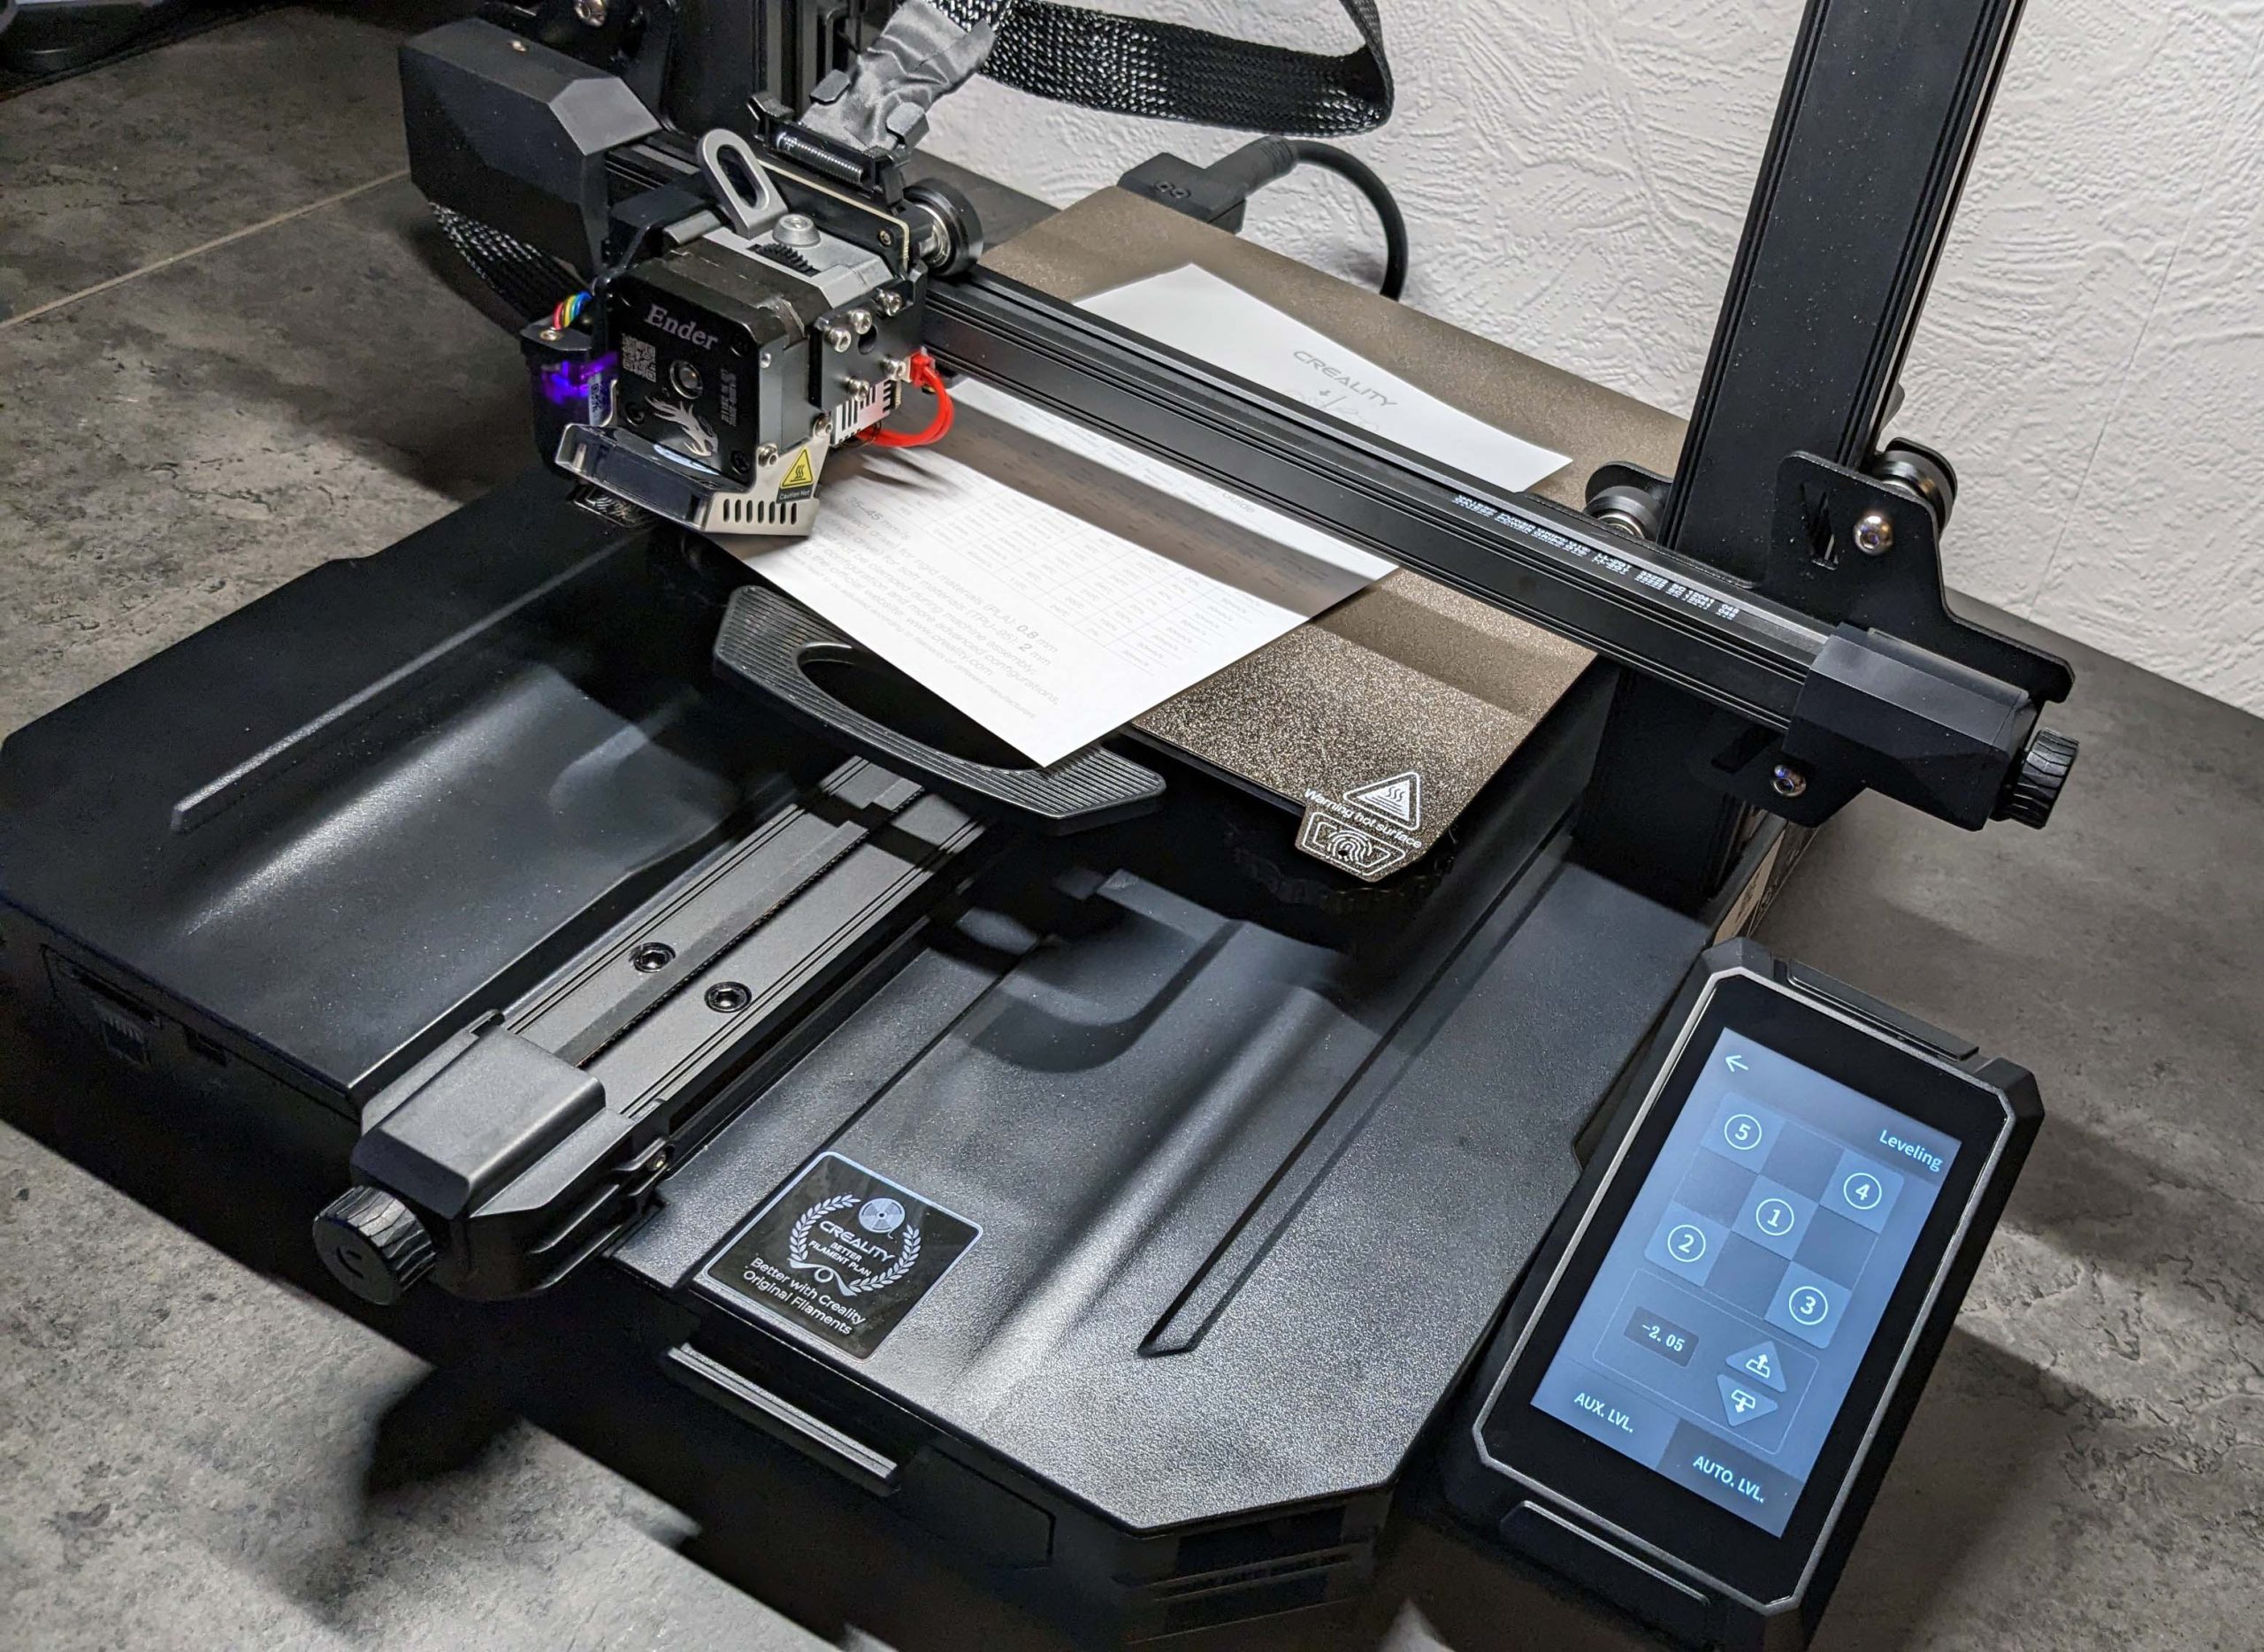
And even though the Ender-3 S1 Pro has autobed leveling, there are still adjustment wheels on the bottom of the print bed. So via the menu you first select the manual “AUX. LVL.”, take a sheet of paper and reduce the Z-offset of the Nozzle until it scratches lightly on the paper. Then on to the next point. Then let the automatic leveling generate a mesh, which then takes care of the fine tuning.
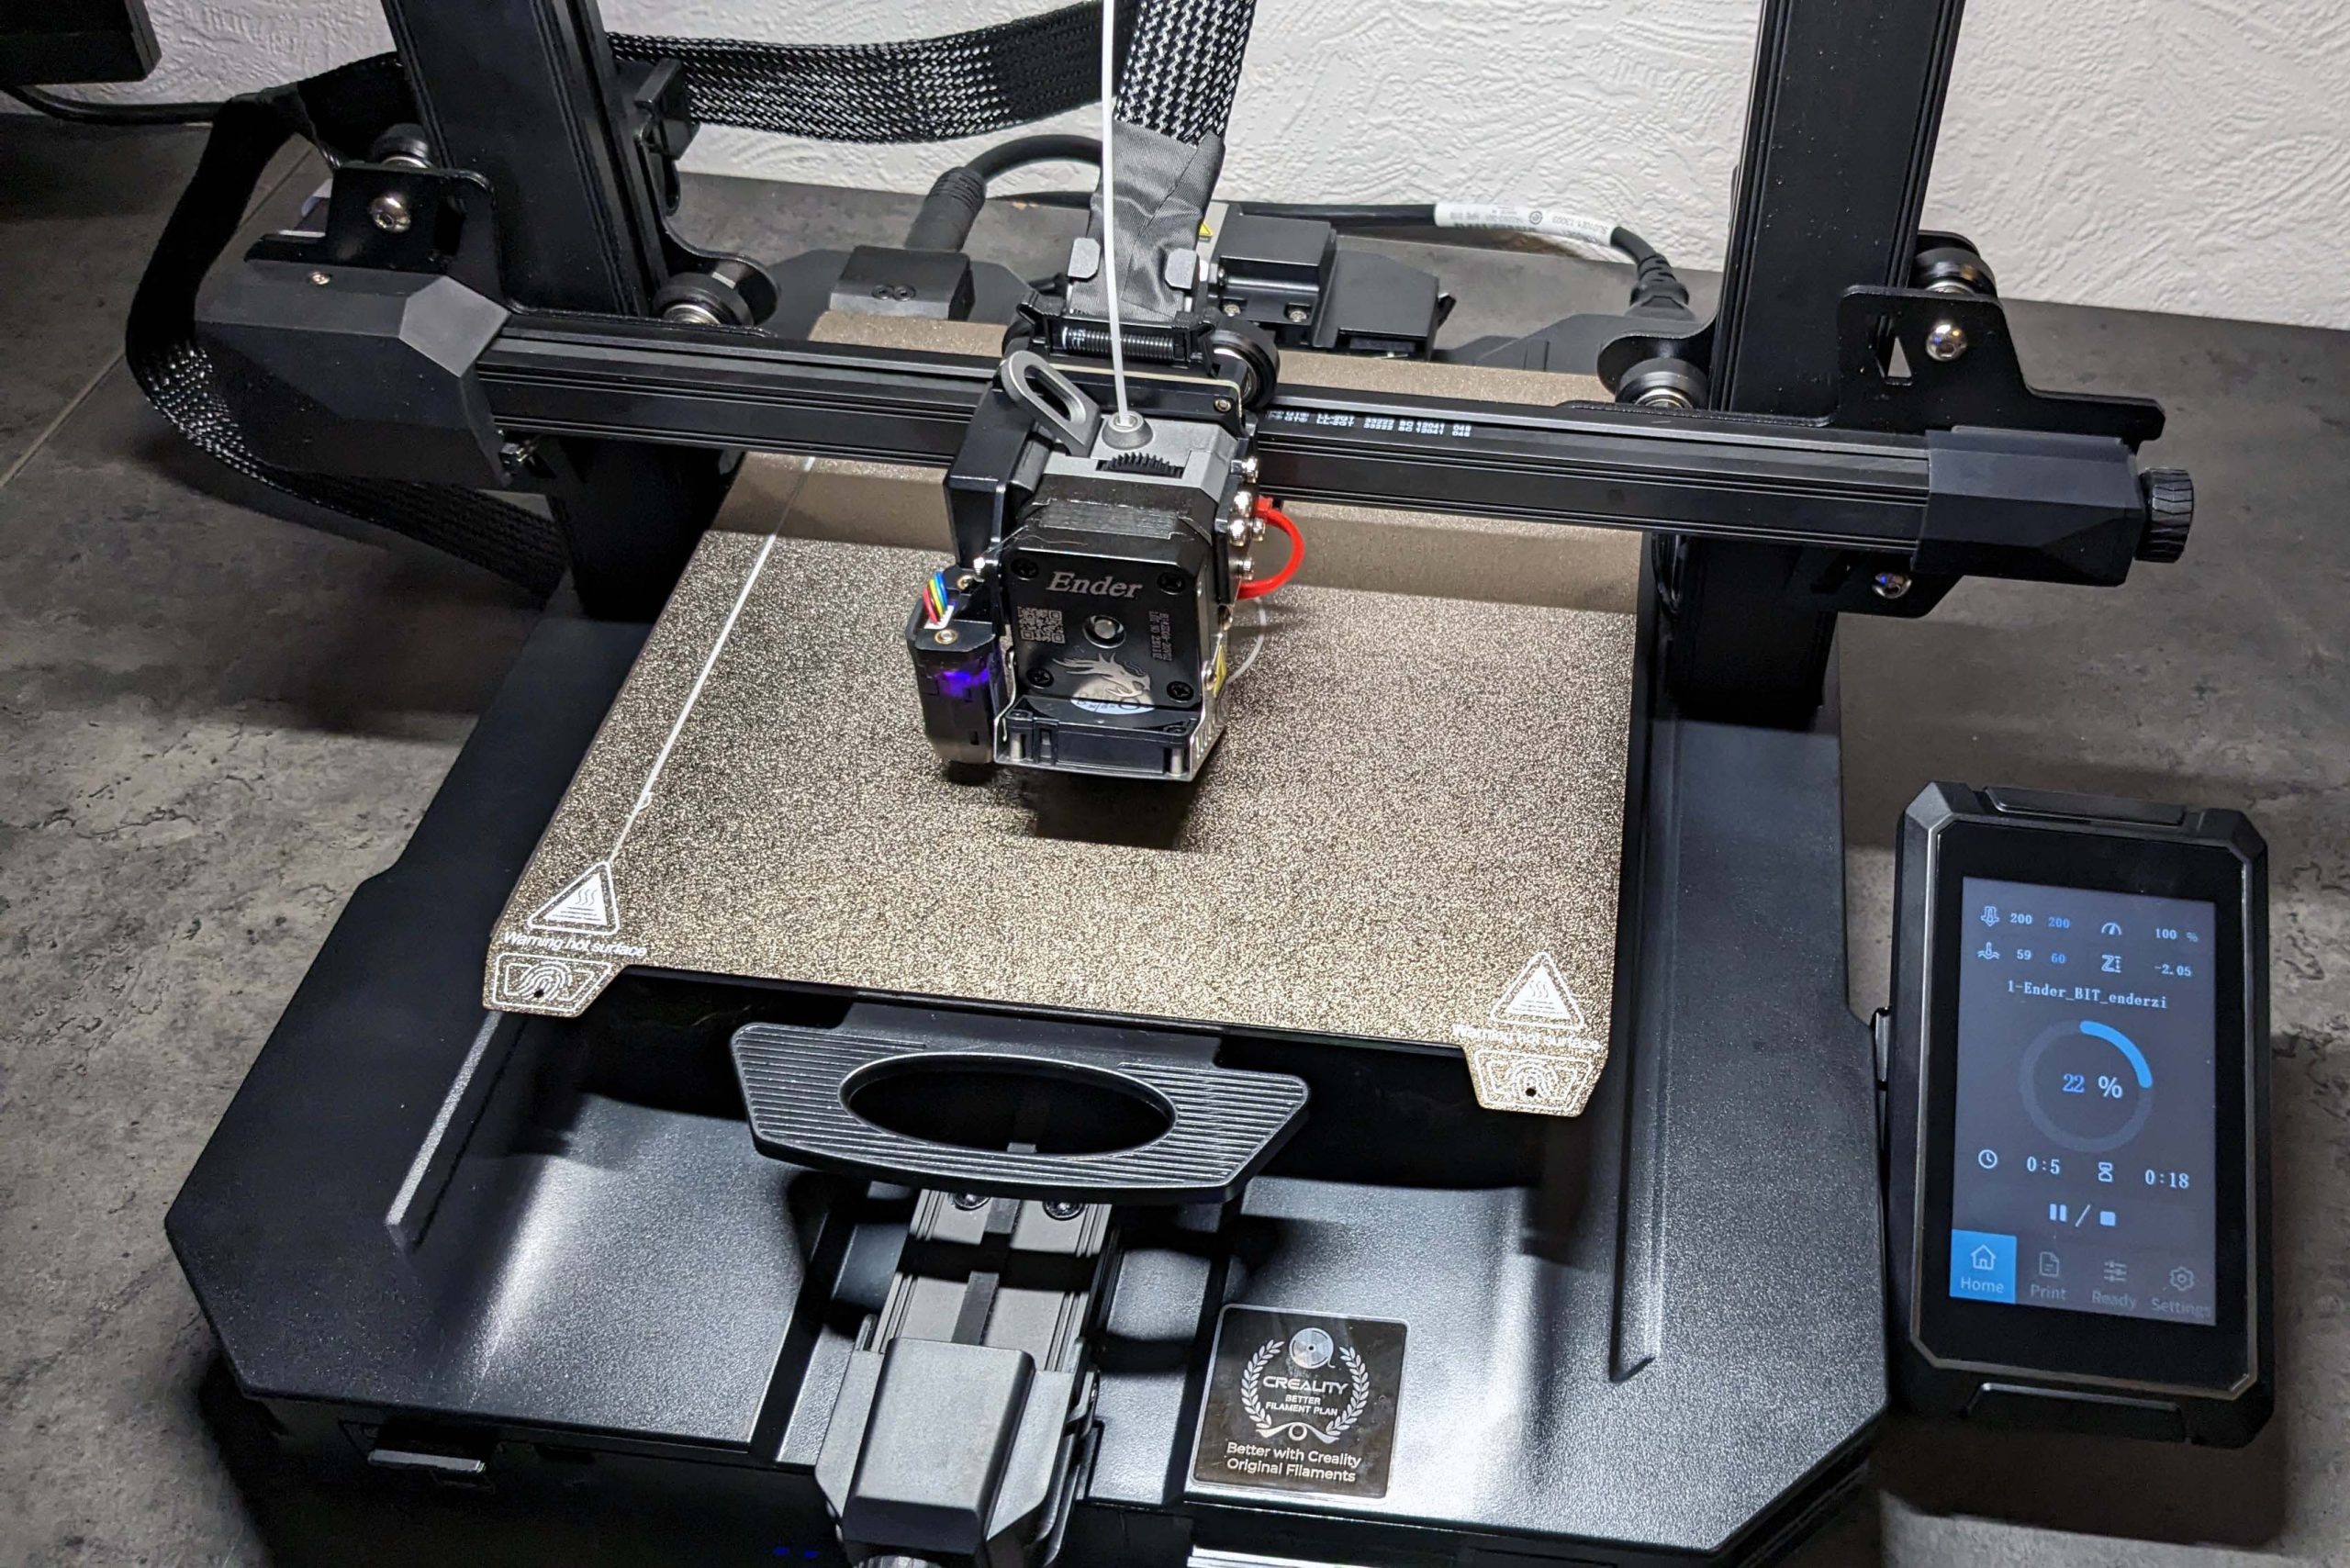
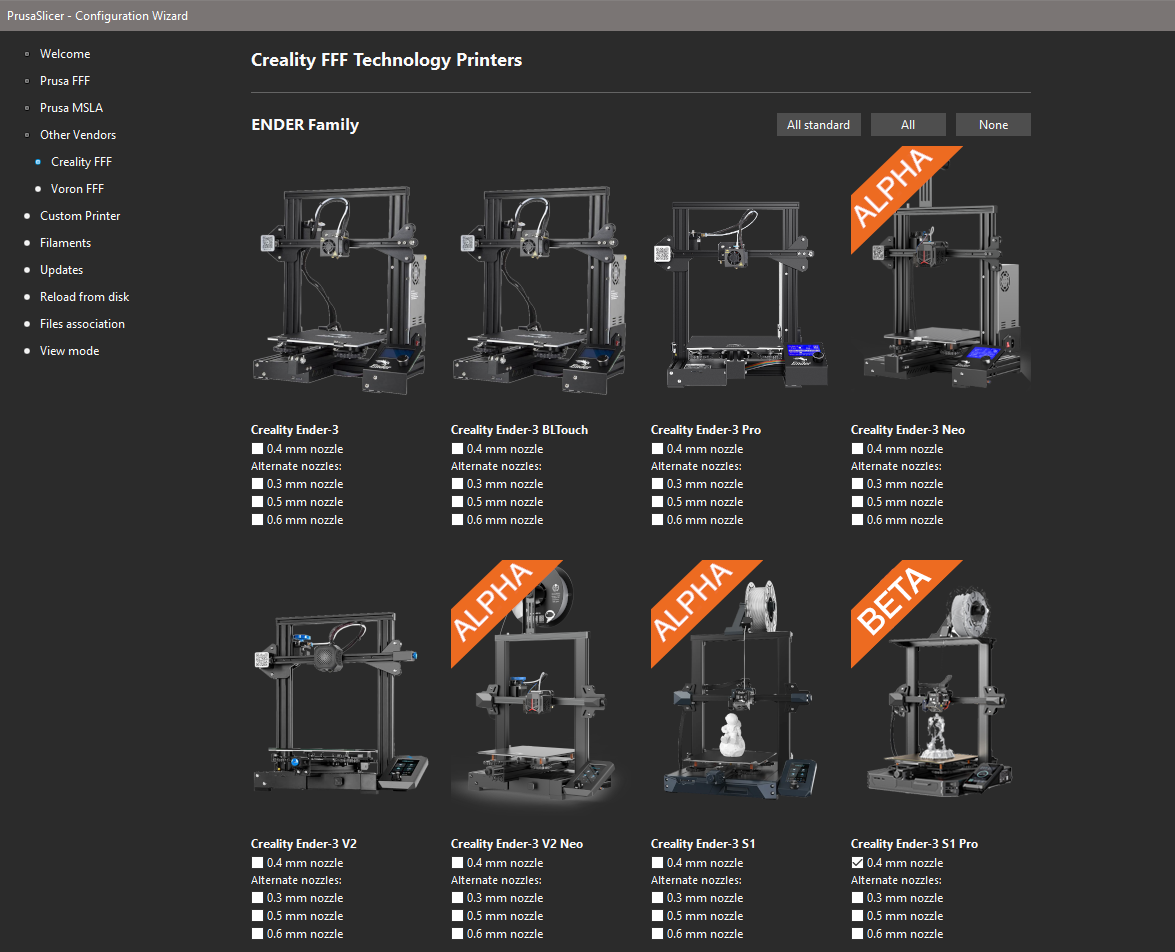
On the included SD card there are already some sliced test models, while we take care of the setup of the slicer the first one can be printed for testing.
Slicer
With “Creality Print” or the “Creality Slicer”, a fork of the Ultimaker Cura software, the manufacturer also offers directly adjusted profiles for this and other printers, but I will fall back on the PrusaSlicer here. There, too, there are print profiles for this printer via third-party integration, at least in “beta” status.
For my part, however, I have directly first turned a little on the screws, because the standard profiles are somewhat conservative in terms of speed. After several attempts and some test prints, I have my own profile ready, which saves time and brings no visible losses in print quality.
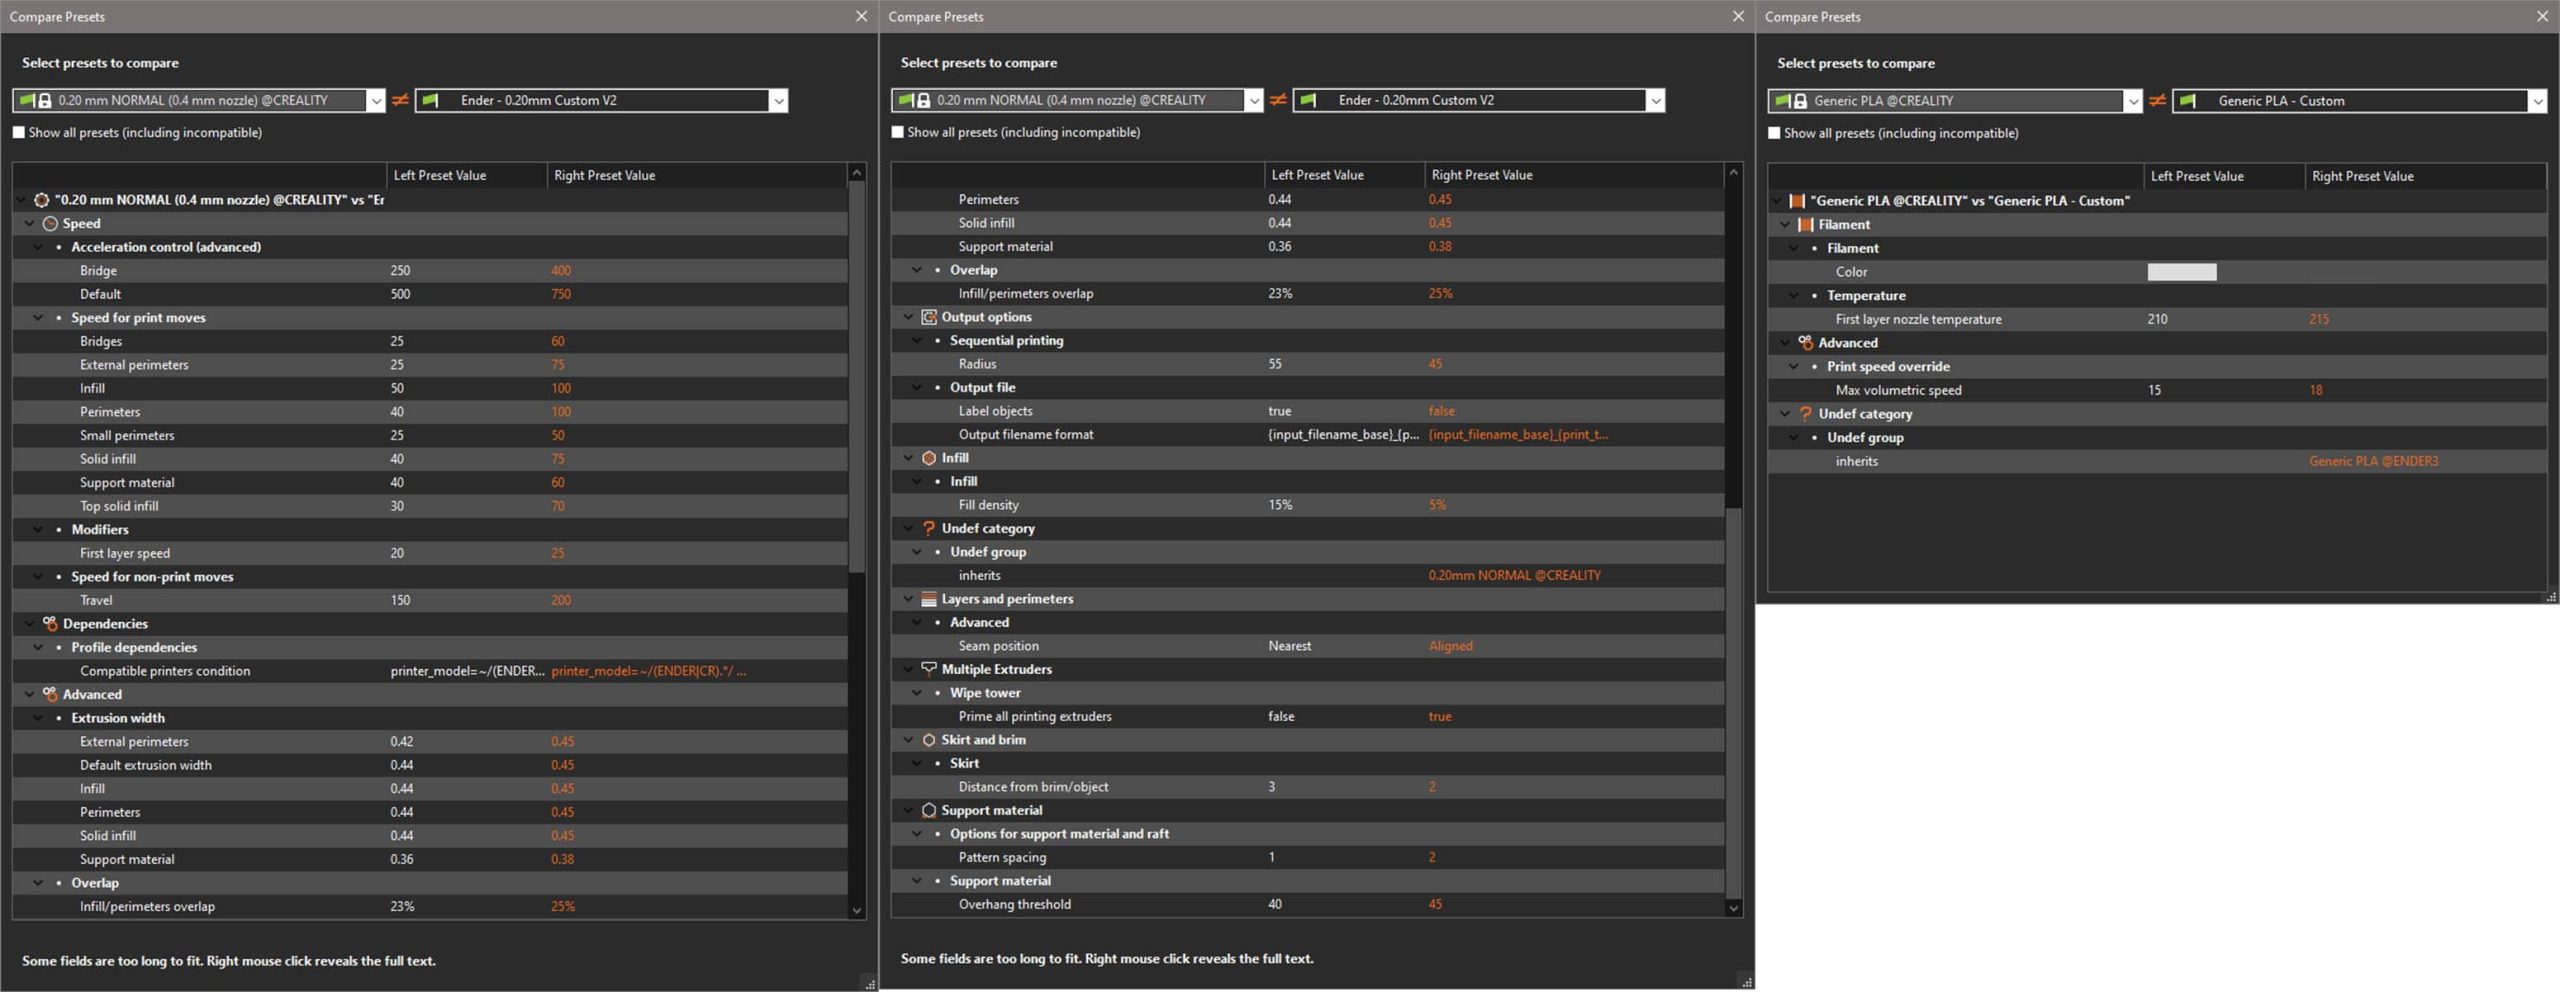
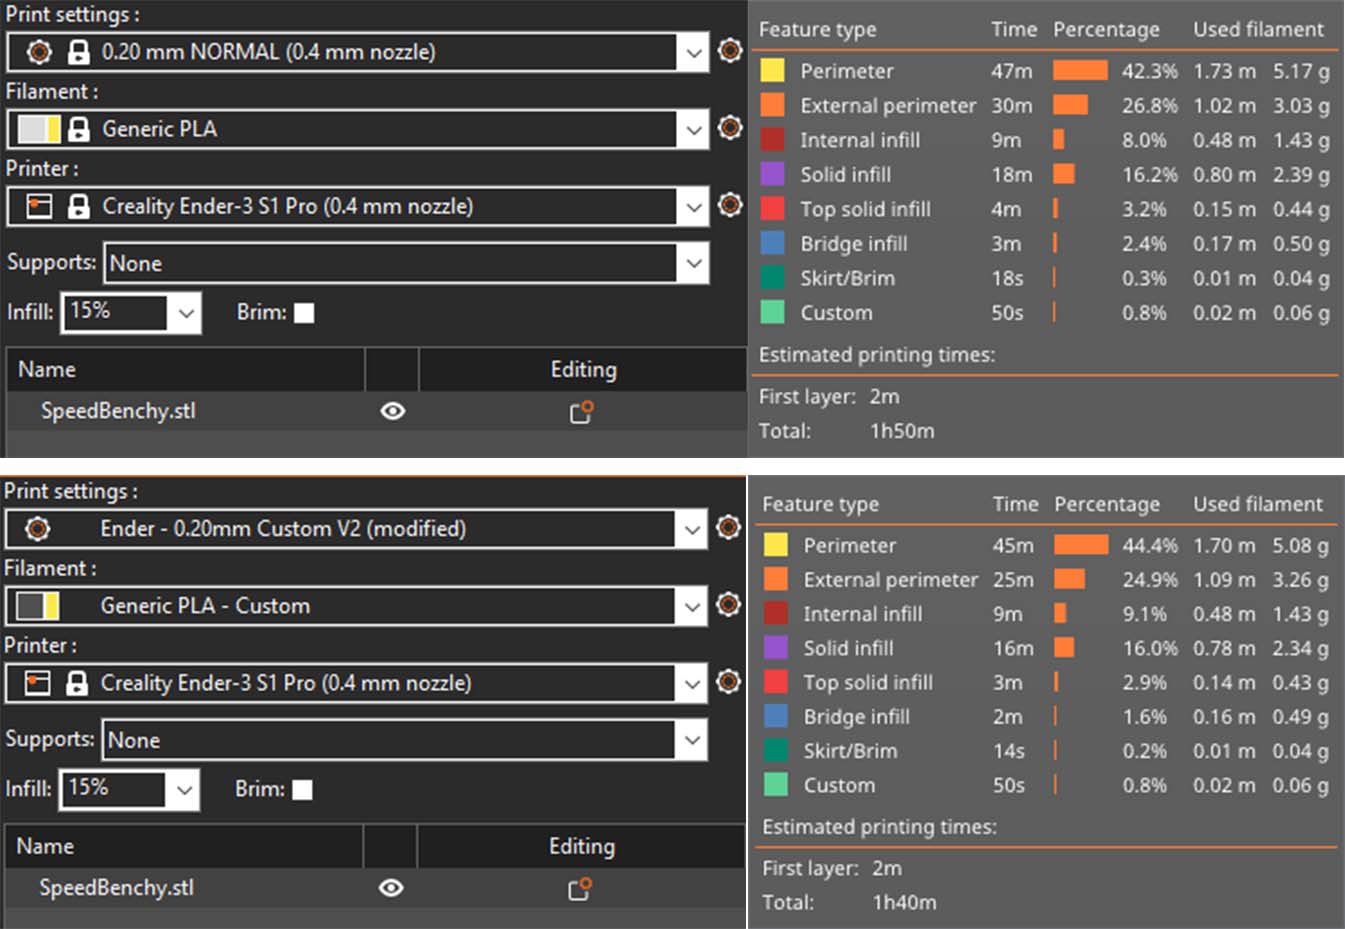
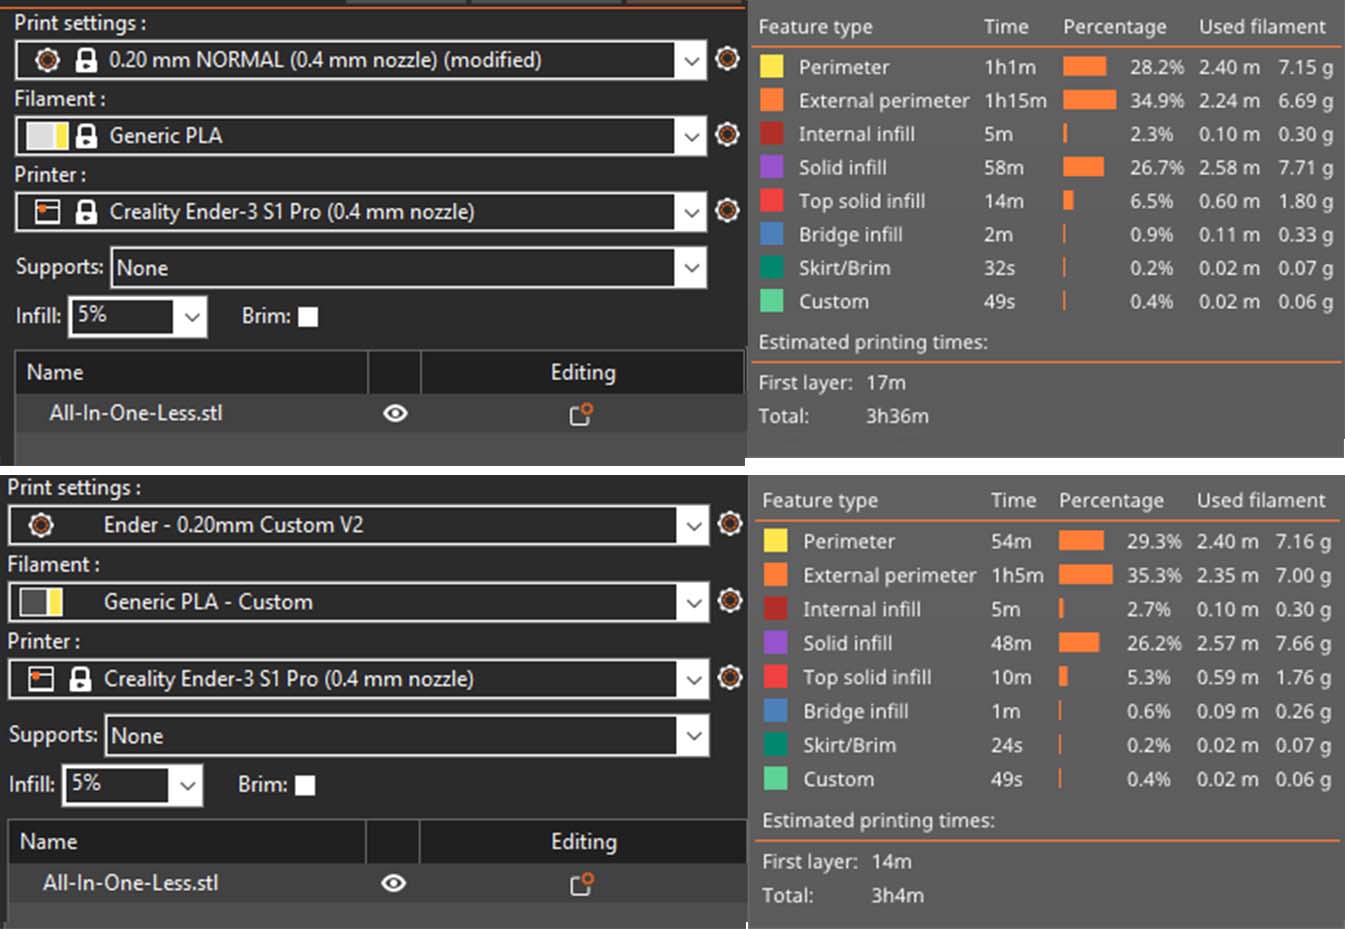
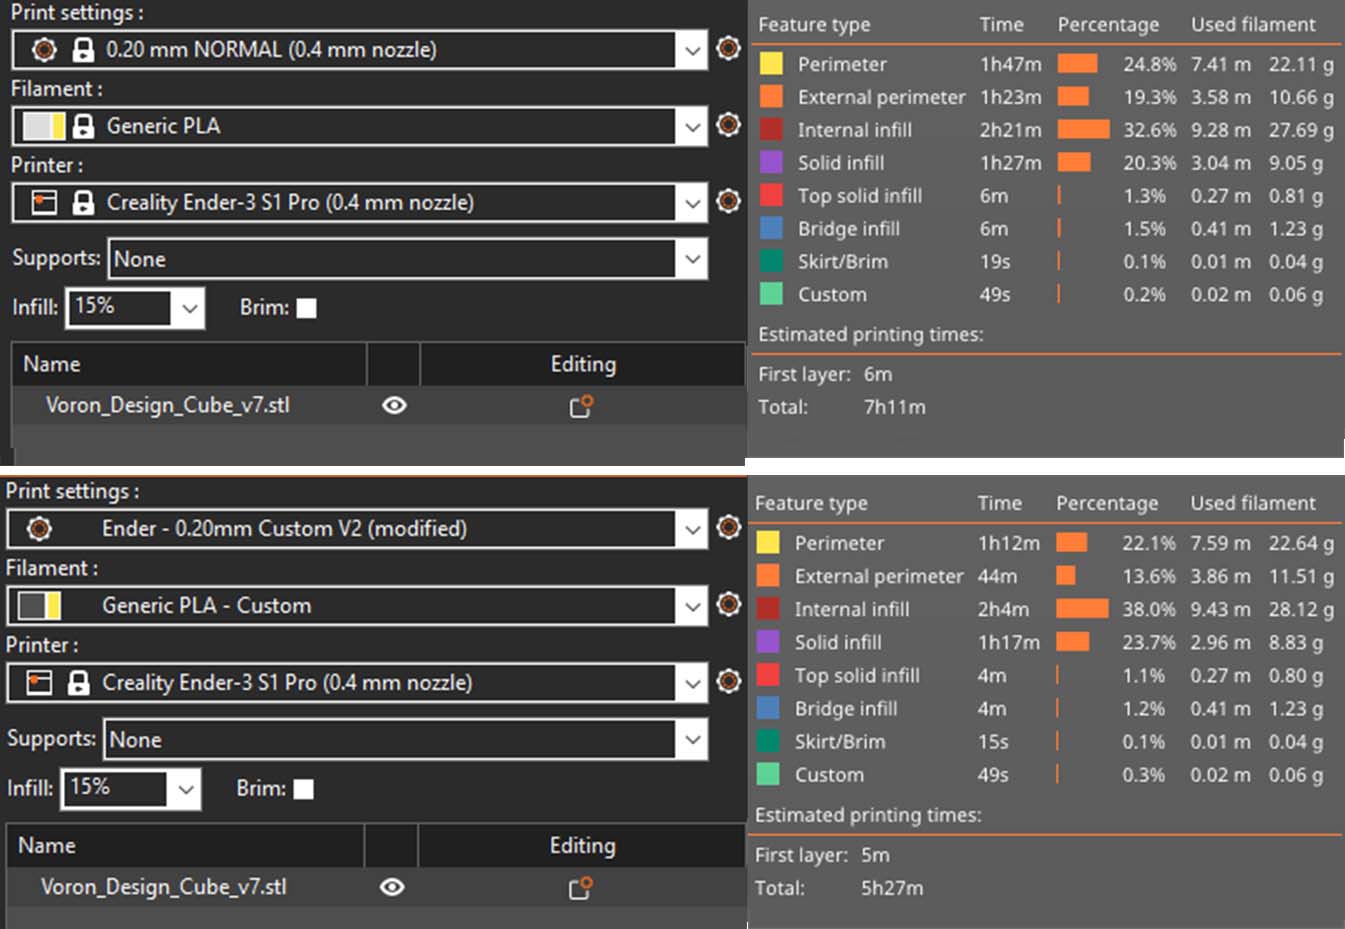
The following table shows a direct comparison of both profiles:
|
Model |
Stock Profile |
Custom Profile |
Reduction |
|
SpeedBenchy |
1h 50min |
1h 40min |
-9.52 % |
|
All in One Test |
3h 36min |
3h 4min |
-16,00 % |
|
Voron Cube v7 |
7h 11min |
5h 27min |
-27.44 % |
Unsurprisingly, the difference gets bigger and bigger the longer the print job takes. How exactly my customized profile affects the different parts of the object can be seen nicely in this overview:
In the popular #SpeedBoatRace Challenge, it will definitely not be enough for one of the first places with this printer, but with my custom profile and considering the slicer rules, I come to a result of 1h 8min. For a bed pusher and without further tuning not bad at all.


30 Antworten
Kommentar
Lade neue Kommentare
Urgestein
Moderator
Urgestein
Moderator
Urgestein
Urgestein
Urgestein
Neuling
Moderator
Urgestein
Urgestein
Urgestein
Urgestein
Urgestein
Urgestein
Mitglied
Urgestein
Moderator
Mitglied
Alle Kommentare lesen unter igor´sLAB Community →