


After all, we’ve already learned that just knowing the height of the pads is useless if you don’t know the degree of hardness. The manufacturers often plan with huge tolerance ranges, which can quickly be up to 1 mm! Apart from the curvature of the die or even the whole package, radiators are not precision-engineered teaching pieces either. Especially with the memory, but also with the voltage transformers, you can even determine the actual distances of your own card yourself, which can differ significantly from the manufacturer’s height specifications!
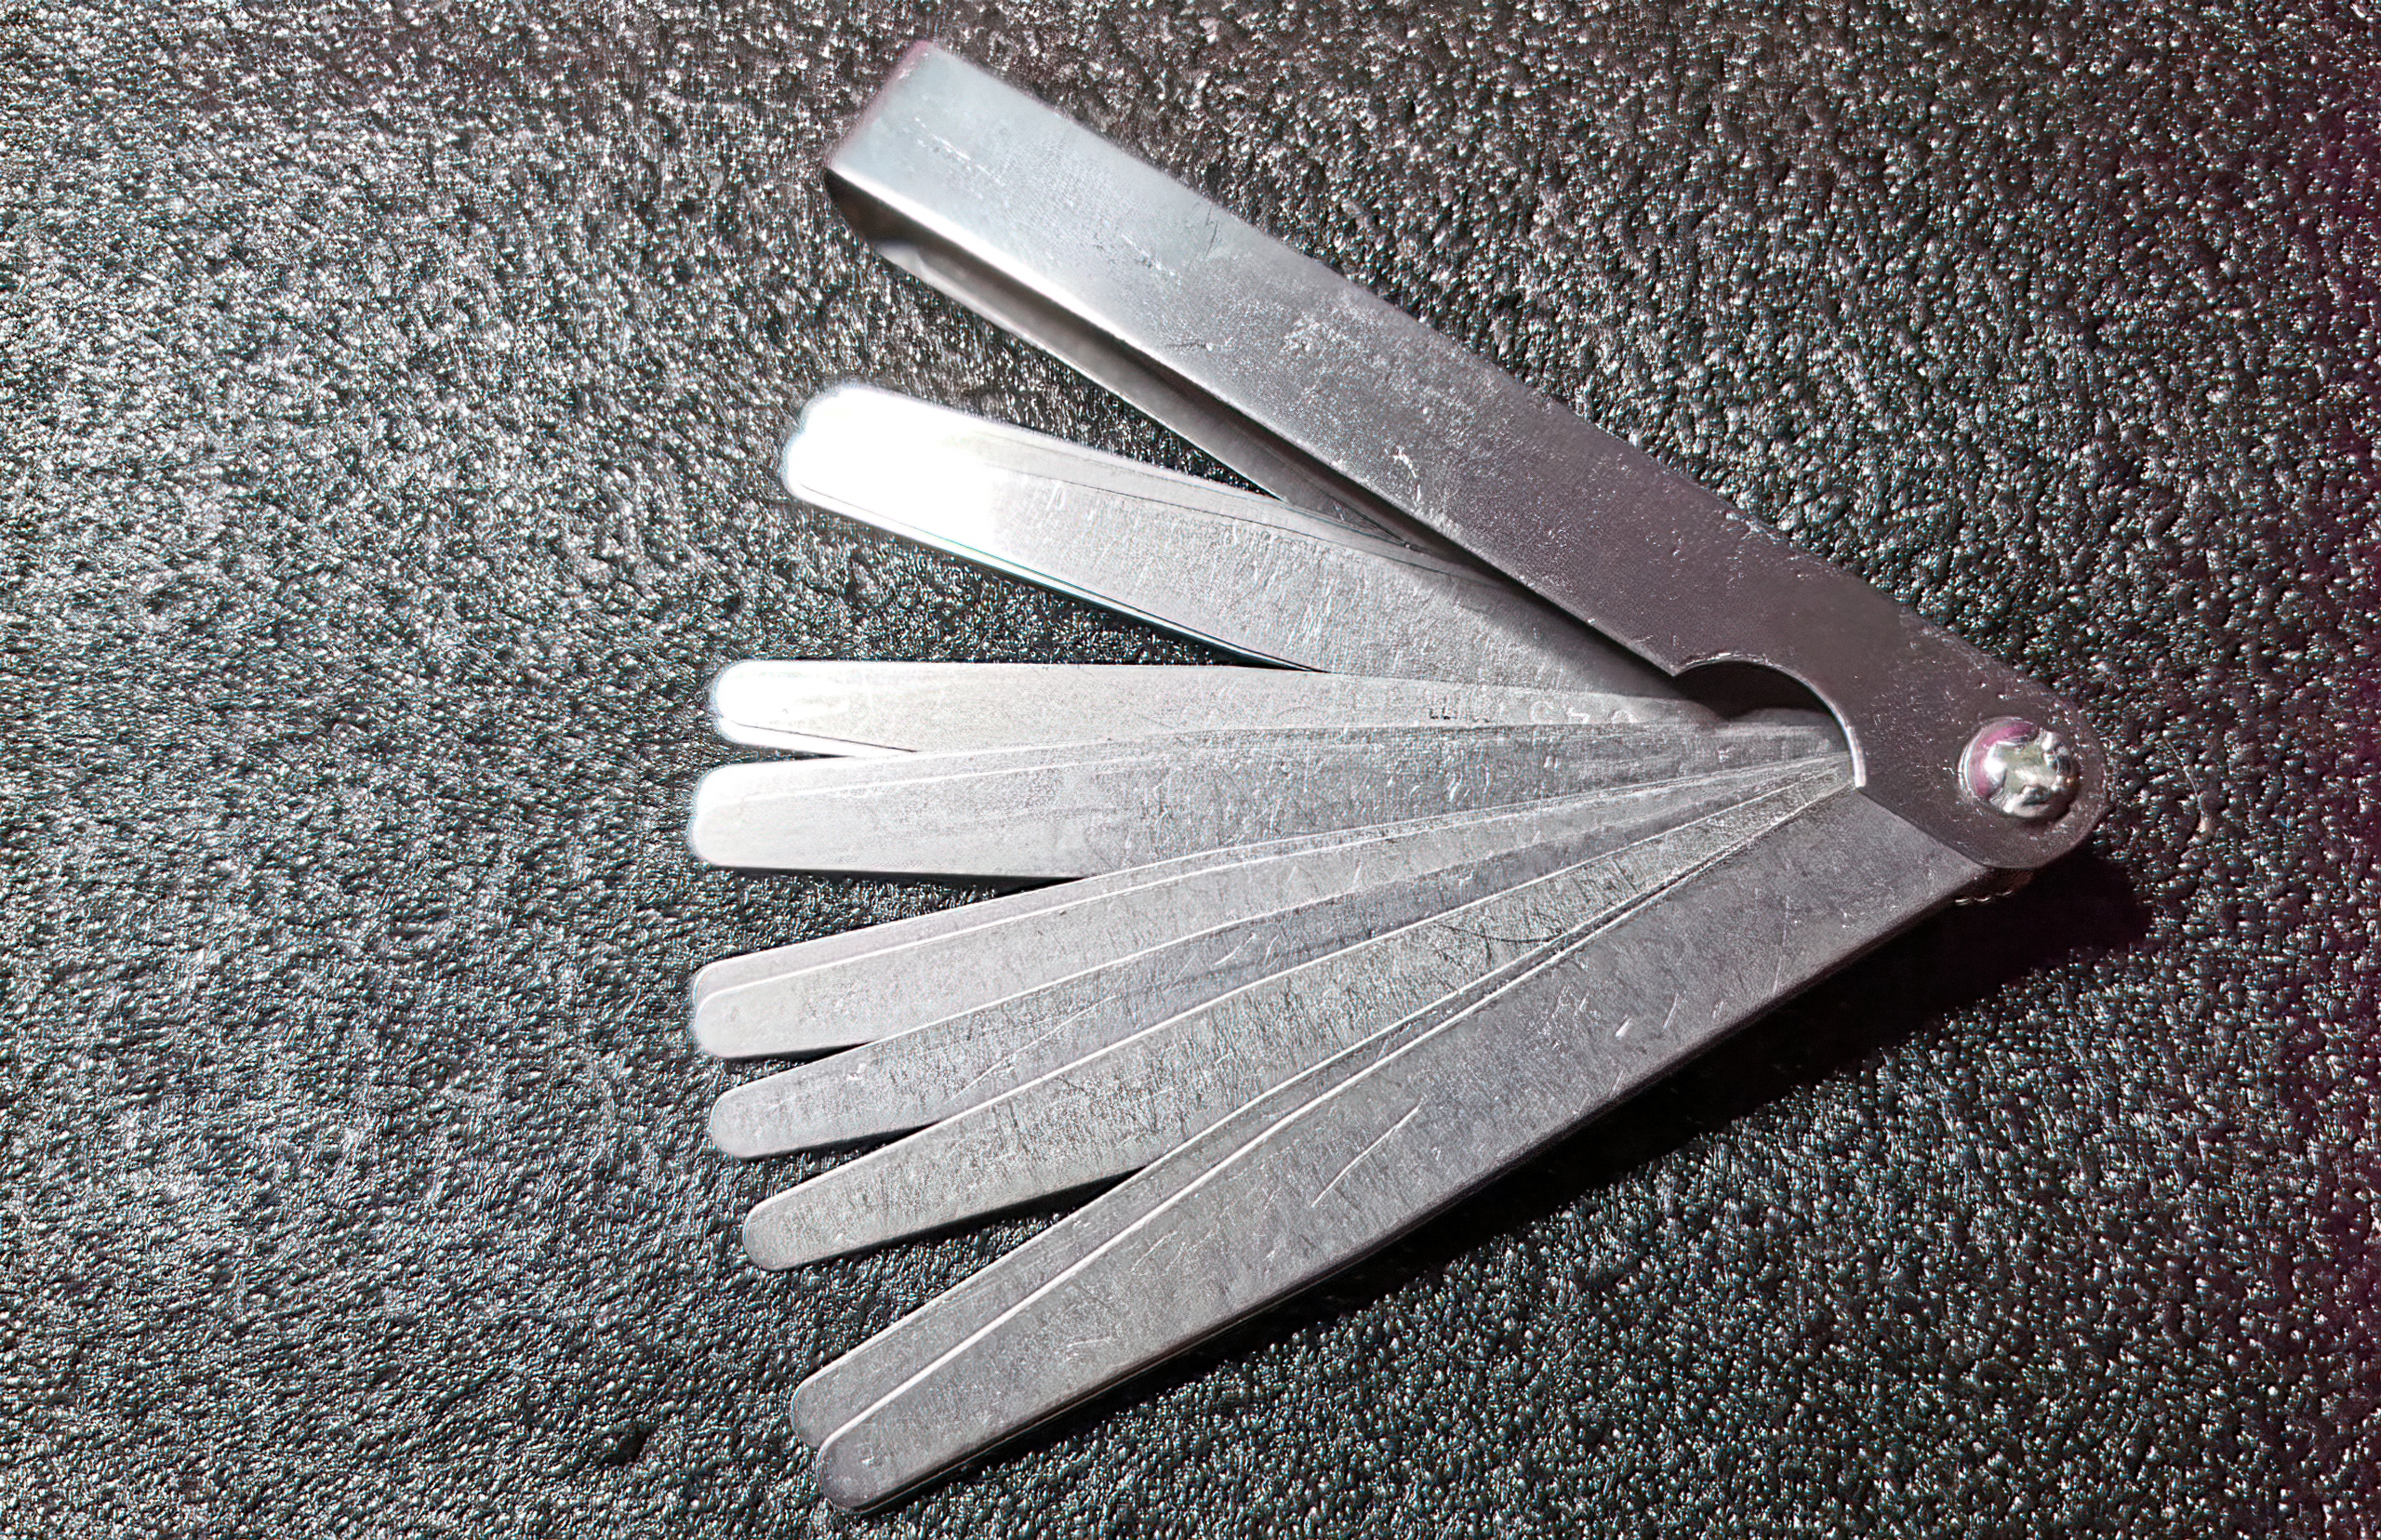
This can be remedied by using a fan gauge, with the help of which it is possible to accurately map pretty much any strength by combining different fans. And here comes trick 17. We stick some normal adhesive or insulating tape in the middle of the GPU on the die, there are certainly layer thicknesses of about 0.1 mm best suited. If necessary, a piece of printer paper that is stuck in between is also sufficient. Then we mount the cooler on the board and screw everything together medium tight.
This combined tongue is then carefully inserted into the relevant crevices and, if necessary, the desired result is approached by swapping individual compartments. Then add 0.1 mm for better contact pressure and round it all up to the next half millimeter to get into commercial ranges for pad thickness.
In this case I used a pad with “only” 3.5 W/mK and put two blue 3 mm pads, as well as the grey 2.5 mm pad of the user back on, because these fell fully into the required grid and were also soft enough. I deliberately sorted out the blue pads with a thermal conductivity of 6 W/mK but a hardness of 25. Since these pads were all too hard, they couldn’t be compressed far enough, so there was a lack of contact pressure on the GPU later on.
You also have to be extremely careful with RAM. We still remember the dreaded “space invaders” on the RTX 2080 Ti because of asymmetrical pressures on the lower modules and the lack of an underfill. That then the solder pills crack is only a logical consequence. We see that I even put ultra-soft 2 mm pads on the RAM, but always left a gap between the modules. The measured 1.48 mm can be perfectly compensated for without extreme pressure, which means that these pads can be compressed to 1.2 mm or less. The only thing is that you also need some space for it. Laying long pad strips is convenient, but not optimal.
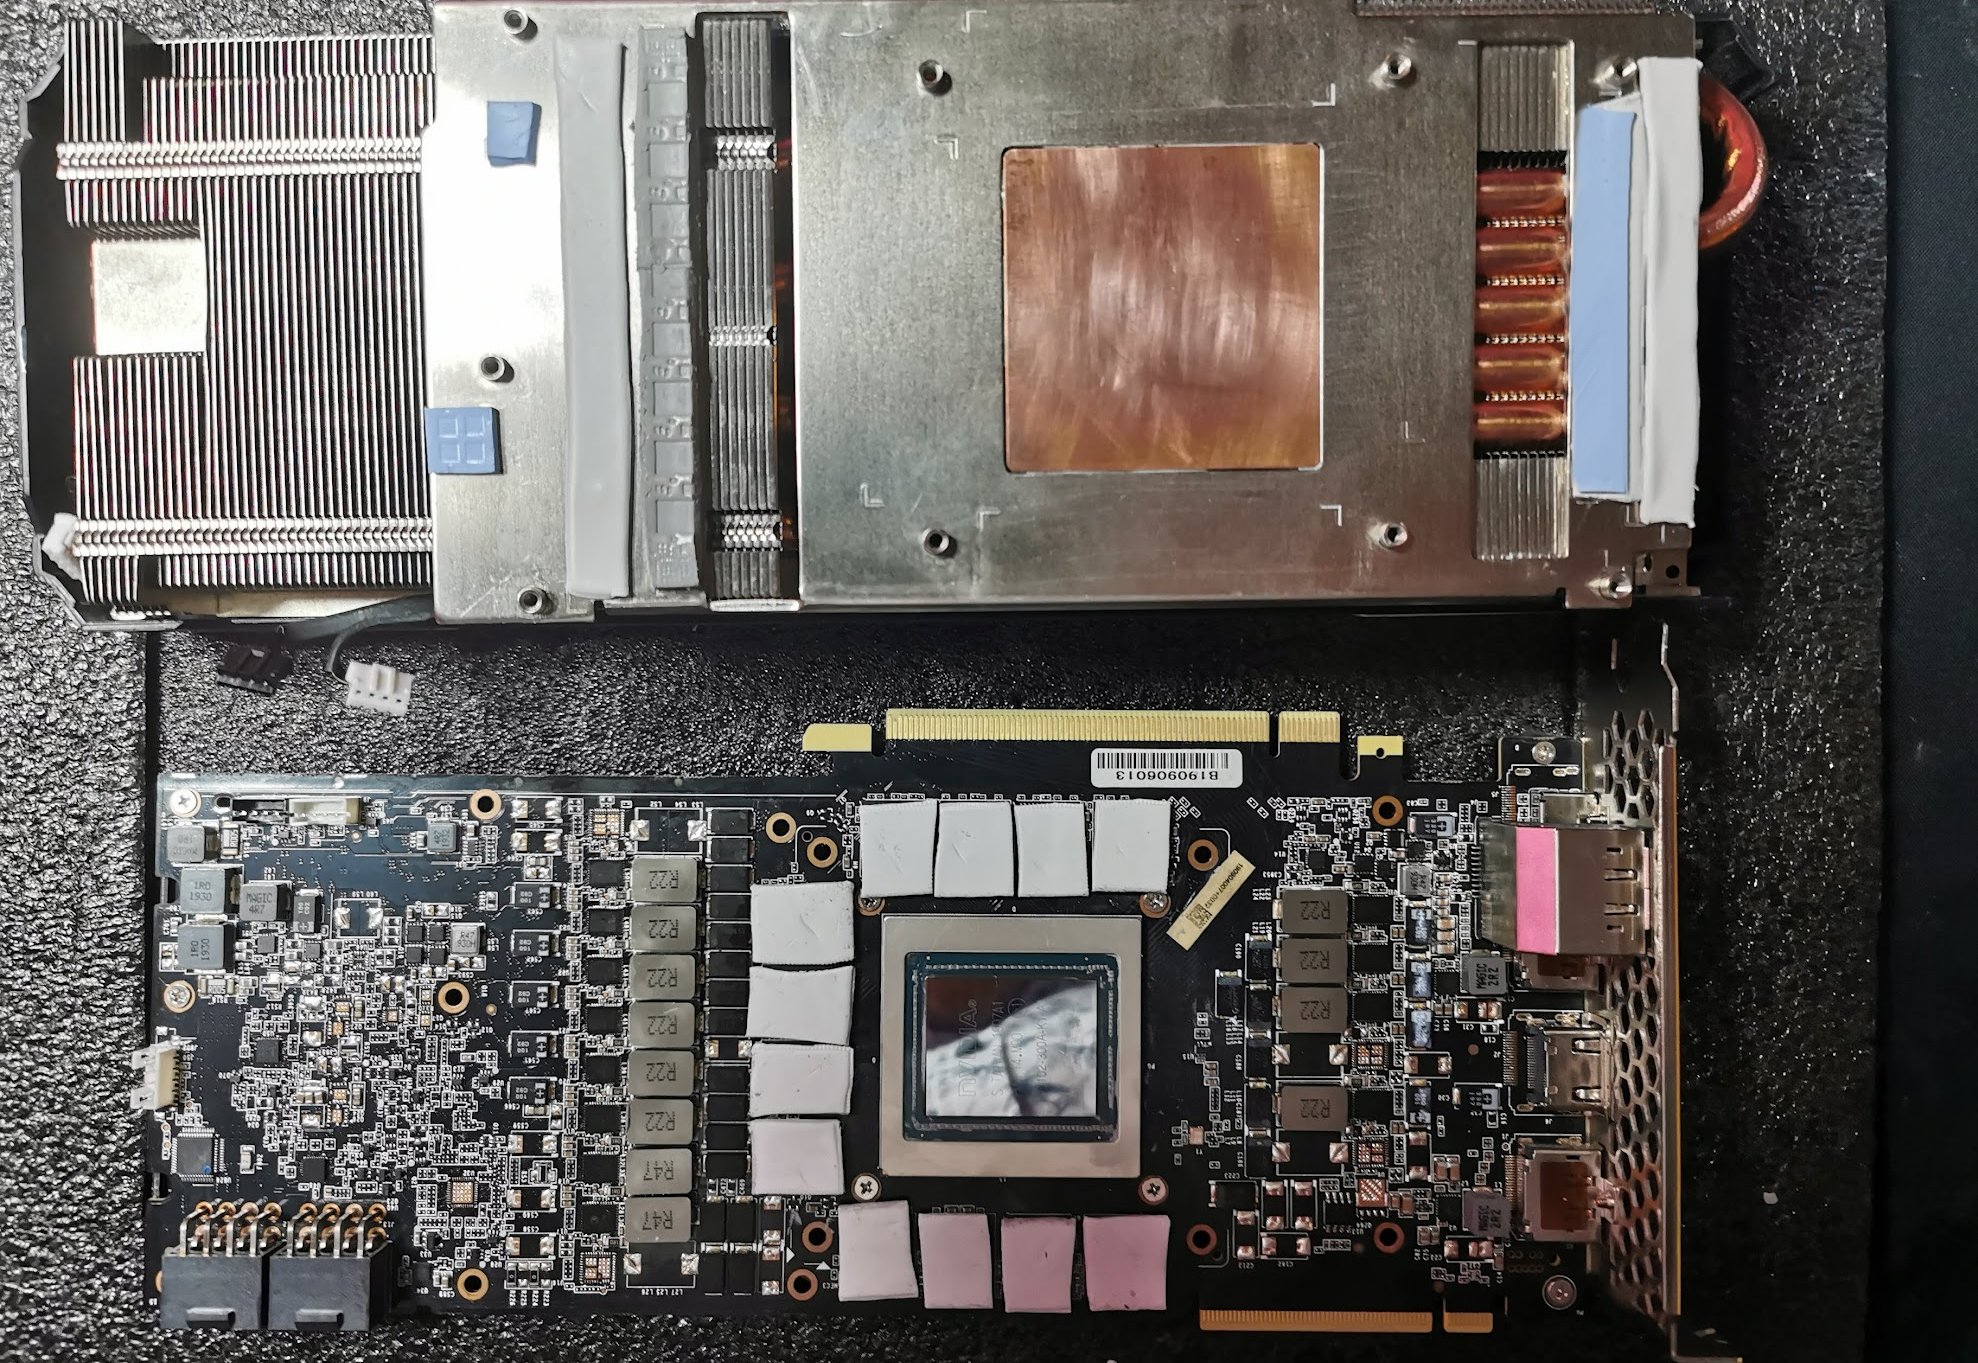
On the right side of the cooler we see two 2mm pads side by side. The SMD caps need 1.8 mm, so this fits perfectly. With the MOSFETs of the voltage converters it would be 2.3 mm, so I didn’t buy an extra 3 mm pad here. Unfortunately, the user’s pads were all too hard. However, pads can be layered and combined quite easily, and the softer they are (at least one of each), the better it works. In this case I combine a slightly harder 1mm pad from Arctic with the ultra soft 2mm pad, fits perfectly.
And of course you must not forget the thermal paste. In this case, I used Alphacool SubZero because it’s not too viscous to spread, but it’s also not so thin that it runs out or bleeds out quickly. The performance of this paste is better than Gainward’s industrial paste anyway, so it fits the bill nicely.


18 Antworten
Kommentar
Lade neue Kommentare
Veteran
Urgestein
1
Urgestein
Veteran
Mitglied
Neuling
1
Veteran
Mitglied
Neuling
Urgestein
Mitglied
Mitglied
Urgestein
Mitglied
Urgestein
Mitglied
Alle Kommentare lesen unter igor´sLAB Community →