


Update from 09.03.2021 – CTR 2.0 RC5
- Lower reference frequency values for Zen3 (extra safety when pressing the TUNE button)
- The number of attempts to contact the SMU is increased from 5 to 10
- Testing Mode – only AVX Light (fixed a bug where it was possible to unlock this switcher)
Update from 04.03.2021 – CTR 2.0 RC4
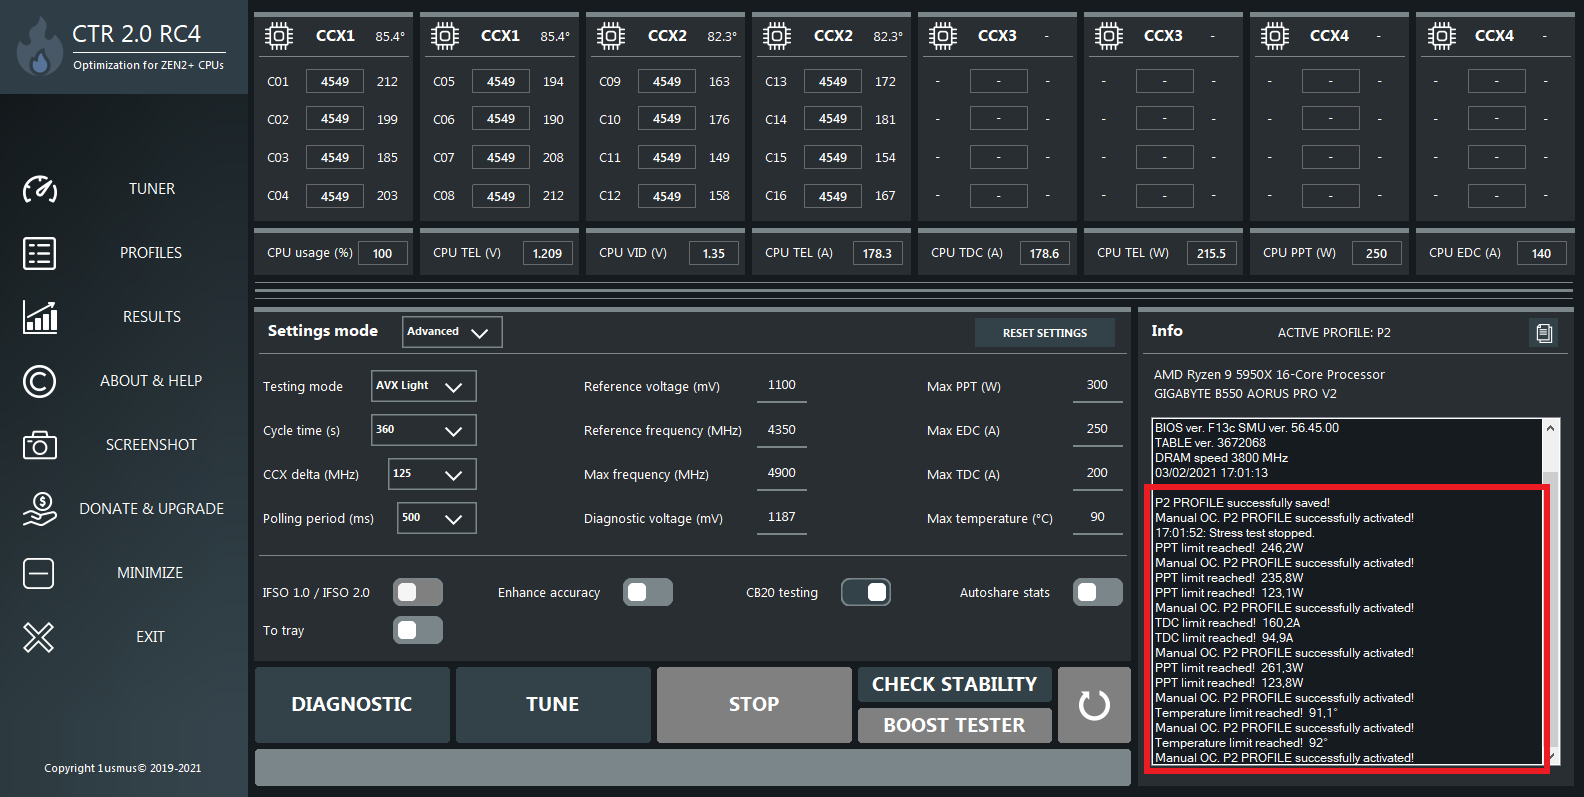
As we recently discovered, the protections in CTR 2.0 RC3 no longer worked as they were last documented in CTR 1.1. This is changed again with today’s release of CTR 2.0 RC4. The thresholds for PPT, TDC and EDC are now not only effective during tuning but also during operation and if exceeded the overclocking is terminated and the CPU is set back to the default PBO mode. In addition to the Max temperature for tuning, there is now a hard temperature limit of 90°C, which also terminates the overclocking and returns the CPU to standard PBO mode.
Also for us the undocumented change from version 1.1 to 2.0 RC3 had caused surprise, confusion and errosion of confidence in the software and its publisher. Even though overclocking comes with the usual canon of possible damage to hardware and loss of warranty, CTR as an “OC tool for everyone” should never have done without these features. However, we also want to credit Yuri for delaying the release for CTR 2.0 RC4 at our request until the protections were restored.
In the following guide we explain the features, usage and peculiarities of the latest CTR 2.0 RC4 release, logically with minor adjustments to the previous RC3 guide. Due to the above mentioned issue, we strongly recommend all users of CTR 2.0 RC3 to upgrade to version 2.0 RC4.
Features and Roadmap
Today is finally the day, the Clock Tuner for Ryzen is released in the long-awaited second version with support for the latest Ryzen 5000 CPUs and many other outstanding features. CTR was already a very popular tool in the community for optimizing CPU voltage and clocking for Ryzen CPUs in the previous version 1. The principle is as simple as it is ingenious: The tool tests each Compute Core Complex (CCX) of a Ryzen CPU for its individual quality and determines the maximum stable clock speed for a given voltage. Taking into account your cooler and motherboard, you can then decide whether you want more performance, less power consumption or even both as a result.
Today the developer Yuri Bubliy aka 1usmus is going one better with version 2.0 and future planned releases with more features and optimizations are already on the roadmap for this year. So Yuri doesn’t let up, spoiling us Ryzen owners constantly with new versions of his software and that completely free of charge. I would like to say thank you in advance on behalf of the community! If you want to keep up with upcoming updates on CTR or are just interested in what Yuri is up to throughout the day, follow him on Twitter. But enough of the preface, let’s first take a look at what’s new in this release.
What’s new?
For example, the tool in version 2.0 can dynamically switch between static overclocking and AMD’s automatic boost algorithm, depending on which provides more performance for the current workload situation. While this feature was previously only available on Asus’ Crosshair XIII Hero motherboard, CTR is now making this feature available to users of all other motherboards. Furthermore, CTR in the new version no longer needs the Ryzen Master as an interface to control the CPU, but can directly access the SMU, System Management Unit, of the CPU. This means more precise monitoring and more reliable communication, but also less resource consumption by the CTR application itself.
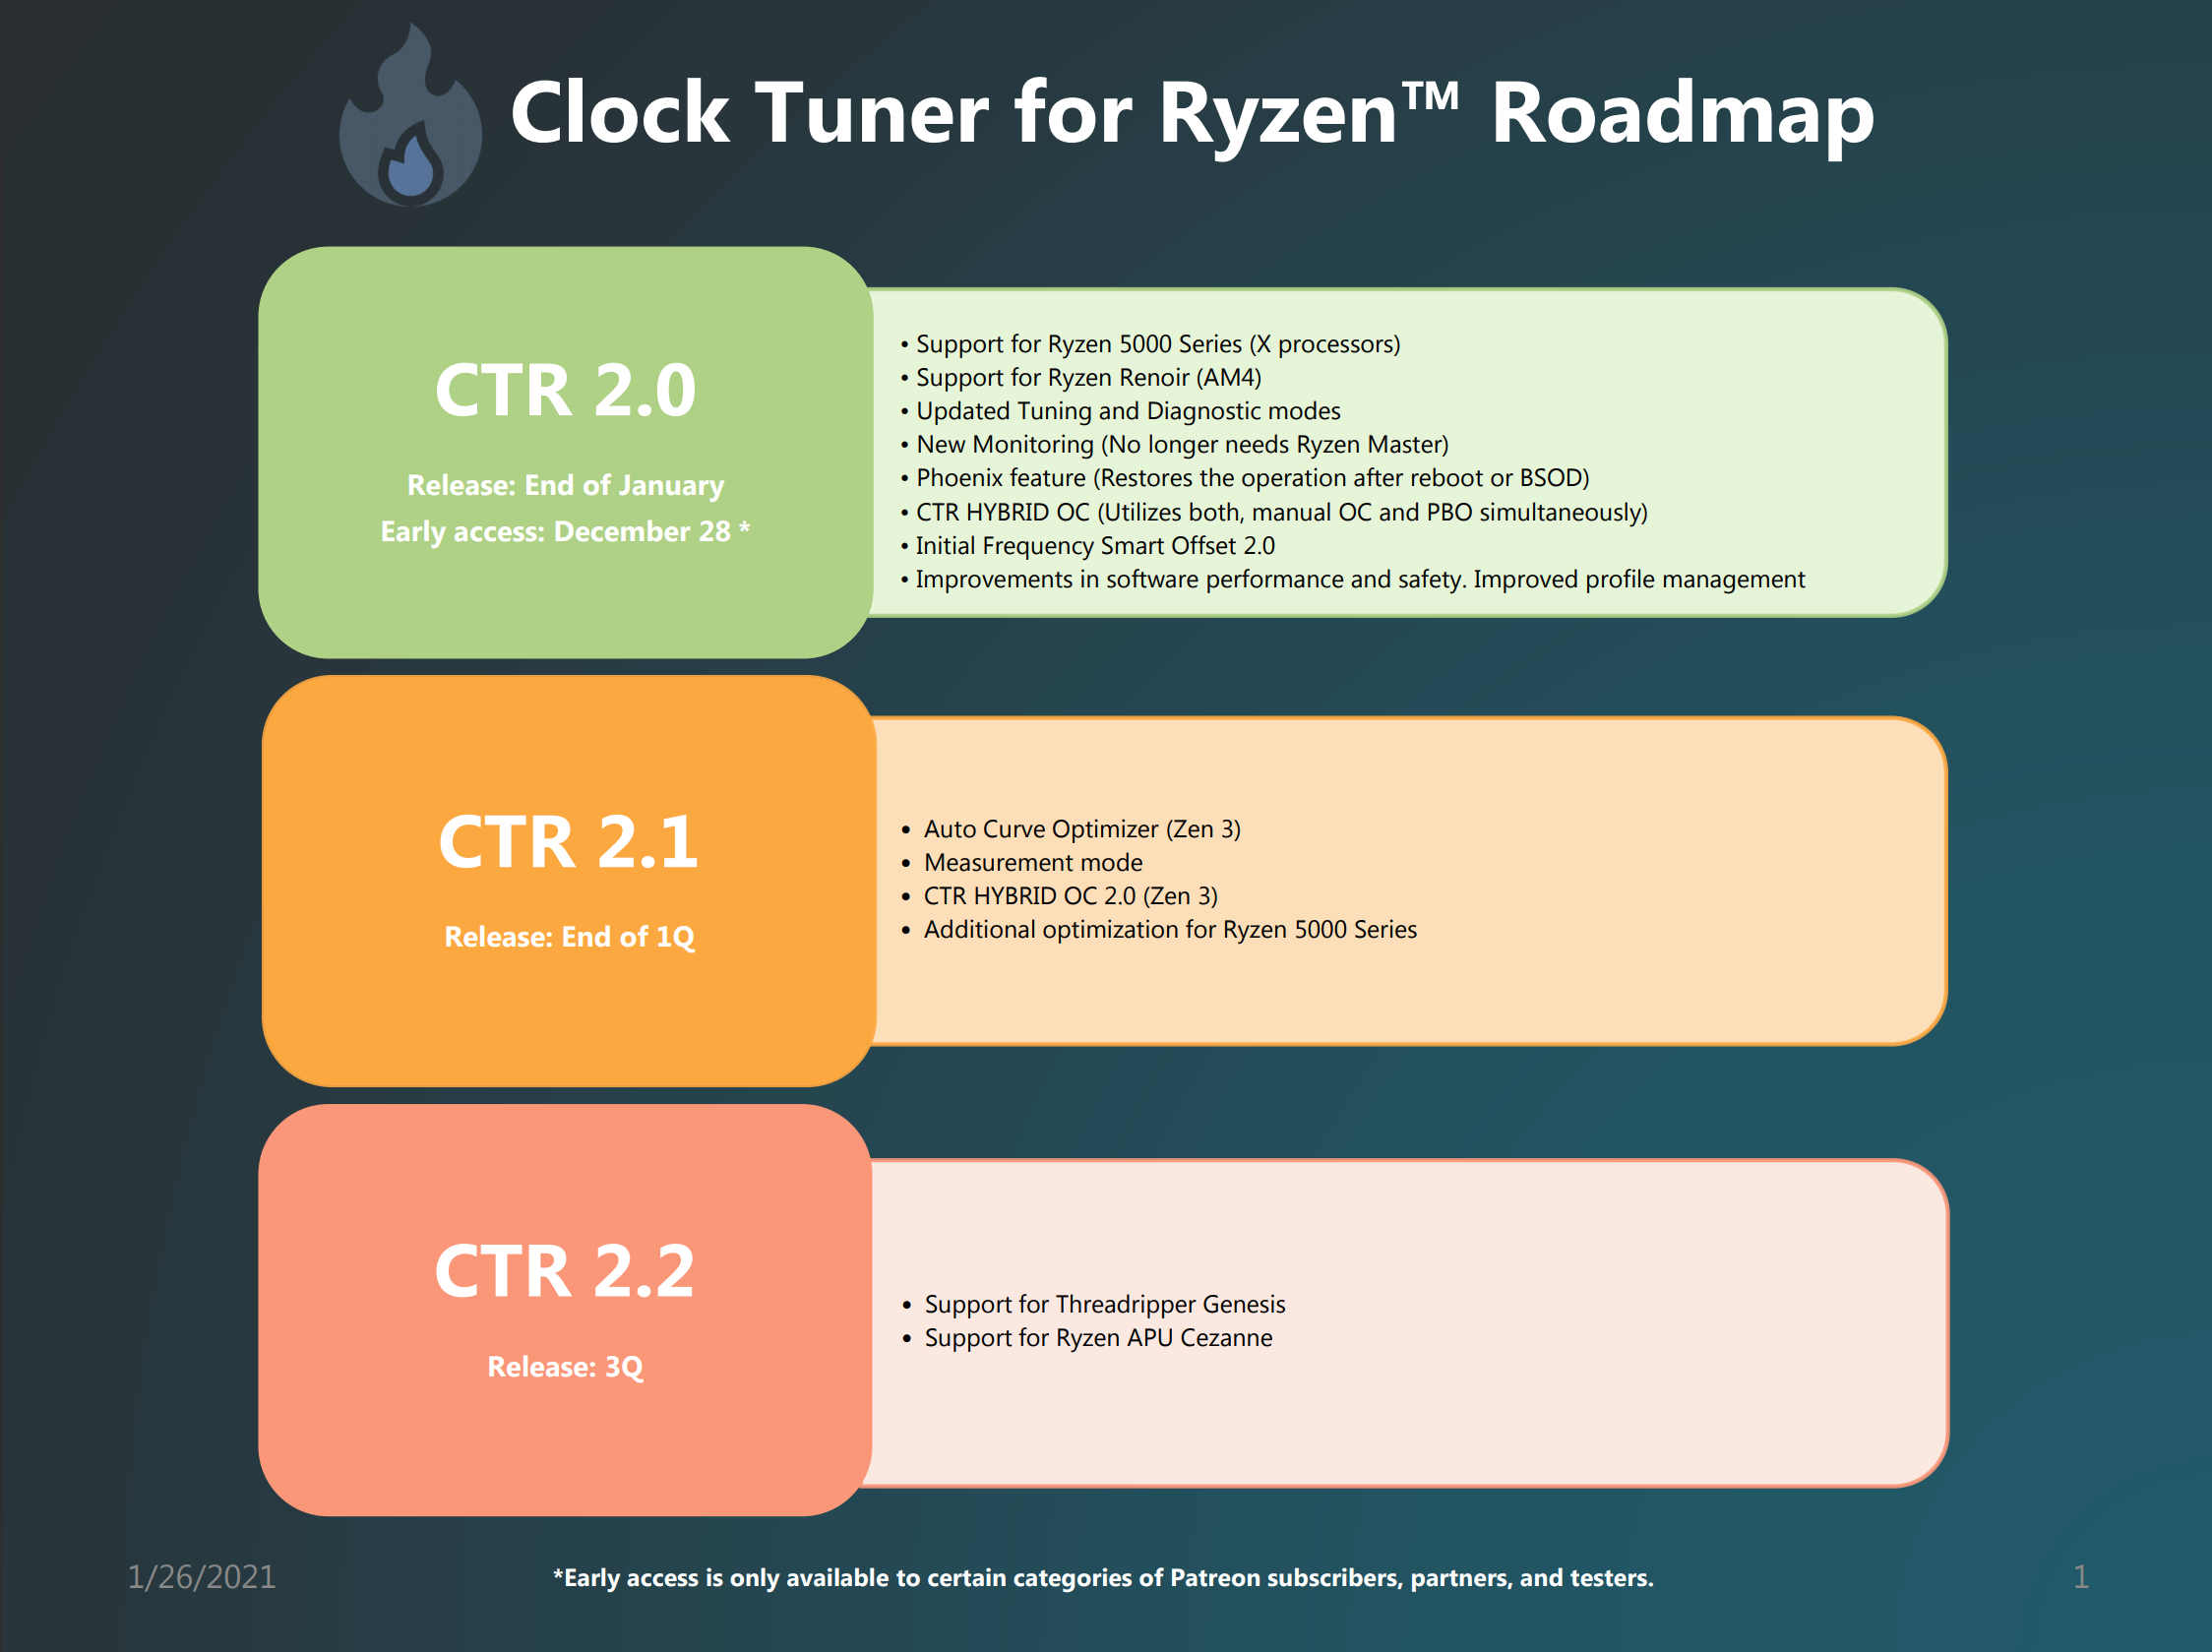
The most welcome new feature for me personally is Phoenix Mode. While the system often crashed during fine tuning of clock and voltage in the previous version and as a result the last status had to be found manually from the logs, CTR 2 can continue where it left off before the crash after an automatic restart and thus successfully complete the tuning completely on its own. The most obvious, but no less important new feature is of course the added support for new generation CPUs Vermeer, that is Ryzen 5000 based on Zen 3 architecture, and Renoir, the APUs based on Zen 2 together with Radeon Vega graphics. A complete list of currently supported CPUs can be found here:
- Zen 3: Ryzen 9 5950X, Ryzen 9 5900X, Ryzen 7 5800X, Ryzen 5 5600X
- Zen 2: Threadripper 3970X, Threadripper 3960X, Ryzen 9 3950X, Ryzen 9 3900X, Ryzen 9 3900XT, Ryzen 9 3900, Ryzen 7 3800XT, Ryzen 7 3800X, Ryzen 7 3700X, Ryzen 5 3600XT , Ryzen 5 3600X, Ryzen 5 3600, Ryzen 5 3500X, Ryzen 5 3500, Ryzen 3 3300X, Ryzen 3 3100
- APU: Ryzen 7 PRO 4750G , Ryzen 7 PRO 4650G, Ryzen 3 PRO 4350G
Also new is the redesigned GUI in a dark design, which should be especially beneficial for users with color blindness. However, the basic structure has remained the same, so that users of previous CTR versions will immediately feel at home again.
Overview Tutorial System
This tutorial is based on a Gigabyte Aorus B550 Pro V2 and an AMD Ryzen 9 5950X CPU. CTR is also compatible with other motherboard manufacturers, chipsets and CPUs (see table above), you may only have to do a little transfer work, e.g. with the settings in the BIOS. If you’re not sure about something or if something doesn’t turn out as expected, just drop by our forum thread and ask, the community is happy to help!
Below you will find the complete specifications of the tested hardware for this tutorial:
| Test system | |
|---|---|
| Hardware: |
|
| Cooling: |
|
| Housing: |
|
| Periphery: |
|
Requirements – Software
The following software components are mandatory:
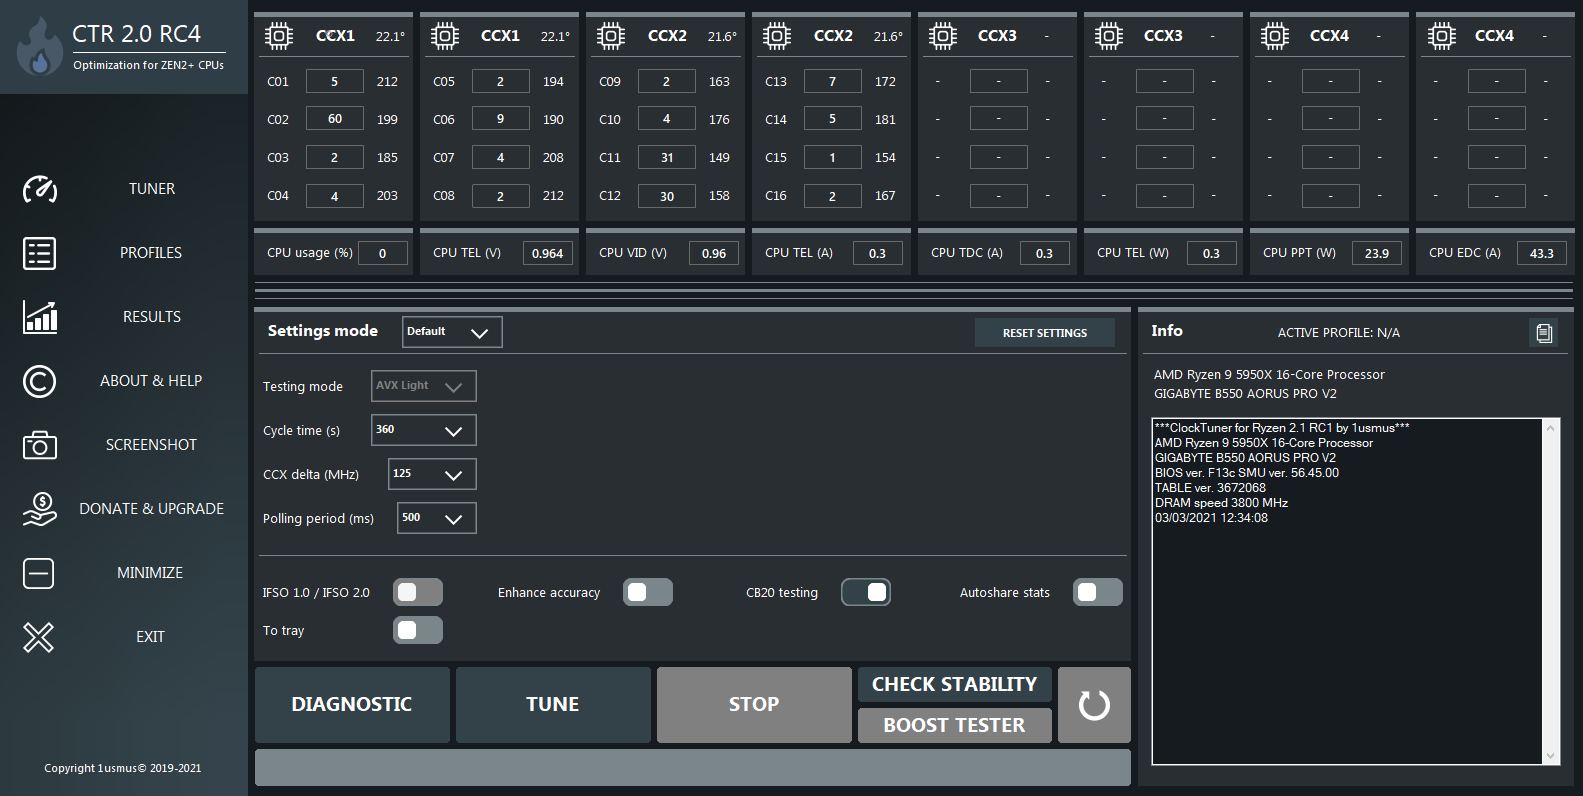
- BIOS with AGESA ComboPI minimum version:
- For Ryzen 5000 and 4000: 1.2.0.0
- For Ryzen 3000: 1.0.0.6
The easiest way to check the AGESA version of your current BIOS is to use CPU-Z, which can be downloaded here: https://www.cpuid.com/softwares/cpu-z.h
tml If your current BIOS is based on an older version, you will have to search a bit, because not every motherboard manufacturer lists this info in the release notes of their BIOS versions.
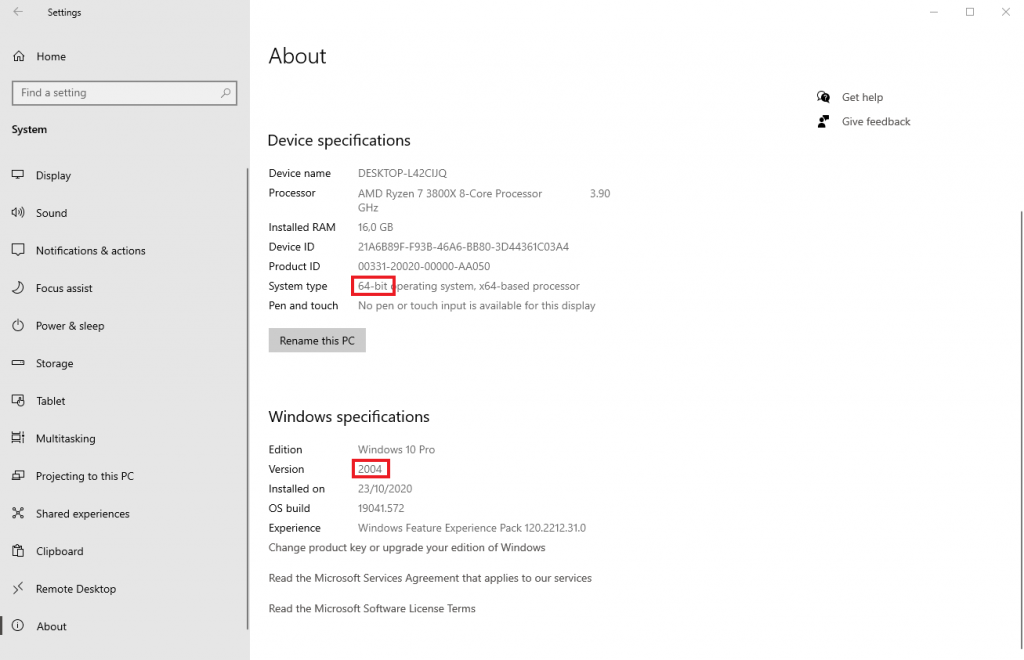
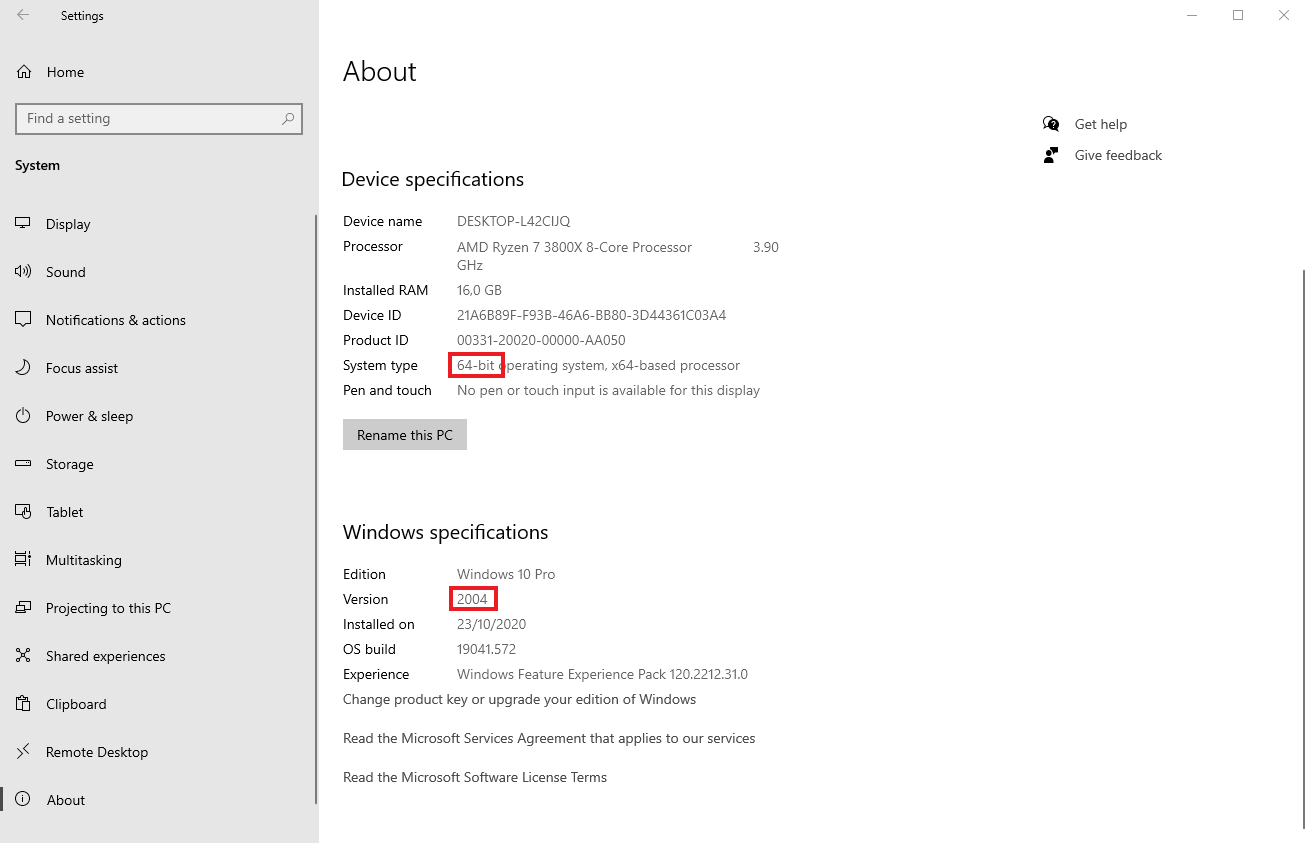
- Windows 10 64-bit, Build 1909 or newer: You can find out which architecture and version your Windows installation has in the Windows Settings under System -> About:
- .Net Framework 4.7.2 or newer: To check if this or a newer version is installed, you can simply execute the following Powershell statement:
Get-ItemProperty "HKLM:SOFTWAREMicrosoftNET Framework SetupNDPv4Full").Release -ge 461808

If the output is “True”, the required version is already installed. If the output is “False”, the current version of .Net Framework can be installed under the following link: https://dotnet.microsoft.com/download/dotnet-framework/thank-you/net48-offline-i
nstaller If this or a more recent version is already installed, the installer will inform you and abort.
Requirements – BIOS
The following listed BIOS settings are minimum requirements for CTR to work correctly. However, since various other settings can also influence the stability of a system and thus the result of CTR (e.g. IF clock, RAM OC etc.), a CMOS Clear or loading of Optimized Defaults is recommended beforehand. If you care about your current BIOS settings, you can save them in a profile on most mainboards.
BIOS settings that must be set are as follows:
- CPU Multiplier: Auto
- CPU voltage: Auto
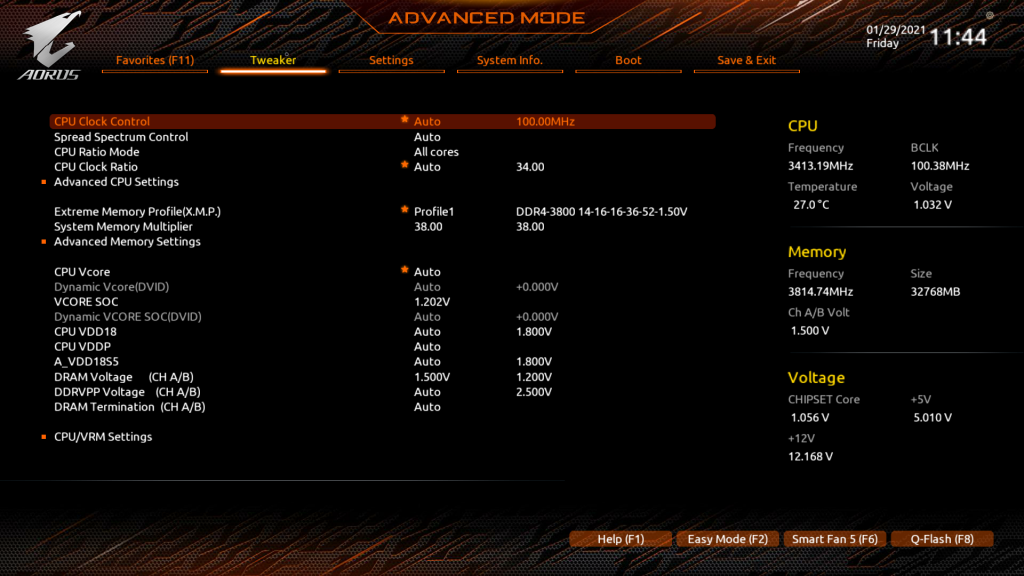
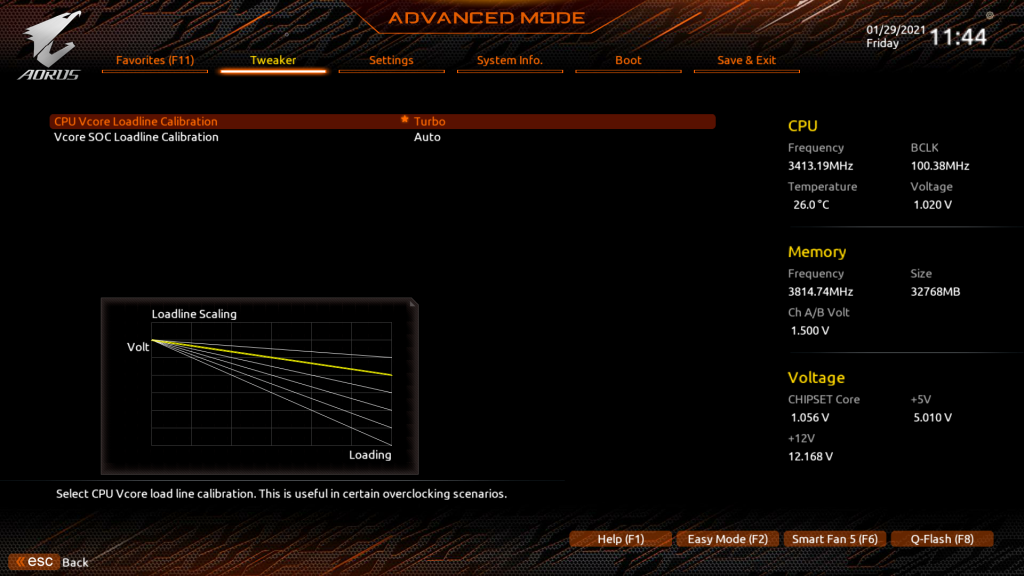
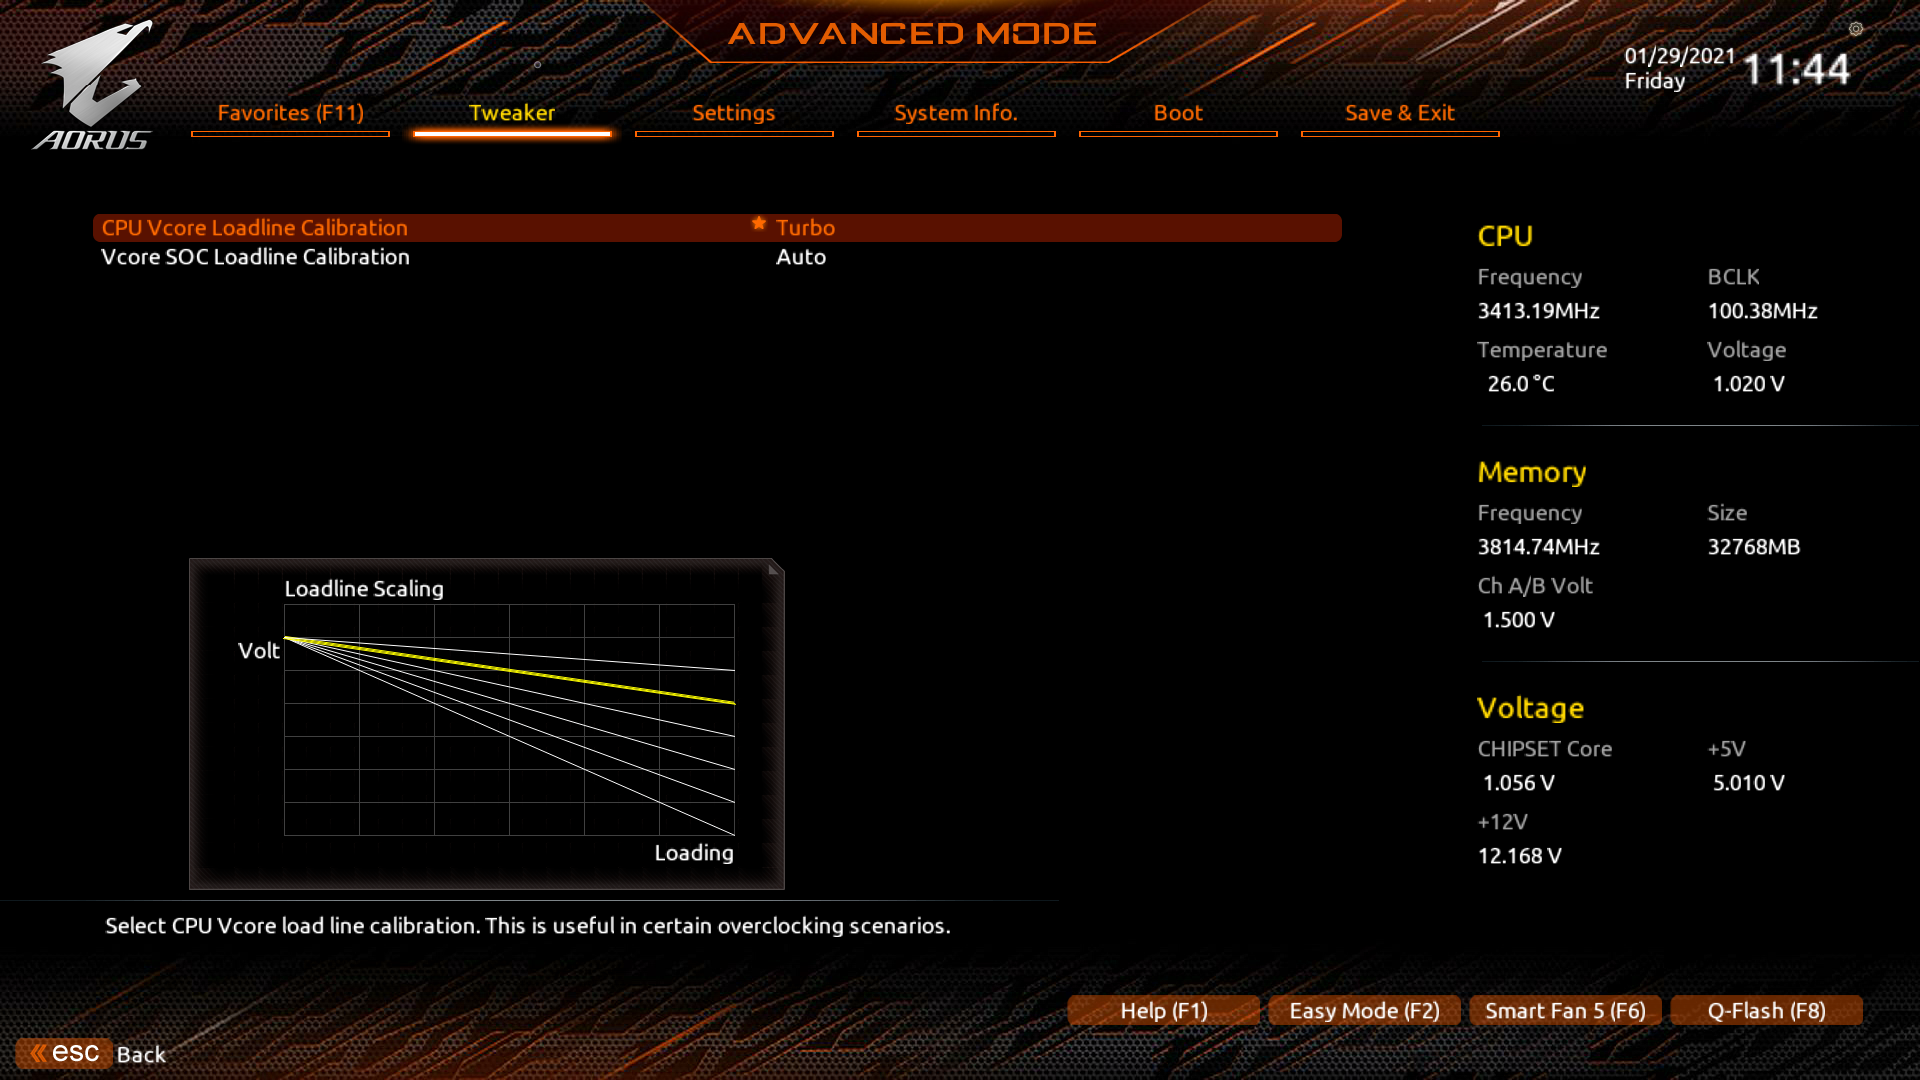
- LLC: Here the settings vary depending on the motherboard manufacturer and also between the generations, e.g. from X370 to X570. In any case, the goal is the lowest possible Vdroop under load without too high an overshoot after the load has stopped. Yuri recommends starting with LLC Auto first and doing a CTR run. If the Vdroop (voltage drop) is outside the recommended tolerance of 1.5-5%, CTR issues a corresponding message with the request to adjust the LLC again. Widely proven alternatives to “car” are as follows, per manufacturer:
- MSI: LLC 3
- Gigabyte: Turbo
- ASRock: LLC2
- Biostar: Level 4+
- ASUS:
- LLC: 3 or 4
- Phase mode: Extreme
- Current carrying capacity mode: 100%
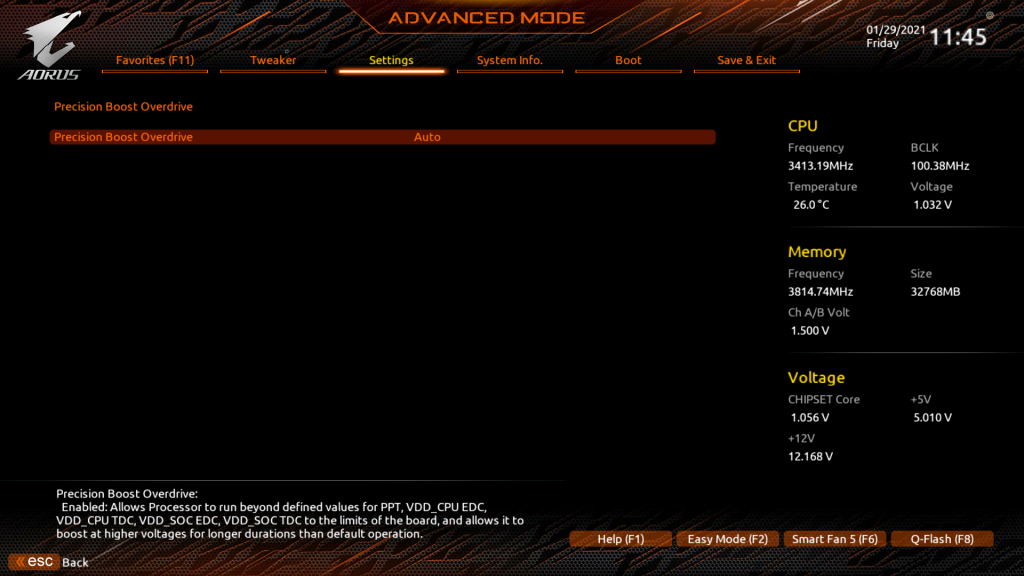
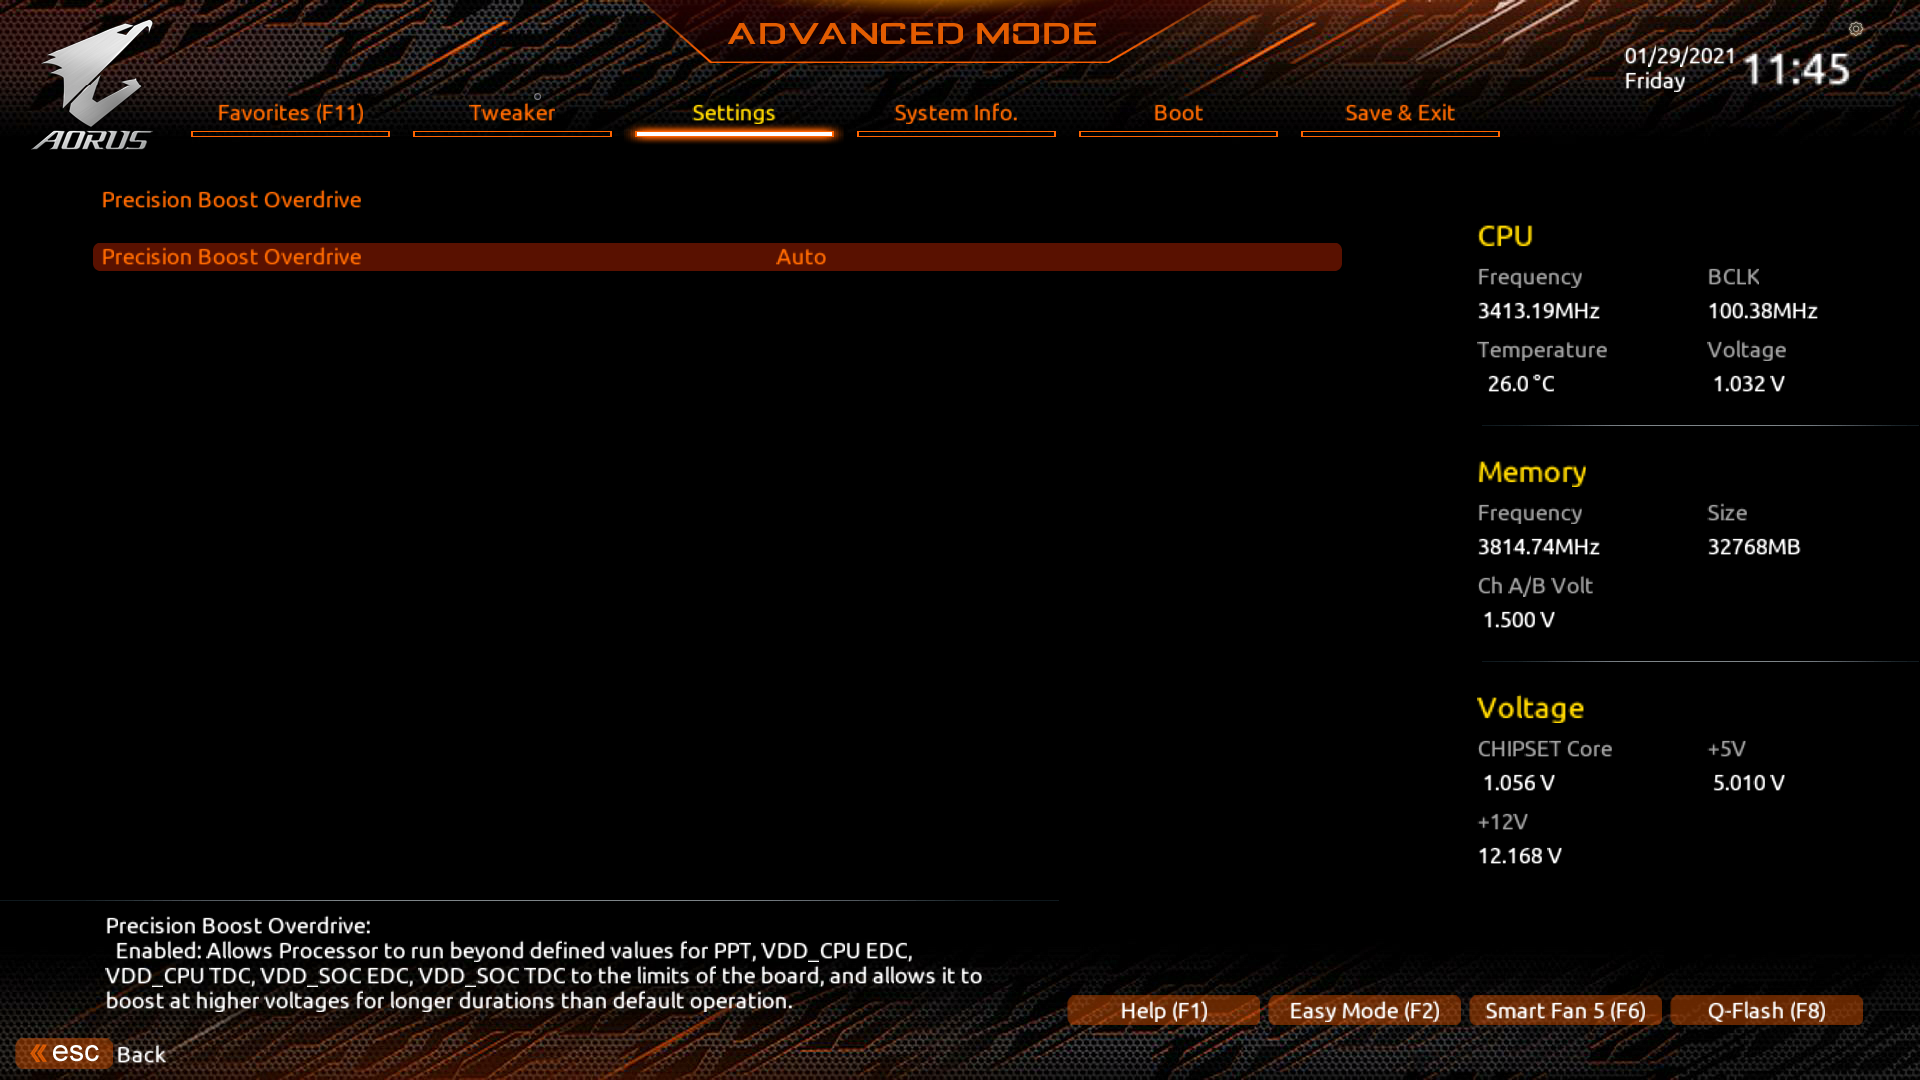
- Precision Boost Overdrive (PBO 2): Auto
- Global C-state Control: Auto (Enabled if there is no Auto)
- CPPC: Auto (Enabled if there is no Auto)
- CPPC Preferred Cores: Auto (Enabled if there is no Auto)

- Stable RAM overclocking or stable XMP: How to test your RAM for stability is beyond the scope of this tutorial. If in doubt, it is recommended to save the current settings to a BIOS profile and reset the RAM settings to Auto or XMP.


Requirements – Human
In addition to the technical tools mentioned above, you should bring along some time, patience, a reliable source of caffeine of your choice, and a bit of experimentation. Also, do not use your system and close all other applications while CTR is exploring the features of your CPU. On the one hand, you could otherwise falsify the result and on the other hand, in the worst case, you could even lose data if the system crashes.
Installation CTR
You can always get the latest version of the CTR from our website (see last page of the tutorial). If you have chosen the CTR download without Cinebench R20, you have to copy a Cinebench R20 installation into the “CB20” directory after downloading and unpacking. Cinebench R20 can also be downloaded from the download page here in the tutorial.
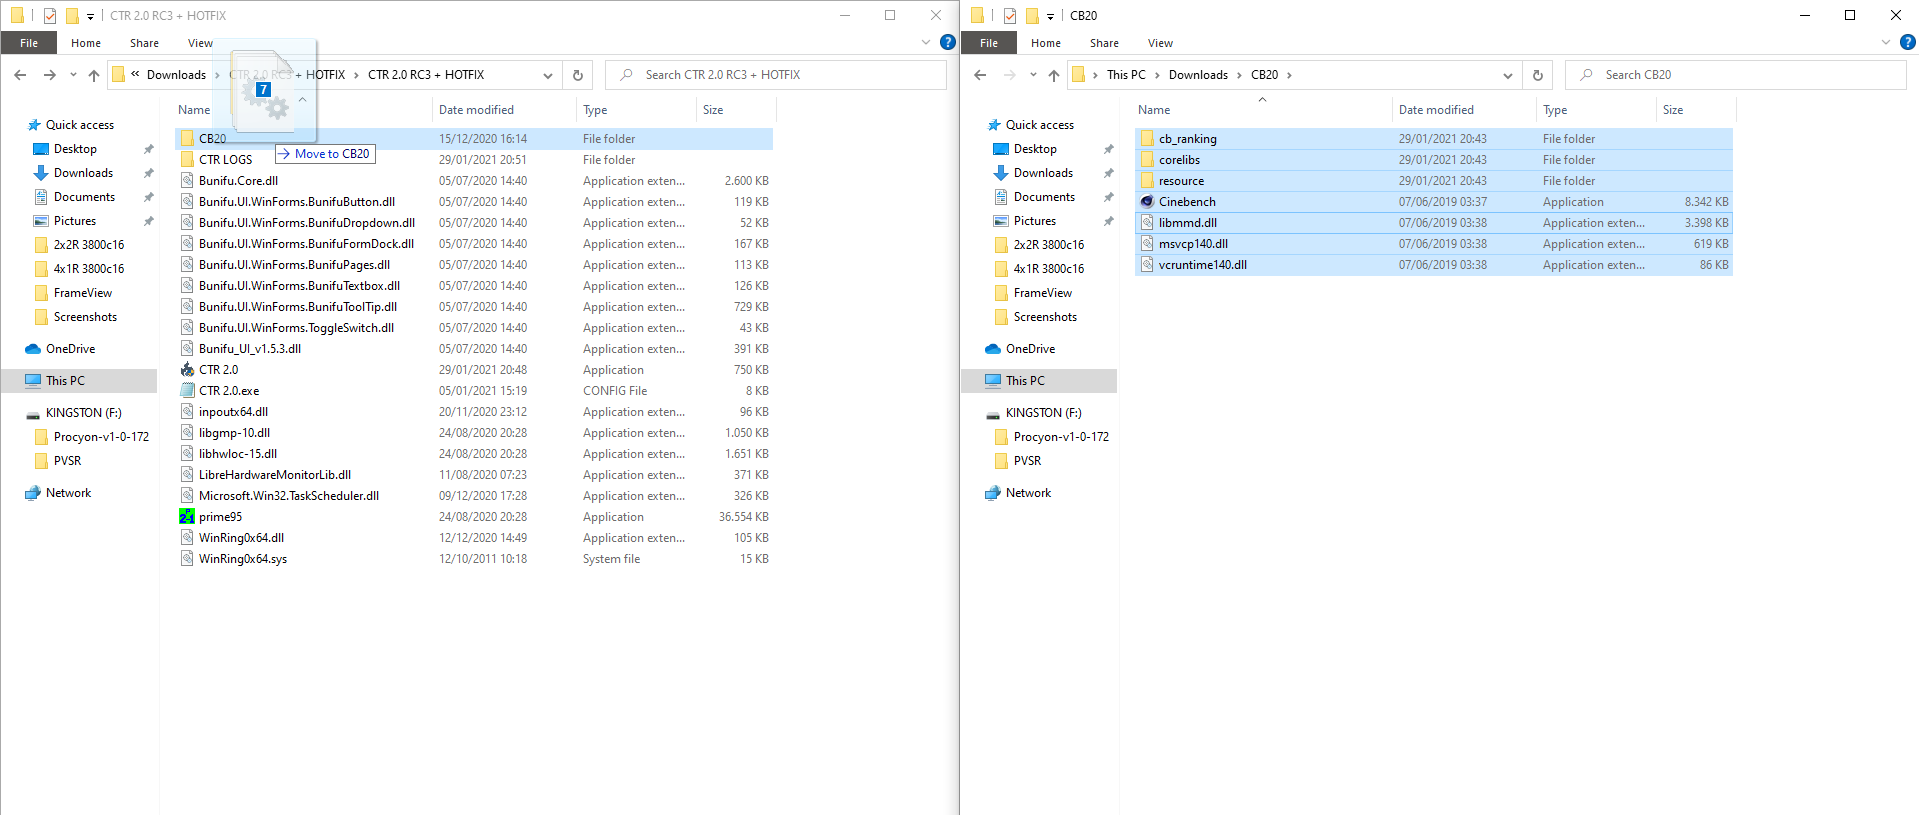
Start Cinebench by clicking on the Cinebench.exe once manually, sell your soul again and close Cinebench again.
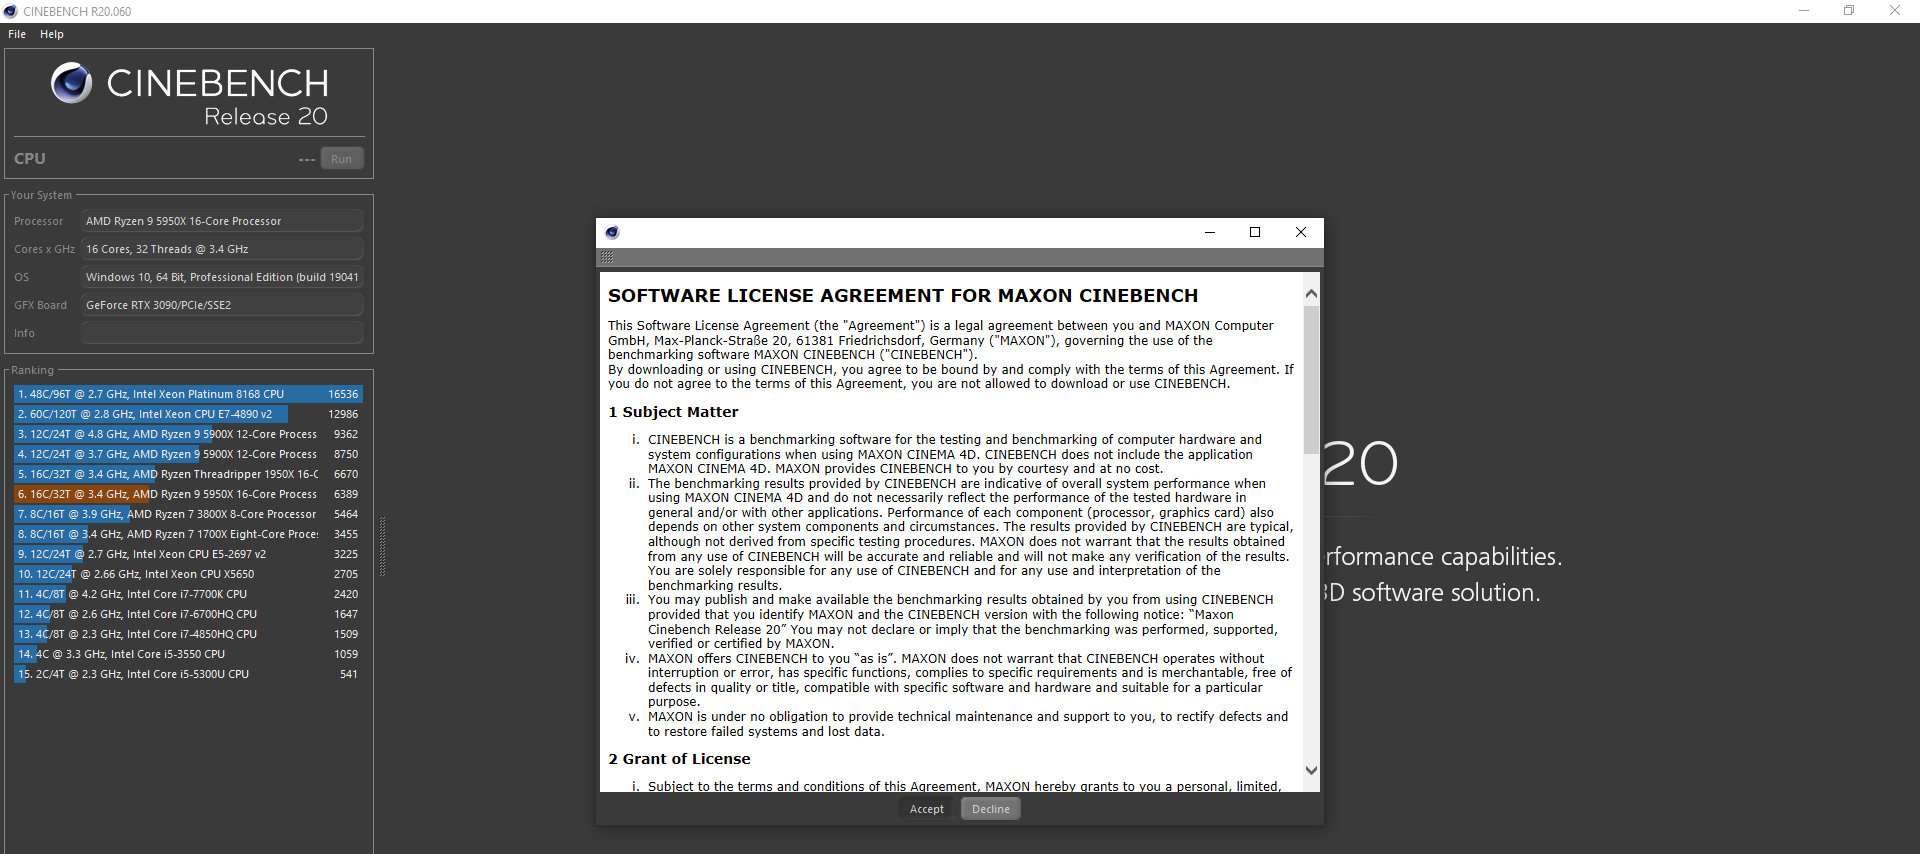
That’s it, CTR is now ready to go!


1,679 Antworten
Kommentar
Lade neue Kommentare
Urgestein
Urgestein
Mitglied
Urgestein
1
Urgestein
1
Veteran
Mitglied
1
Mitglied
Urgestein
Moderator
1
Neuling
Urgestein
1
Veteran
Urgestein
Alle Kommentare lesen unter igor´sLAB Community →