


Power consumption in detail
Of course, if you need to cool something, you have to record power first. The overview of our measurements directly on the graphics card shows the table:
| Power consumption | |
|---|---|
| Idle | 12 watts |
| Idle Multi-Monitor | 15 watts |
| Blu-ray | 14 watts |
| Browser games | 115 to 135 watts |
| Gaming (Metro Last Light 4K) | 216 watts |
| Torture (Furmark) | 238 watts |
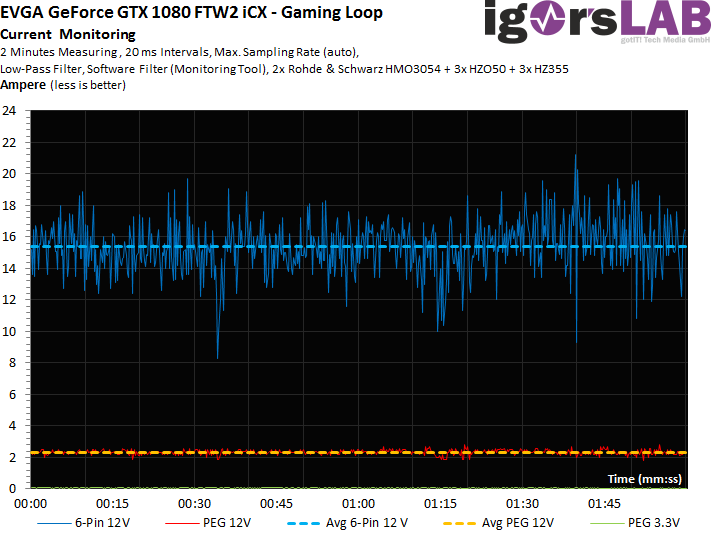
In detail, this is the case with the gaming loop:
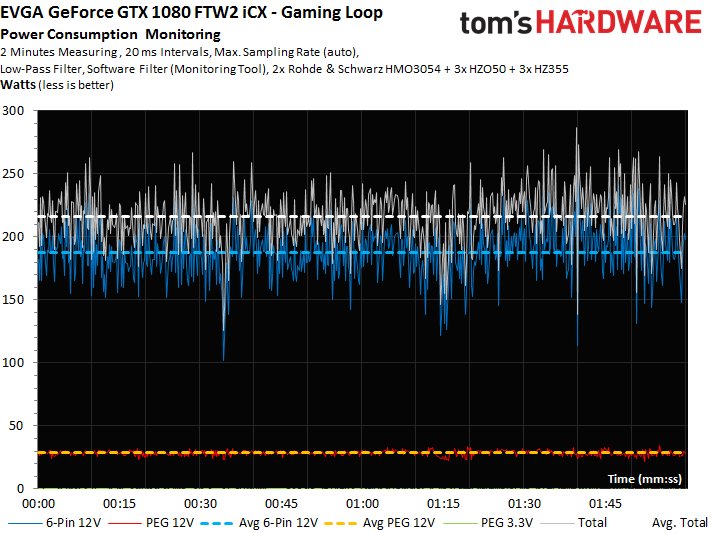
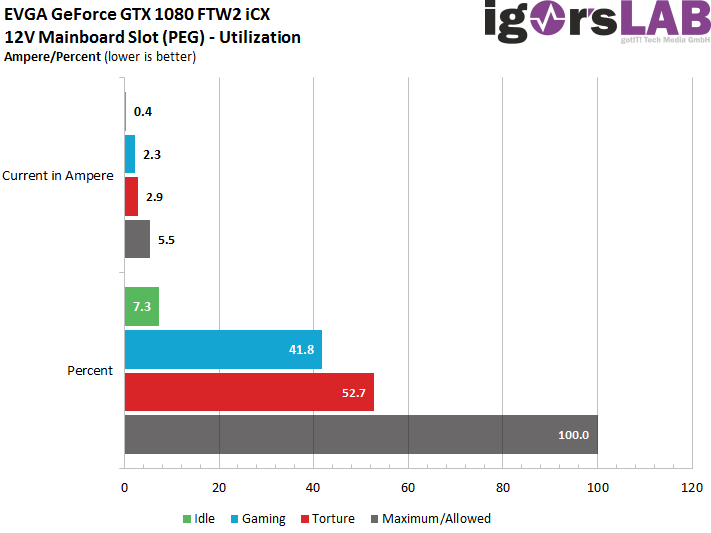
The flowing currents are concentrated almost exclusively on the external supply connections and not on the motherboard slot:
During the stress test, another skip comes on it, whereby the 240 watts are not quite reached. If you put the power target on top in suitable tools, the 250-watt mark can be cracked. However, nothing more can be done, so you could have bet on a combination of 8- and 6-pin connectors. But of course this doesn't look so nicely martial.
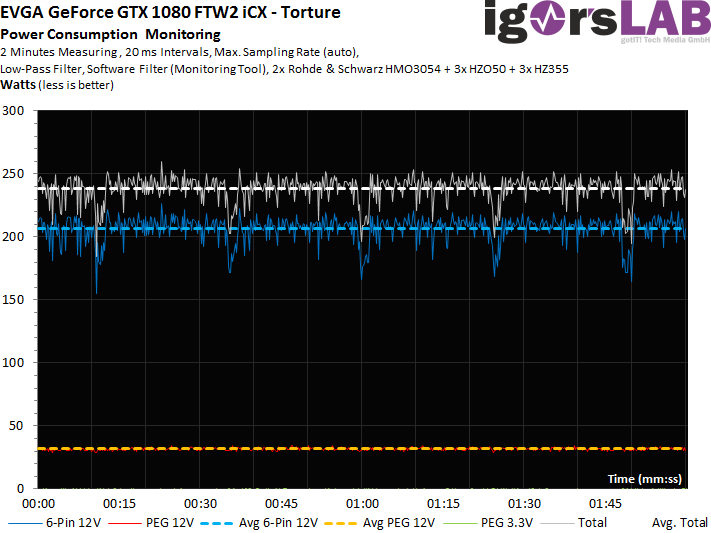
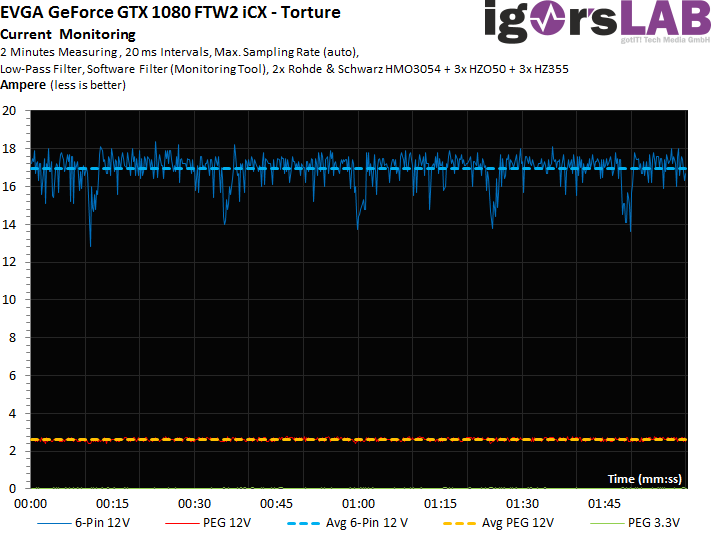
Also during the stress test, the flowing currents are distributed as desired:
Tabularly, the load on the motherboard slot looks like this, with the 100% mark marking exactly the 5.5 amperes that are allowed according to the PCI SIG. The fact that 75 watts instead of the computational 66 watts is often spoken of is due to the fact that the PCI SIG includes the voltage fluctuations of the ATX power supplies. At exactly 12 volts, however, it is really only 66 watts, the rest is an Urban Legend.
Cooling and monitoring
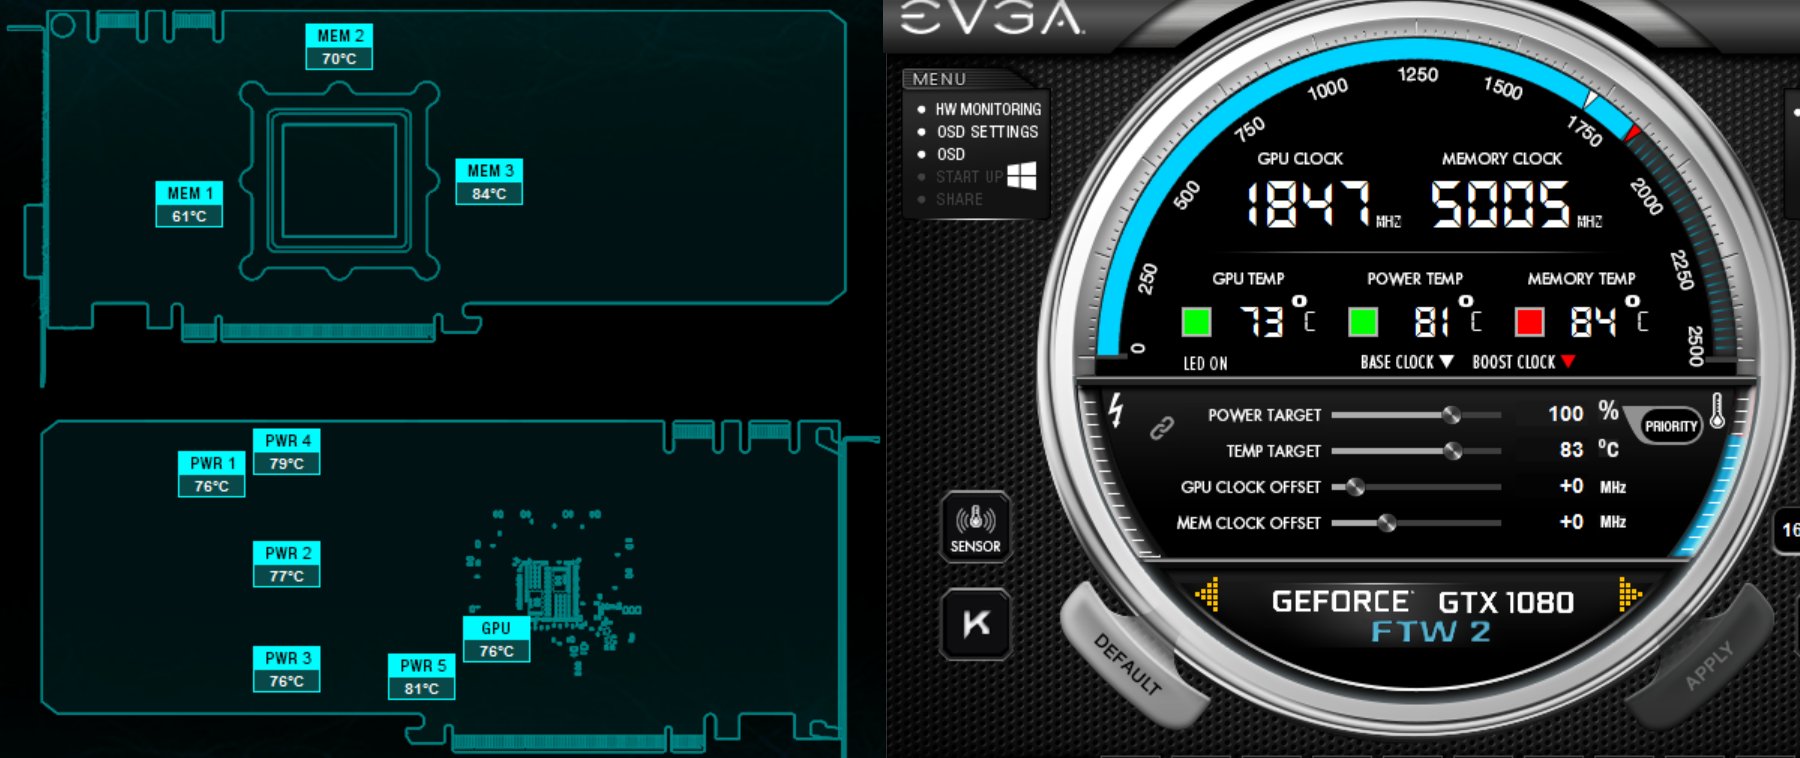
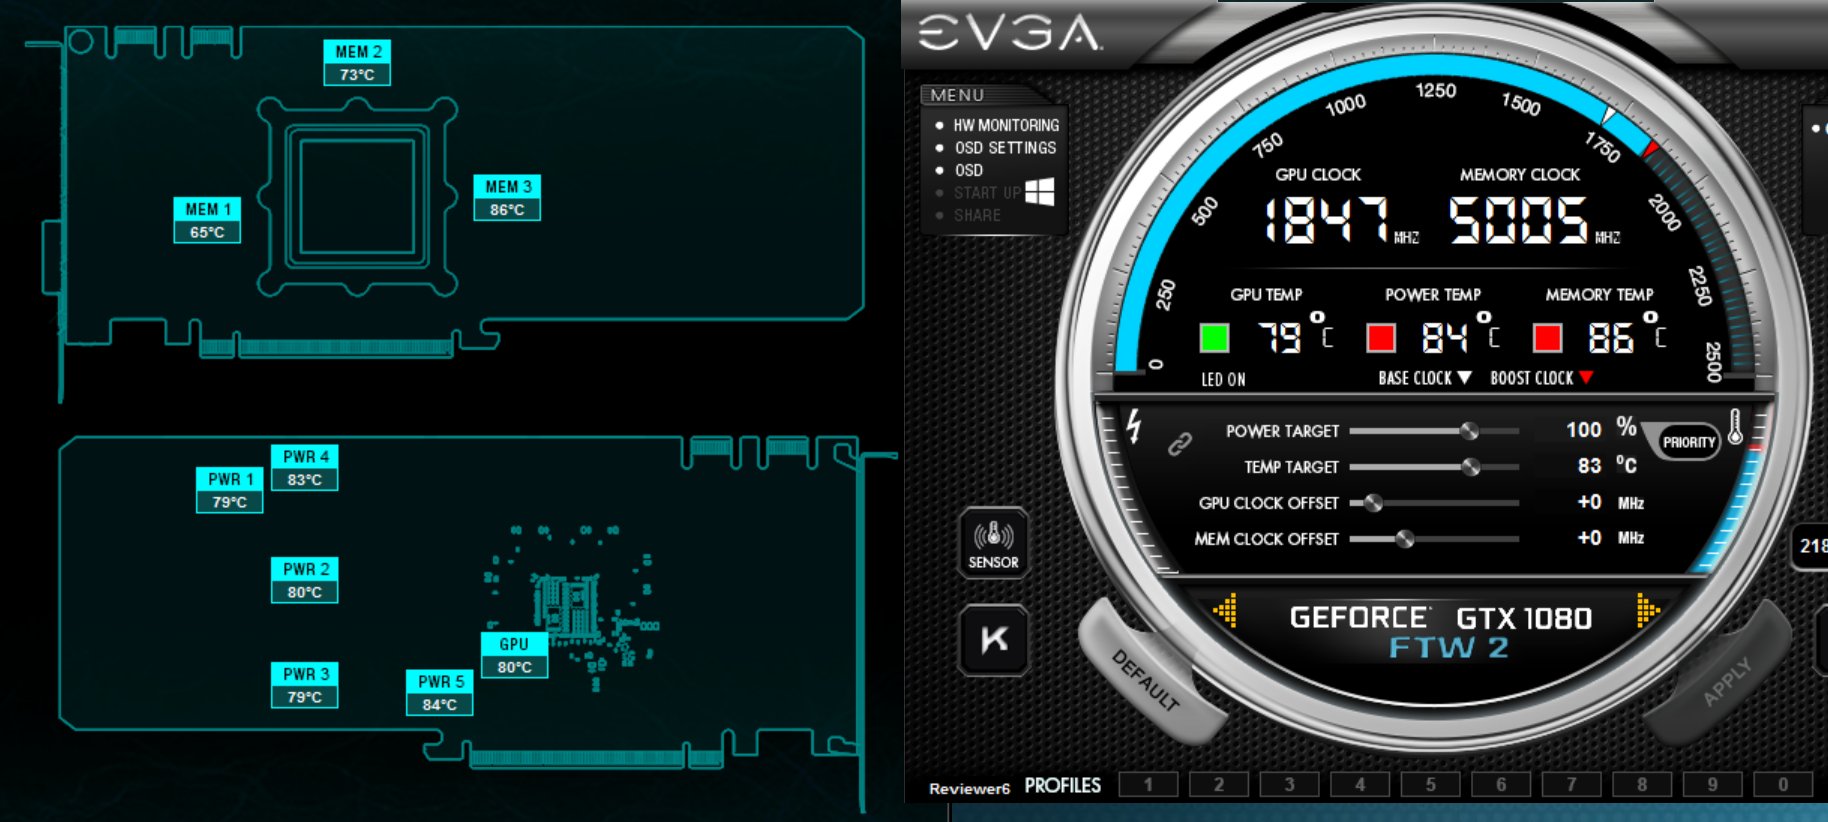
After such a long technical start, we finally come to what EVGA sees as the main focus of the slightly more expensive iCX model. We first stress the map in the open benchtable and look at the temperature course (logged by the EVGA tool). We chose the three most important values: the GPU, the hottest voltage converter, and the hottest memory module (M7).
The Precision tool also shows us the relevant locations on the board and the corresponding readout values of the sensors. But are the results of the beautiful new technology really correct?
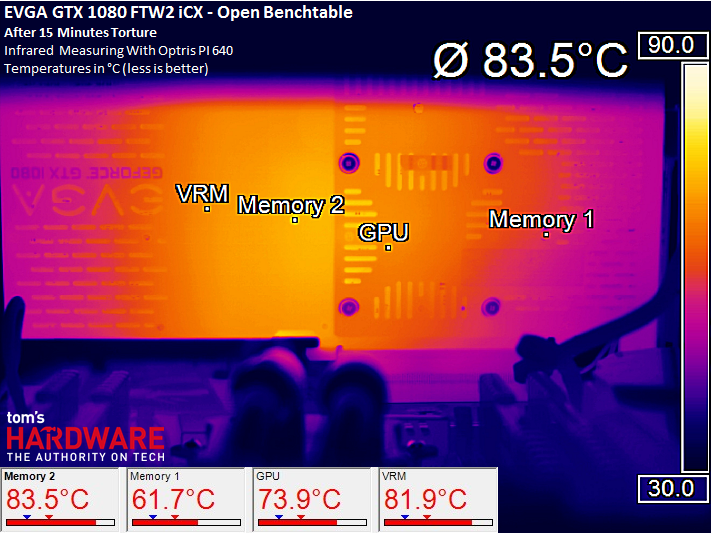
We drilled a suitable opening into the backplate at exactly these three places and cut out the pads there if necessary in order to be able to "look" directly at the board. If one compares the measurements with the high-resolution thermal imaging camera and the values of the sensors, this fits conspicuously exactly.
But what happens if you operate the card in a closed housing? This is exactly what we can perfectly understand with our new measuring setup! Let's first look at the temperature curves of the sensors from the log file:
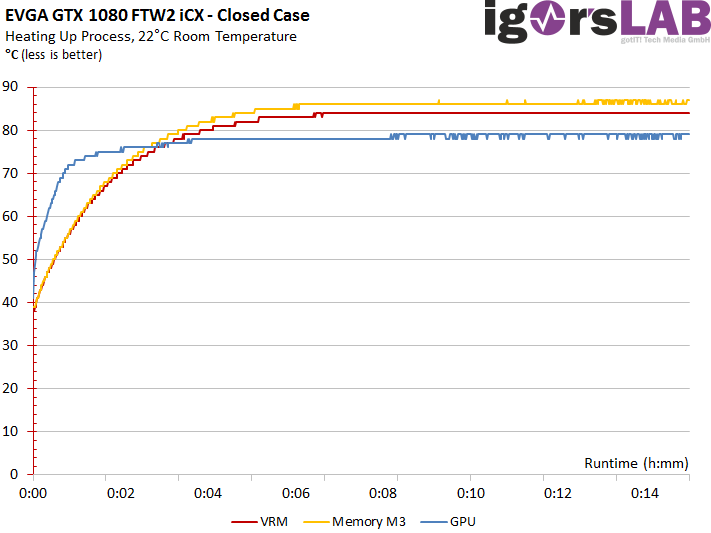
The EVGA tool reliably displays the corresponding values:
And the thermal imaging camera also proves that the numbers are correct:
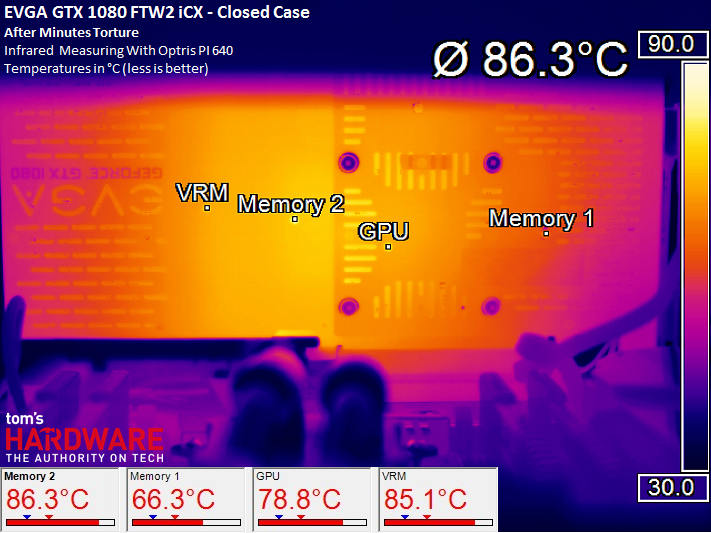
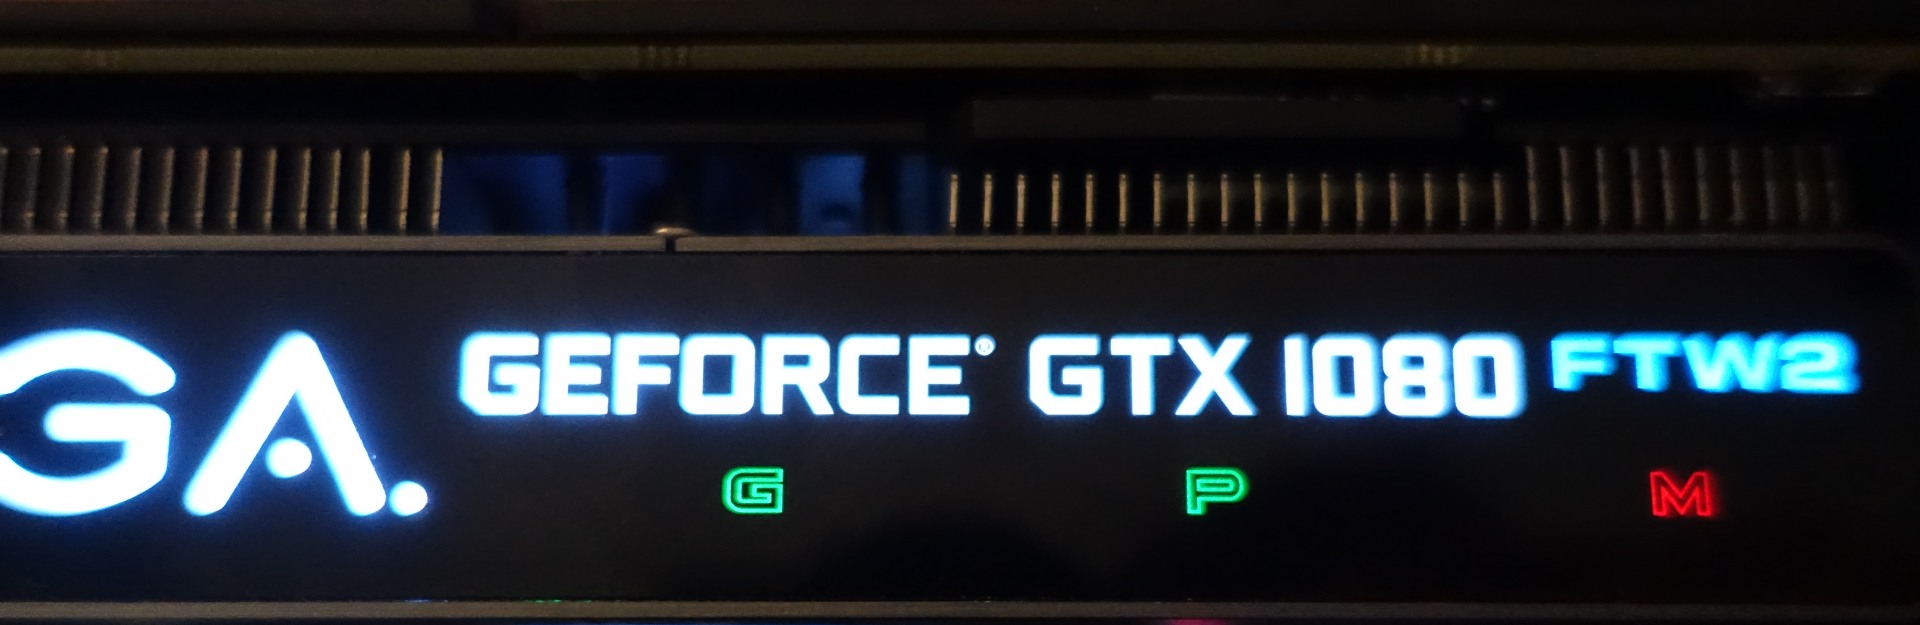
However, if we internalize that the memory should actually reach the upper limit at 85°C, the red color of the status LED for the memory on the top of the card is not very surprising to us.
Intermediate conclusion cooling performance
We have deliberately tested the worst case.


Kommentieren